Nginx入门
Nginx 入门
什么是 Nginx?
Nginx 是 lgor Sysoev 为俄罗斯访问量第二的 rambler.ru 站点设计开发的。从 2004 年发布至今,凭借开源的力量,已经接近成熟与完善。
Nginx 功能丰富,可作为HTTP 服务器,也可作为反向代理服务器,邮件服务器。支持 FastCGI、SSL、Virtual Host、URL Rewrite、Gzip 等功能。并且支持很多第三方的模块扩展。
Nginx 的稳定性、功能集、示例配置文件和低系统资源的消耗让他后来居上,在全球活跃的网站中有 12.18% 的使用比率,大约为 2220 万个网站。
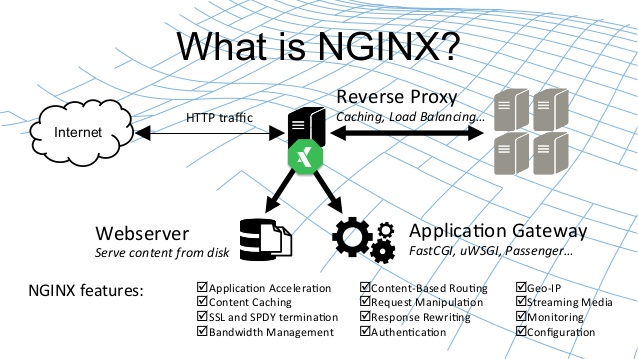
Nginx 提供的功能
HTTP 代理、反向代理
作为 web 服务器最常用的功能之一,尤其是反向代理。
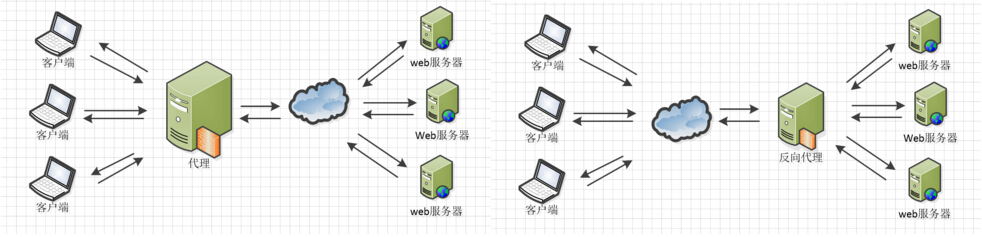
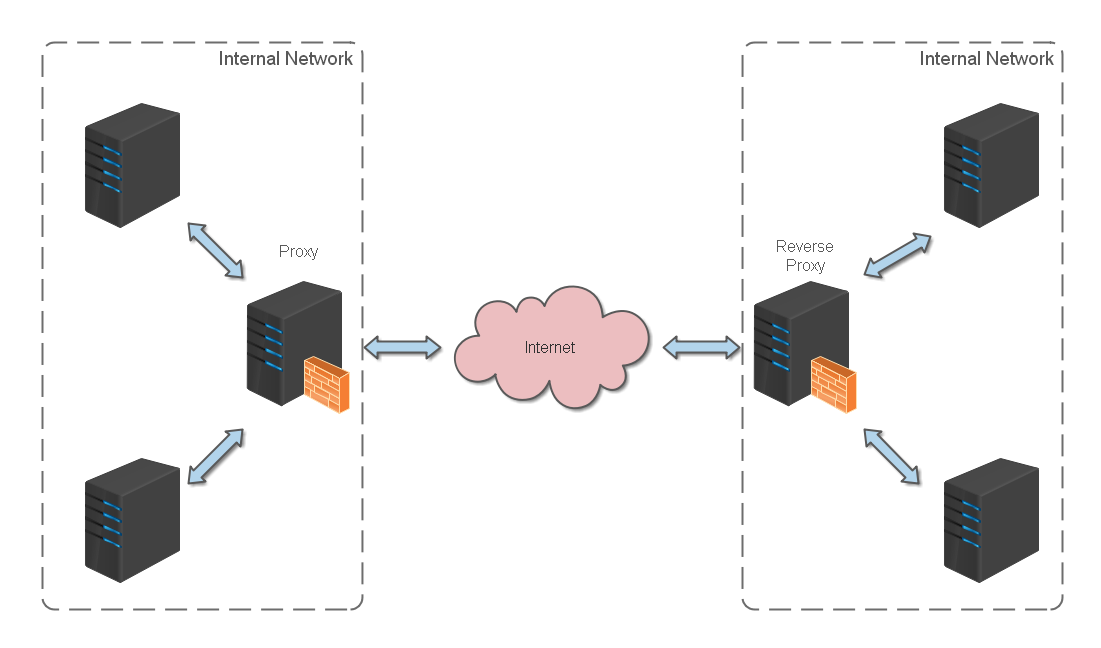
这里我给来 2 张图,对正向代理与反向代理做个诠释:
- Nginx 在做反向代理时,提供性能稳定,并且能够提供配置灵活的转发功能。
- Nginx 可以根据不同的正则匹配,采取不同的转发策略,比如图片文件结尾的走文件服务器,动态页面走 web 服务器,只要你正则写的没问题,又有相对应的服务器解决方案,你就可以随心所欲的玩。
- 并且 Nginx 对返回结果进行错误页跳转,异常判断等。如果被分发的服务器存在异常,他可以将请求重新转发给另外一台服务器,然后自动去除异常服务器。
什么是反向代理?
反向代理(Reverse Proxy)方式是指以代理服务器来接受 internet 上的连接请求,然后将请求转发给内部网络上的服务器,并将从服务器上得到的结果返回给 internet 上请求连接的客户端,此时代理服务器对外就表现为一个反向代理服务器。
负载均衡
Nginx 提供的负载均衡策略有 2 种:内置策略和扩展策略。
内置策略为轮询,加权轮询,Ip hash。
扩展策略,就天马行空,只有你想不到的没有他做不到的啦,你可以参照所有的负载均衡算法,给他一一找出来做下实现。
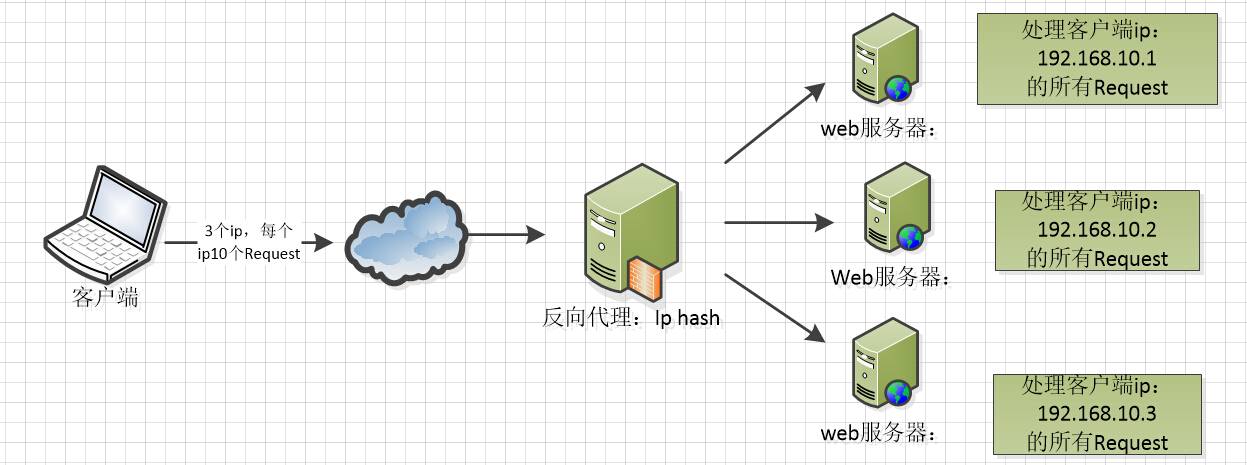
理解这三种负载均衡算法的实现:

Ip hash 算法,对客户端请求的 ip 进行 hash 操作,然后根据 hash 结果将同一个客户端 ip 的请求分发给同一台服务器进行处理,可以解决 session 不共享的问题。
Web 缓存
Nginx 可以对不同的文件做不同的缓存处理,配置灵活,并且支持 FastCGI_Cache,主要用于对 FastCGI 的动态程序进行缓存。配合着第三方的 ngx_cache_purge,对制定的 URL 缓存内容可以的进行增删管理。
Nginx 安装卸载
安装(通过 yum )
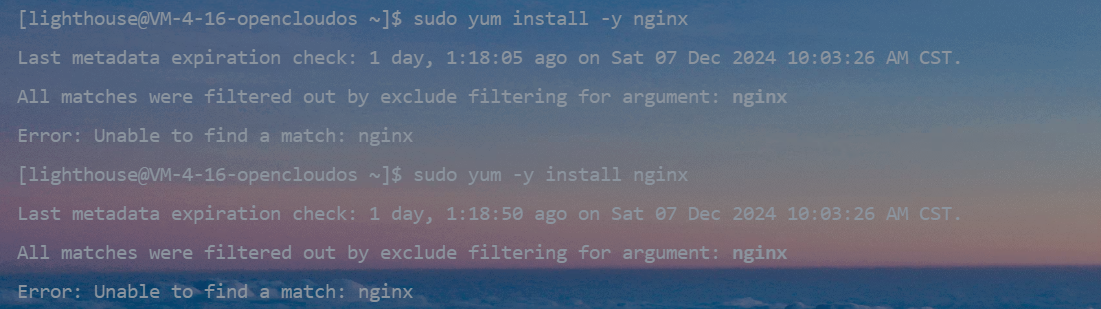
当使用以下命令安装 Nginx 时,发现无法安装成功。
1
yum install -y nginx
|  |
如果出现没有可用软件包需要做一点处理。
安装 Nginx 源
1
sudo rpm -ivh http://nginx.org/packages/centos/7/noarch/RPMS/nginx-release-centos-7-0.el7.ngx.noarch.rpm
安装该 rpm 后,我们就能在 /etc/yum.repos.d/ 目录中看到一个名为 nginx.repo 的文件。

|  |
安装 Nginx
1
sudo yum install -y nginx --nobest #--skip-broken
验证
Nginx 欢迎页
访问,默认开放 80 端口,如:http://hacket.me:80/,出现下面页面就成功了
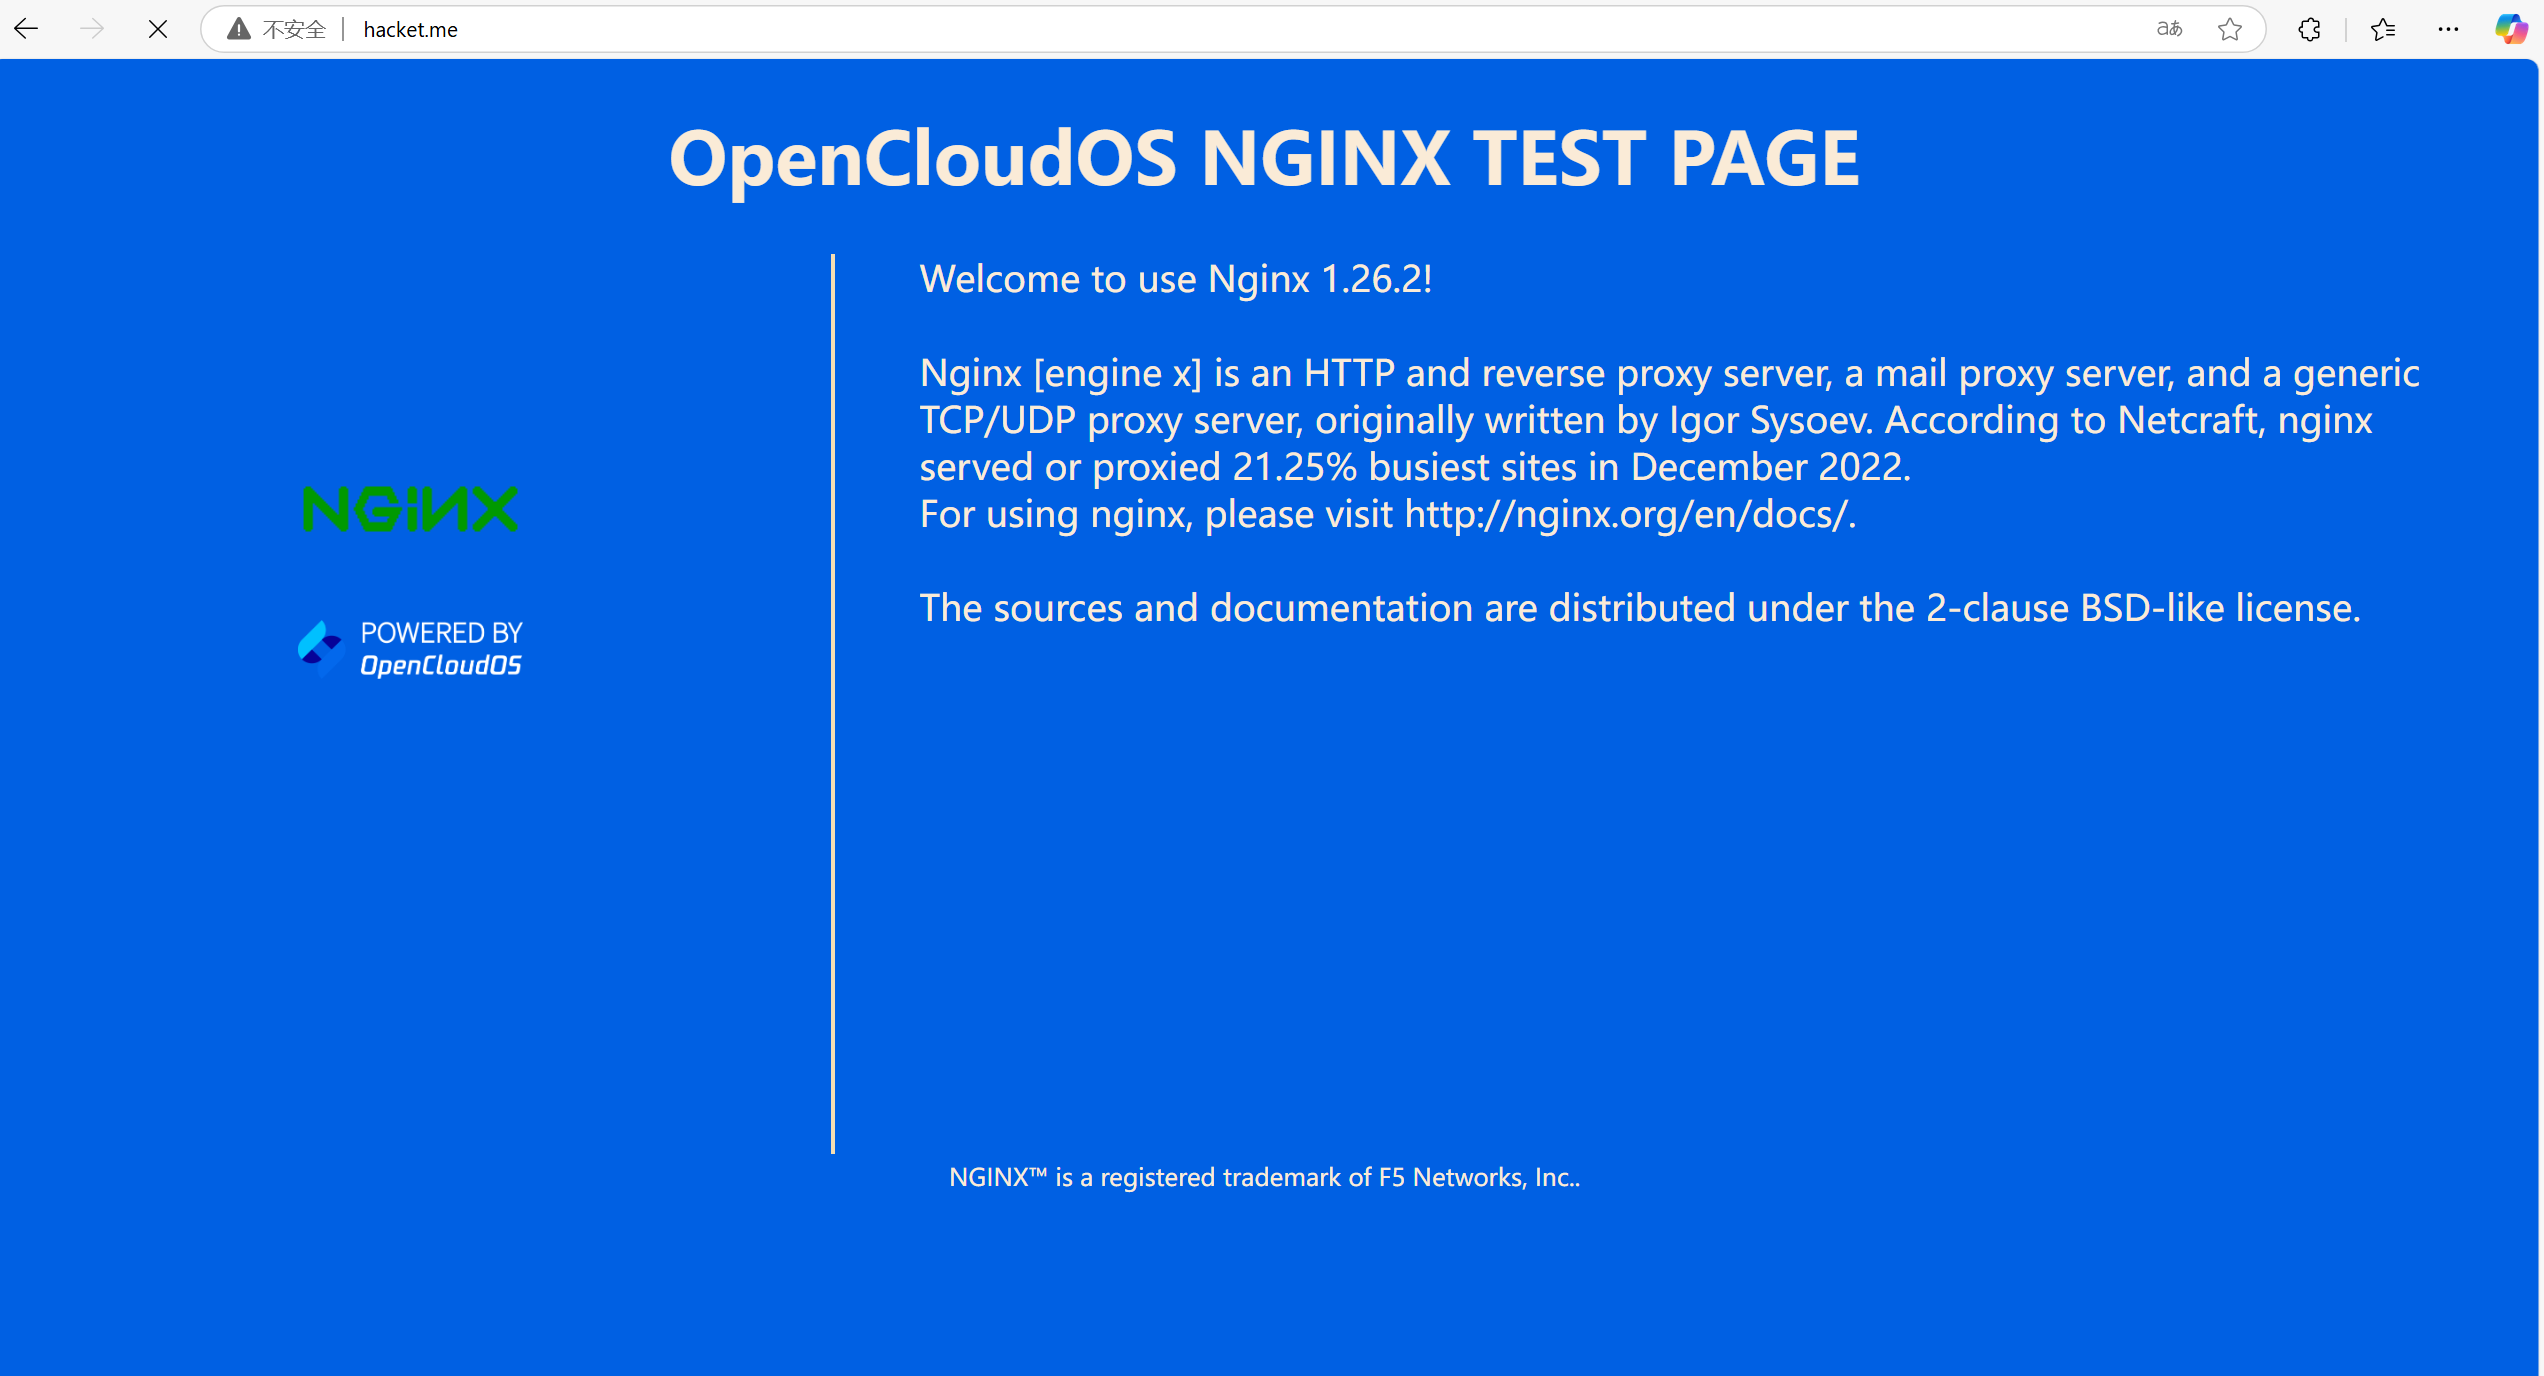
欢迎页,每个版本的 nginx 各不相同,可以查看 /usr/share/nginx/html 目录下的 index.html 的内容,判断 Nginx 是否正确启动
Nginx 默认目录
1
2
3
4
5
whereis nginx

# 即可看到类似于如下的内容:
[lighthouse@VM-4-16-opencloudos yum.repos.d]$ whereis nginx
nginx: /usr/bin/nginx /usr/sbin/nginx /usr/lib64/nginx /etc/nginx /usr/share/nginx /usr/share/man/man3/nginx.3pm.gz /usr/share/man/man8/nginx.8.gz
以下是 Nginx 的默认路径:
- Nginx 配置路径:
/etc/nginx/ - PID 目录:
/var/run/nginx.pid - 错误日志:
/var/log/nginx/error.log - 访问日志:
/var/log/nginx/access.log - 默认站点目录:
/usr/share/nginx/html
事实上,只需知道 Nginx 配置路径,其他路径均可在 /etc/nginx/nginx.conf 以及 /etc/nginx/conf.d/default.conf 中查询到。
查看版本
1
nginx -V
安装 Nginx 后的注意事项
Nginx 默认使用 80 端口,因为 Linux 有防火墙,因此,我们需要查看 80 端口是否开启,如果没有开启,需要开启
- 查看开放的端口信息
1
2
3
4
5
6
7
8
9
10
11
12
13
14
15
16
sudo firewall-cmd --list-all
# 输出:
public (active)
  target: default
  icmp-block-inversion: no
  interfaces: eth0
  sources:
  services: dhcpv6-client mdns ssh
  ports: 20/tcp 21/tcp 22/tcp 80/tcp 443/tcp 19434/tcp 39000-40000/tcp 8888/tcp
  protocols:
  forward: yes
  masquerade: no
  forward-ports:
  source-ports:
  icmp-blocks:
  rich rules:
- 开启 80 端口
1
2
3
4
5
# 开启80
sudo firewall-cmd --add-port=80/tcp --permanent

# 开启8080
sudo firewall-cmd --add-port=8080/tcp --permanent
- 重启防火墙,使增加的端口生效
1
firewall-cmd --reload
- 查看 nginx 的相关路径信息
CentOS 7 安装失败
1
2
3
nginx repo           106 kB/s | 113 kB     00:01
All matches were filtered out by exclude filtering for argument: nginx
Error: Unable to find a match: nginx
|  |
找到这个文件:/etc/yum.conf,将 exclude 这一行注释掉就行了。
1
2
3
4
5
6
7
8
[main]
gpgcheck=1
installonly_limit=3
clean_requirements_on_remove=True
best=True
skip_if_unavailable=False
zchunk=False
exclude=httpd nginx php mysql mairadb python-psutil python2-psutil
源码编译安装
卸载
- 停止 Nginx 软件
1
2
3
4
5
nginx -s stop

# 如果不知道nginx安装路径,可以通过执行ps命令找到nginx程序的PID,然后kill其PID
px -aux|grep nginx
kill -9 xxx1 xxx2
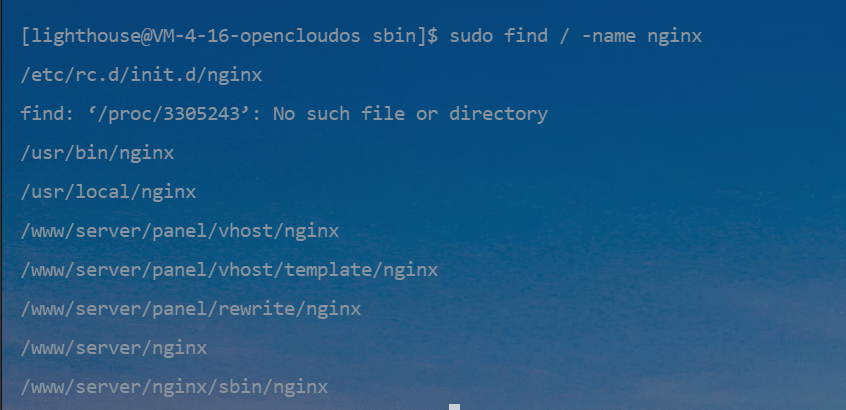
- 查找根下所有名字包含 nginx 的文件
1
find / -name nginx
- 执行命令
rm -rf *删除 nignx 安装的相关文件
说明:全局查找往往会查出很多相关文件,但是前缀基本都是相同,后面不同的部分可以用 * 代替,以便快速删除~
1
2
3
4
5
6
7
8
9
10
11
su
sudo rm -rf /usr/local/nginx
sudo rm -rf /usr/local/nginx
sudo rm -rf /www/server/panel/vhost/nginx
sudo rm -rf /www/server/panel/vhost/template/nginx
sudo rm -rf /www/server/panel/rewrite/nginx
sudo rm -rf /www/server/nginx
sudo rm -rf /www/server/nginx/sbin/nginx
#rm -rf /usr/local/sbin/nginx
#rm -rf /usr/src/nginx-1.11.1
#rm -rf /var/spool/mail/nginx
- 如果设置了 Nginx 开机自启动的话,可能还需要下面两步
1
2
sudo chkconfig nginx off
rm -rf /etc/init.d/nginx
Nginx 命令
常用命令
1
2
3
4
5
6
7
8
9
nginx 启动Nginx
nginx -s stop       快速关闭Nginx,可能不保存相关信息,并迅速终止web服务。
nginx -s quit       平稳关闭Nginx,保存相关信息,有安排的结束web服务。
nginx -s reload     因改变了Nginx相关配置,需要重新加载配置而重载。
nginx -s reopen     重新打开日志文件。
nginx -c filename   为 Nginx 指定一个配置文件,来代替缺省的。
nginx -t            不运行,仅仅测试配置文件。nginx 将检查配置文件的语法的正确性,并尝试打开配置文件中所引用到的文件。
nginx -v            显示 nginx 的版本。
nginx -V            显示 nginx 的版本,编译器版本和配置参数。
如果不想每次都敲命令,可以在 nginx 安装目录下新添一个启动批处理文件startup.bat,双击即可运行。内容如下:
1
2
3
4
5
6
7
8
9
10
11
12
@echo off
rem 如果启动前已经启动nginx并记录下pid文件,会kill指定进程
nginx.exe -s stop

rem 测试配置文件语法正确性
nginx.exe -t -c conf/nginx.conf

rem 显示版本信息
nginx.exe -v

rem 按照指定配置去启动nginx
nginx.exe -c conf/nginx.conf
其他命令
1
2
3
4
5
6
7
8
9
# 启动 nginx
systemctl start nginx
# 停止
systemctl stop nginx
# 加载配置文件
systemctl reload nginx

# 关闭虚拟机
init 0
Nginx VSCode 插件
nginx-format
| 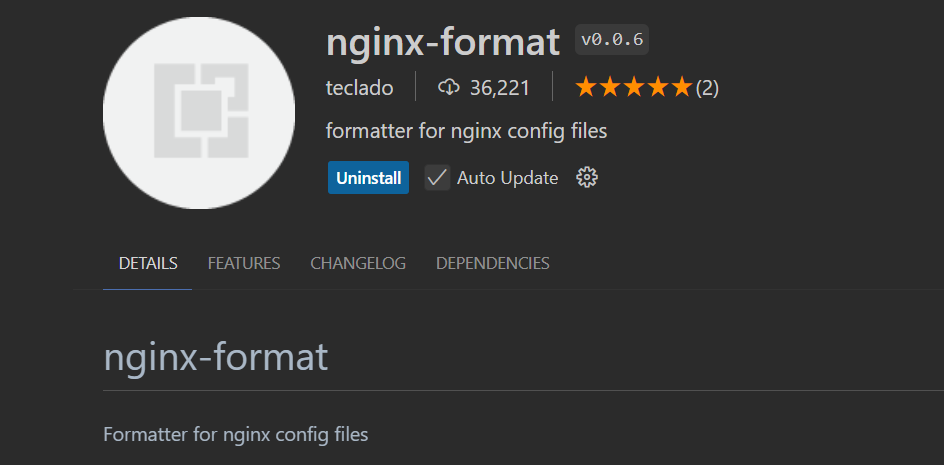 |
在打开的 nginx.conf 文件上右击,选择 Format Document With,再选 nginx-format,可以看到配置文件已经自动美化。
nginx-formatter
|  |
Nginx 配置
概述
默认在 Linux 上安装的 Nginx,配置文件在安装的 nginx 目录下 (/etc/nginx/nginx.conf) 的 conf 目录下,名字叫做 nginx.conf
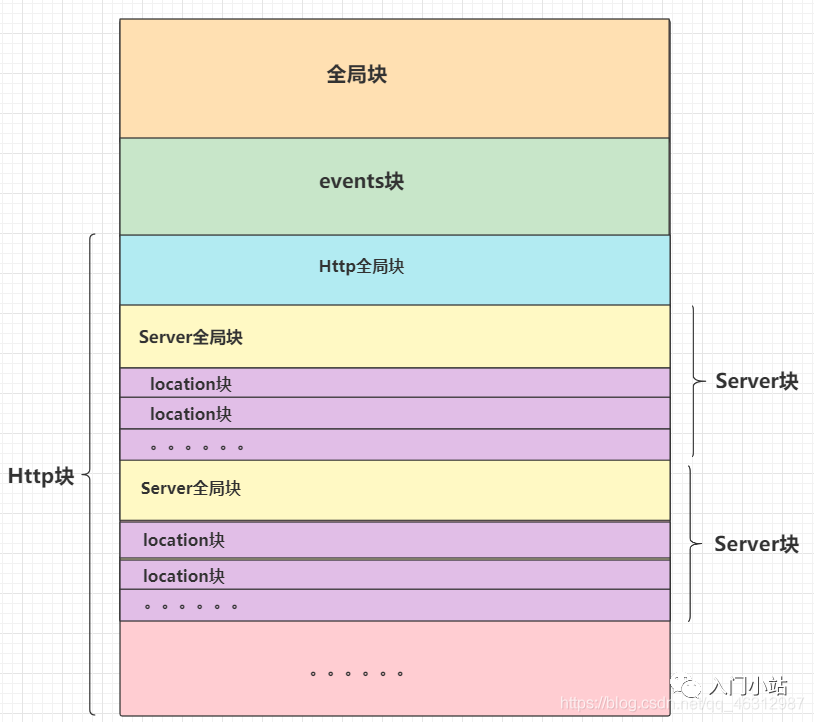
nginx.conf 主要由三部分组成
- 全局块,
- events 块
- http 块
配置文件结构
|  |
/etc/nginx/nginx.conf 默认的配置:
1
2
3
4
5
6
7
8
9
10
11
12
13
14
15
16
17
18
19
20
21
22
23
24
25
26
27
28
29
30
31
32
33
34
35
36
37
38
39
40
41
42
43
44
45
46
47
48
49
50
51
52
53
54
55
56
57
58
59
60
61
62
63
64
65
66
67
68
69
70
71
72
73
74
75
76
77
78
79
80
81
82
83
84
# For more information on configuration, see:
#   * Official English Documentation: http://nginx.org/en/docs/
#   * Official Russian Documentation: http://nginx.org/ru/docs/

user nginx;
worker_processes auto;
error_log /var/log/nginx/error.log notice;
pid /run/nginx.pid;

# Load dynamic modules. See /usr/share/doc/nginx/README.dynamic.
include /usr/share/nginx/modules/*.conf;

events {
    worker_connections 1024;
}

http {
    log_format main
        '$remote_addr - $remote_user [$time_local] "$request" '
        '$status $body_bytes_sent "$http_referer" '
        '"$http_user_agent" "$http_x_forwarded_for"';

    access_log /var/log/nginx/access.log main;

    sendfile on;
    tcp_nopush on;
    keepalive_timeout 65;
    types_hash_max_size 4096;

    include /etc/nginx/mime.types;
    default_type application/octet-stream;

    # Load modular configuration files from the /etc/nginx/conf.d directory.
    # See http://nginx.org/en/docs/ngx_core_module.html#include
    # for more information.
    include /etc/nginx/conf.d/*.conf;

    server {
        listen 80;
        listen [::]:80;
        server_name _;
        root /usr/share/nginx/html;

        # Load configuration files for the default server block.
        include /etc/nginx/default.d/*.conf;

        error_page 404 /404.html;
        location = /404.html {
        }

        error_page 500 502 503 504 /50x.html;
        location = /50x.html {
        }
    }


    # Settings for a TLS enabled server.
    #
    #    server {
    #        listen       443 ssl http2;
    #        listen       [::]:443 ssl http2;
    #        server_name  _;
    #        root         /usr/share/nginx/html;
    #
    #        ssl_certificate "/etc/pki/nginx/server.crt";
    #        ssl_certificate_key "/etc/pki/nginx/private/server.key";
    #        ssl_session_cache shared:SSL:1m;
    #        ssl_session_timeout  10m;
    #        ssl_ciphers PROFILE=SYSTEM;
    #        ssl_prefer_server_ciphers on;
    #
    #        # Load configuration files for the default server block.
    #        include /etc/nginx/default.d/*.conf;
    #
    #        error_page 404 /404.html;
    #        location = /404.html {
    #        }
    #
    #        error_page 500 502 503 504 /50x.html;
    #        location = /50x.html {
    #        }
    #    }

}
全局块
就是配置文件从头开始到 events 块之间的内容,主要设置的是影响 nginx 服务器整体运行的配置指令比如 worker_process, 值越大,可以支持的并发处理量也越多,但是还是和服务器的硬件相关。
events 块
events 块涉及的指令主要影响 Nginx 服务器与用户的网络连接,常用的设置包括是否开启对多 work process 下的网络连接进行序列化,是否允许同时接收多个网络连接,选取哪种事件驱动模型来处理连接请求,每个 word process 可以同时支持的最大连接数等。
下面例子就表示每个 work process 支持的最大连接数为 1024
这部分的配置对 Nginx 的性能影响较大,在实际中应该灵活配置
1
2
3
4
# events块
events {
    worker_connections  1024;
}
http 块
包括 http 全局块,以及多个 server 块
http 全局块
http 全局块配置的指令 包括 文件引入、 MIME-TYPE 定义、日志自定义、连接超时时间、单链接请求数上限 等。
server 块
- 这块和虚拟主机有密切关系,虚拟主机从用户角度看,和一台独立的硬件主机是完全一样的,该技术的产生是为了节省互联网服务器硬件成本。
- 每个 http 块可以包括多个 server 块,而每个 server 块就相当于一个虚拟主机
- 而每个 server 块也分为
全局 server 块,以及可以同时包含多个location块。
server 全局块
最常见的配置是本虚拟机主机的监听配置和本虚拟主机的名称或 IP 配置。
1
2
3
4
#这一行表示这个server块监听的端口是80,只要有请求访问了80端口,此server块就处理请求
listen       80;
#  表示这个server块代表的虚拟主机的名字
server_name  localhost;
location 块
- 一个 server 块可以配置多个 location 块。
- 主要作用是根据请求地址路径的匹配,匹配成功进行特定的处理
- 这块的主要作用是基于 Nginx 服务器接收到的请求字符串(例如
server_name/uri-string),对虚拟主机名称(也可以是 IP 别名)之外的字符串(例如前面的/uri-string)进行匹配,对特定的请求进行处理。地址定向、数据缓存和应答控制等功能,还有许多第三方模块的配置也在这里进行。
1
2
3
4
5
# 表示如果请求路径是/就是用这个location块进行处理
location / {
	root   html;
	index  index.html index.htm;
}
Nginx 常用配置
设置 Nginx 服务自启动
【前提是你的 nginx 已经启动,80 端口可访问】
- 在
/lib/systemd/system目录添加nginx.service文件
1
2
3
4
#进入自启文件目录
cd /lib/systemd/system
#自定义nginx自启文件
touch nginx.service
- 编辑
nginx.service - 添加以下内容,
Restart=always【如果是手动安装,直接复制粘贴,并按照下面的步骤一步步执行】
1
2
3
4
5
6
7
8
9
10
11
12
13
14
15
16
17
18
19
20
21
22
[Unit]
Description=The nginx HTTP and reverse proxy server
After=network-online.target remote-fs.target nss-lookup.target
Wants=network-online.target

[Service]
Type=forking
PIDFile=/run/nginx.pid
# Nginx will fail to start if /run/nginx.pid already exists but has the wrong
# SELinux context. This might happen when running `nginx -t` from the cmdline.
ExecStartPre=/usr/bin/rm -f /run/nginx.pid
ExecStartPre=/usr/sbin/nginx -t
ExecStart=/usr/sbin/nginx
ExecReload=/usr/sbin/nginx -s reload
KillSignal=SIGQUIT
TimeoutStopSec=5
KillMode=mixed
PrivateTmp=true
Restart=always

[Install]
WantedBy=multi-user.target
- 设置开机自启
1
sudo systemctl enable nginx
修改默认端口 80
修改配置文件,80 改成 8001
1
2
3
4
5
6
http {
	server {
		listen       8001;
		listen       [::]:8001;
	}
}
重新加载 Nginx 配置:
1
nginx -s reload
修改完端口后,防火墙开通 8001 端口并重启防火墙;在腾讯云控制台添加没用:
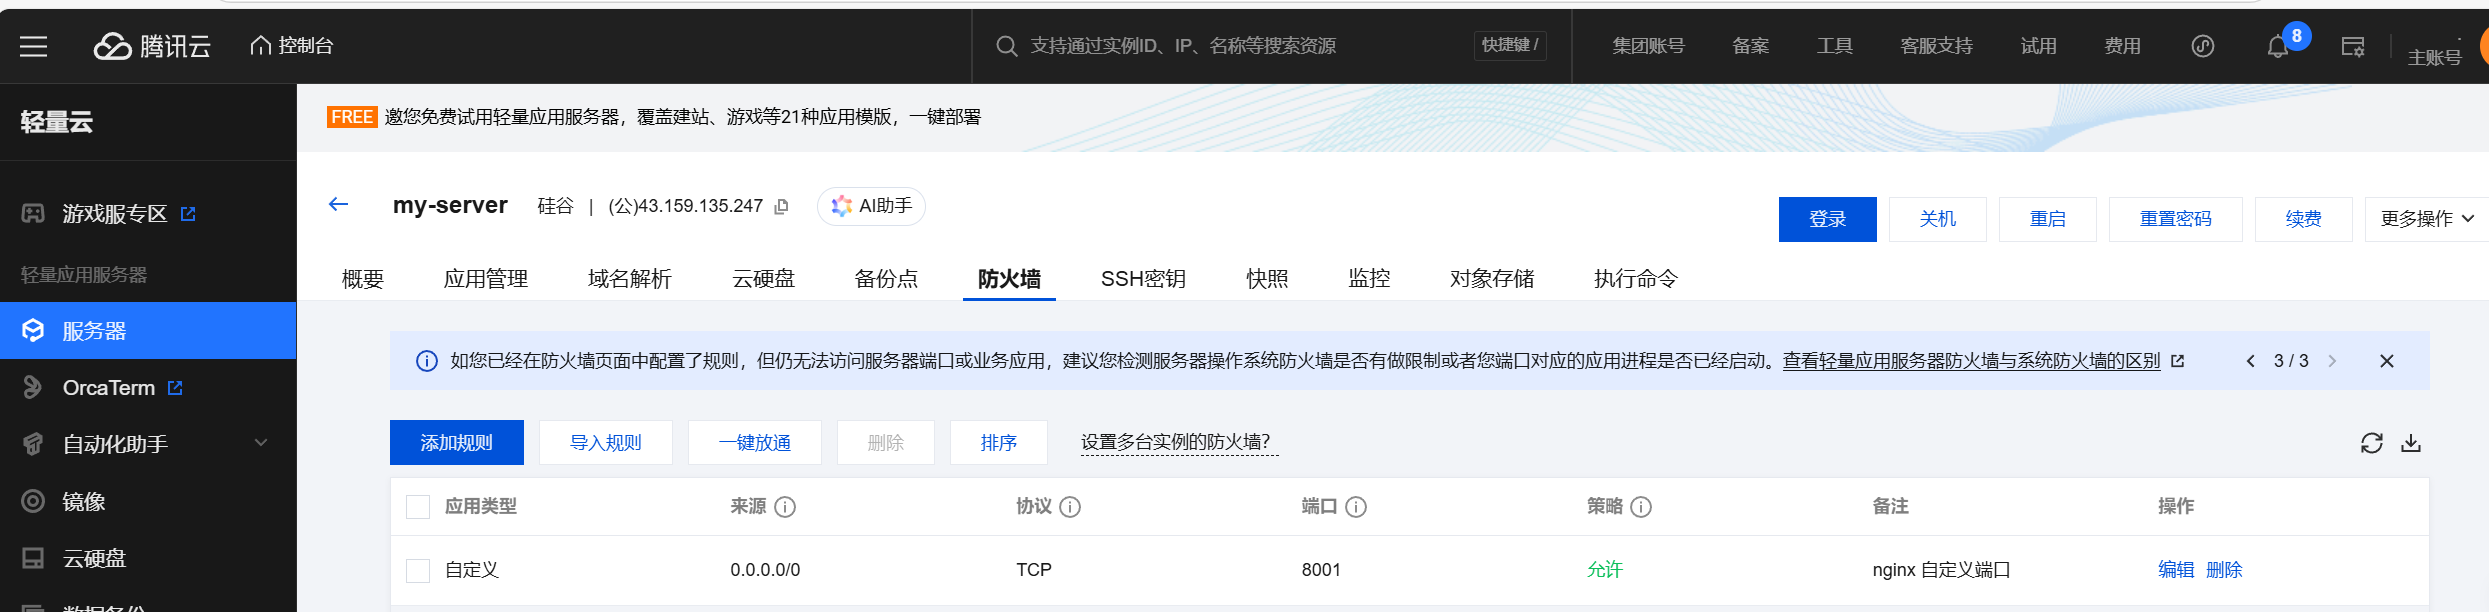
还是需要命令行放行:
1
2
sudo firewall-cmd --add-port=8001/tcp --permanent
sudo firewall-cmd --reload
Nginx http 配置
- [[Nginx http 配置]]
Nginx 反向代理
- [[Nginx server 配置]]
Nginx 负载均衡
- [[Nginx 负载均衡]]