Canvas基础
自定义 View: Canvas(画布)
Canvas 是画布,我们通过 Canvas 的各种 drawXXX 方法将图形绘制到 Canvas 上面
Canvas 基础
坐标系
Canvas 绘图中牵扯到两种坐标系:Canvas 坐标系 (View 坐标系) 与 绘图坐标系
Canvas 坐标系(不变,左上角)
Canvas 坐标系,也叫 View 坐标系。指的是 Canvas 本身的坐标系,Canvas 坐标系有且只有一个,且是唯一不变的,其坐标原点在 View 的左上角,从坐标原点向右为 x 轴的正半轴,从坐标原点向下为 y 轴的正半轴。
绘图坐标系 (变化)
Canvas 的 drawXXX 方法中传入的各种坐标指的都是绘图坐标系中的坐标,而非 Canvas 坐标系中的坐标。
默认情况下,绘图坐标系与 Canvas 坐标系完全重合,即初始状况下,绘图坐标系的坐标原点也在 View 的左上角,从原点向右为 x 轴正半轴,从原点向下为 y 轴正半轴。
但不同于 Canvas 坐标系,绘图坐标系并不是一成不变的,可以通过调用 Canvas 的 translate 方法平移坐标系,可以通过 Canvas 的 rotate 方法旋转坐标系,还可以通过 Canvas 的 scale 方法缩放坐标系,而且需要注意的是,translate、rotate、scale 的操作都是基于当前绘图坐标系的,而不是基于 Canvas 坐标系,一旦通过以上方法对坐标系进行了操作之后,当前绘图坐标系就变化了,以后绘图都是基于更新的绘图坐标系了。也就是说,真正对我们绘图有用的是绘图坐标系而非 Canvas 坐标系。
1
2
3
4
5
6
7
8
9
10
11
12
13
14
15
16
17
18
19
20
21
22
23
24
25
26
27
28
29
30
private void drawAxis(Canvas canvas){
    int canvasWidth = canvas.getWidth();
    int canvasHeight = canvas.getHeight();
    paint.setStyle(Paint.Style.STROKE);
    paint.setStrokeCap(Paint.Cap.ROUND);
    paint.setStrokeWidth(6 * density);

    //用绿色画x轴,用蓝色画y轴

    //第一次绘制坐标轴
    paint.setColor(0xff00ff00);//绿色
    canvas.drawLine(0, 0, canvasWidth, 0, paint);//绘制x轴
    paint.setColor(0xff0000ff);//蓝色
    canvas.drawLine(0, 0, 0, canvasHeight, paint);//绘制y轴

    //对坐标系平移后,第二次绘制坐标轴
    canvas.translate(canvasWidth / 4, canvasWidth /4);//把坐标系向右下角平移
    paint.setColor(0xff00ff00);//绿色
    canvas.drawLine(0, 0, canvasWidth, 0, paint);//绘制x轴
    paint.setColor(0xff0000ff);//蓝色
    canvas.drawLine(0, 0, 0, canvasHeight, paint);//绘制y轴

    //再次平移坐标系并在此基础上旋转坐标系,第三次绘制坐标轴
    canvas.translate(canvasWidth / 4, canvasWidth / 4);//在上次平移的基础上再把坐标系向右下角平移
    canvas.rotate(30);//基于当前绘图坐标系的原点旋转坐标系
    paint.setColor(0xff00ff00);//绿色
    canvas.drawLine(0, 0, canvasWidth, 0, paint);//绘制x轴
    paint.setColor(0xff0000ff);//蓝色
    canvas.drawLine(0, 0, 0, canvasHeight, paint);//绘制y轴
}
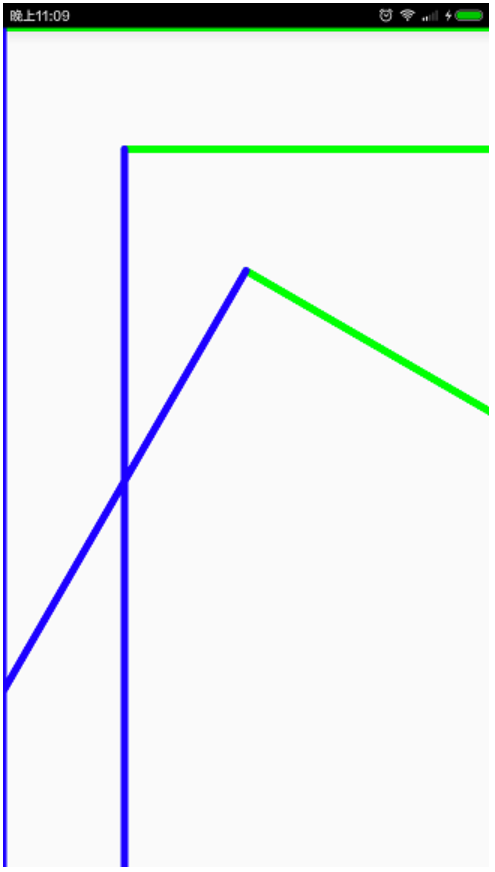
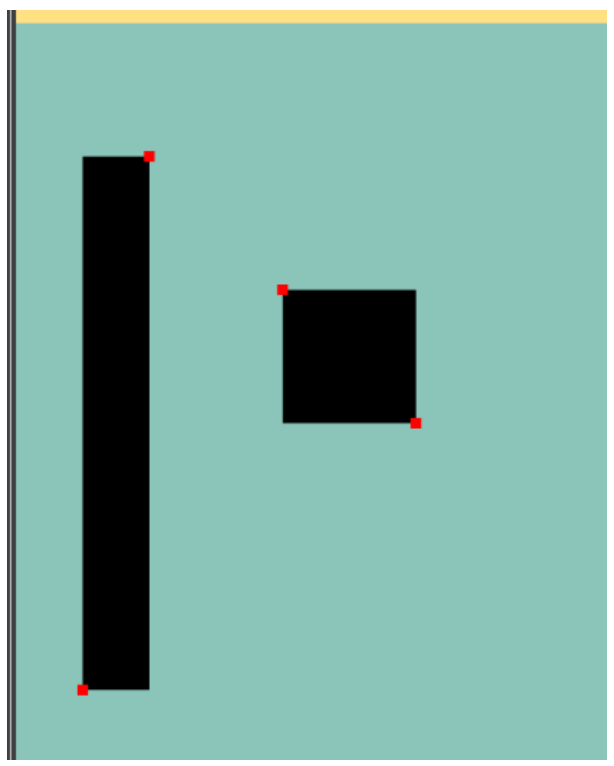
- 第一次绘制绘图坐标系时,绘图坐标系默认情况下和 Canvas 坐标系重合,所以绘制出的坐标系紧贴 View 的上侧和左侧;
- 第二次首先将坐标轴向右下角平移了一段距离,然后绘制出的坐标系也就整体向右下角平移了;
- 第三次再次向右下角平移,并旋转了 30 度,图上倾斜的坐标系即最后的绘图坐标系。
Canvas API
Canvas 的常用操作速查表
| 操作类型 | 相关 API | 备注 |
|---|---|---|
| 绘制颜色 | drawColor, drawRGB, drawARGB | 使用单一颜色填充整个画布 |
| 绘制基本形状 | drawPoint, drawPoints, drawLine, drawLines, drawRect, drawRoundRect, drawOval, drawCircle, drawArc | 依次为 点、线、矩形、圆角矩形、椭圆、圆、圆弧 |
| 绘制图片 | drawBitmap, drawPicture | 绘制位图和图片 |
| 绘制文本 | drawText, drawPosText, drawTextOnPath | 依次为 绘制文字、绘制文字时指定每个文字位置、根据路径绘制文字 |
| 绘制路径 | drawPath | 绘制路径,绘制贝塞尔曲线时也需要用到该函数 |
| 顶点操作 | drawVertices, drawBitmapMesh | 通过对顶点操作可以使图像形变,drawVertices 直接对画布作用、 drawBitmapMesh 只对绘制的 Bitmap 作用 |
| 画布剪裁 | clipPath, clipRect | 设置画布的显示区域 |
| 画布快照 | save, restore, saveLayerXxx, restoreToCount, getSaveCount | 依次为 保存当前状态、 回滚到上一次保存的状态、 保存图层状态、 回滚到指定状态、 获取保存次数 |
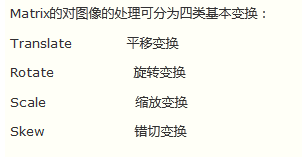
| 画布变换 | translate, scale, rotate, skew | 依次为 位移、缩放、 旋转、错切 |
| Matrix(矩阵) | getMatrix, setMatrix, concat | 实际上画布的位移,缩放等操作的都是图像矩阵 Matrix, 只不过 Matrix 比较难以理解和使用,故封装了一些常用的方法。 |
画 图形、线、点、Path
drawColor/drawRGB 颜色填充
- drawColor(@ColorInt int color)
在整个绘制区域统一涂上指定的颜色;这类颜色填充方法一般用于在绘制之前设置底色,或者在绘制之后为界面设置半透明蒙版。
1
2
drawColor(Color.BLACK);  // 纯黑
drawColor(Color.parse("#88880000"); // 半透明红色
类似的方法还有 drawRGB(int r, int g, int b) 和 drawARGB(int a, int r, int g, int b) ,它们和 drawColor(color) 只是使用方式不同,作用都是一样的。
1
2
canvas.drawRGB(100, 200, 100);
canvas.drawARGB(100, 100, 200, 100);
drawCircle 画圆
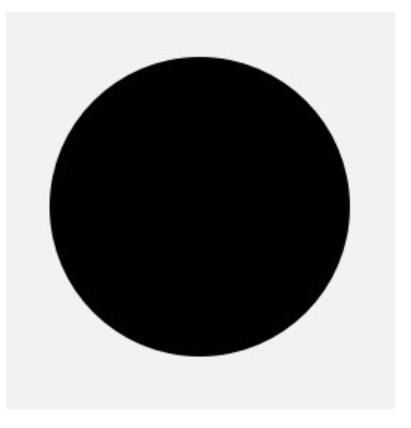
drawCircle(float centerX, float centerY, float radius, Paint paint)
参数:
- 前两个参数 centerX centerY 是圆心的坐标
- 第三个参数 radius 是圆的半径,单位都是像素
- 第四个参数 paint 它提供基本信息之外的所有风格信息,例如颜色、线条粗细、阴影等
1
canvas.drawCircle(300, 300, 200, paint);
drawRect 画矩形
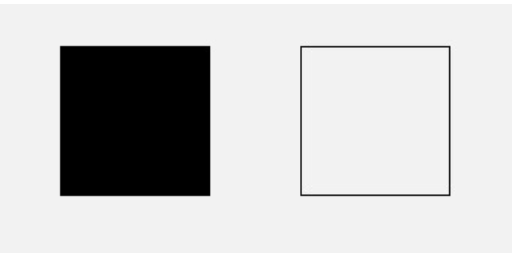
drawRect(float left, float top, float right, float bottom, Paint paint)
参数:
left, top, right, bottom 是矩形四条边的坐标;参数 rect 也是代表的坐标
(left,top)左上角坐标(right,bottom)右下角坐标
1
2
3
4
5
paint.setStyle(Style.FILL);
canvas.drawRect(100, 100, 500, 500, paint);

paint.setStyle(Style.STROKE);
canvas.drawRect(700, 100, 1100, 500, paint);
1
canvas.drawRect(100F, 100F, 50F, 500F, paint)
还有两个重载方法 drawRect(RectF rect, Paint paint) 和 drawRect(Rect rect, Paint paint) ,让你可以直接填写 RectF 或 Rect 对象来绘制矩形。
1
2
canvas.drawRect(100F, 100F, 50F, 500F, paint)
canvas.drawRect(RectF(200F, 200F, 300F, 300F), paint)
drawRoundRect 画圆角矩形
drawRoundRect(float left, float top, float right, float bottom, float rx, float ry, Paint paint)
参数:
left, top, right, bottom 是四条边的坐标,rx 和 ry 是圆角的横向半径和纵向半径。
1
canvas.drawRoundRect(100, 100, 500, 300, 50, 50, paint);
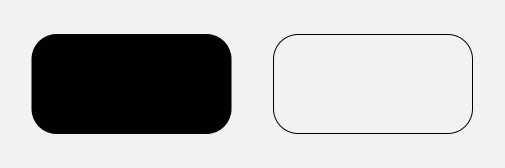
它还有一个重载方法 drawRoundRect(RectF rect, float rx, float ry, Paint paint),让你可以直接填写 RectF 来绘制圆角矩形
drawArc 绘制弧形或扇形
drawArc(float left, float top, float right, float bottom, float startAngle, float sweepAngle, boolean useCenter, Paint paint)
drawArc 是使用一个椭圆来描述弧形的
- left, top, right, bottom 描述的是这个弧形所在的椭圆
- startAngle 是弧形的起始角度(x 轴的正向,即正右的方向,是 0 度的位置;顺时针为正角度,逆时针为负角度)
- sweepAngle 是弧形划过的角度
- useCenter 表示是否连接到圆心,如果不连接到圆心,就是弧形,如果连接到圆心,就是扇形。
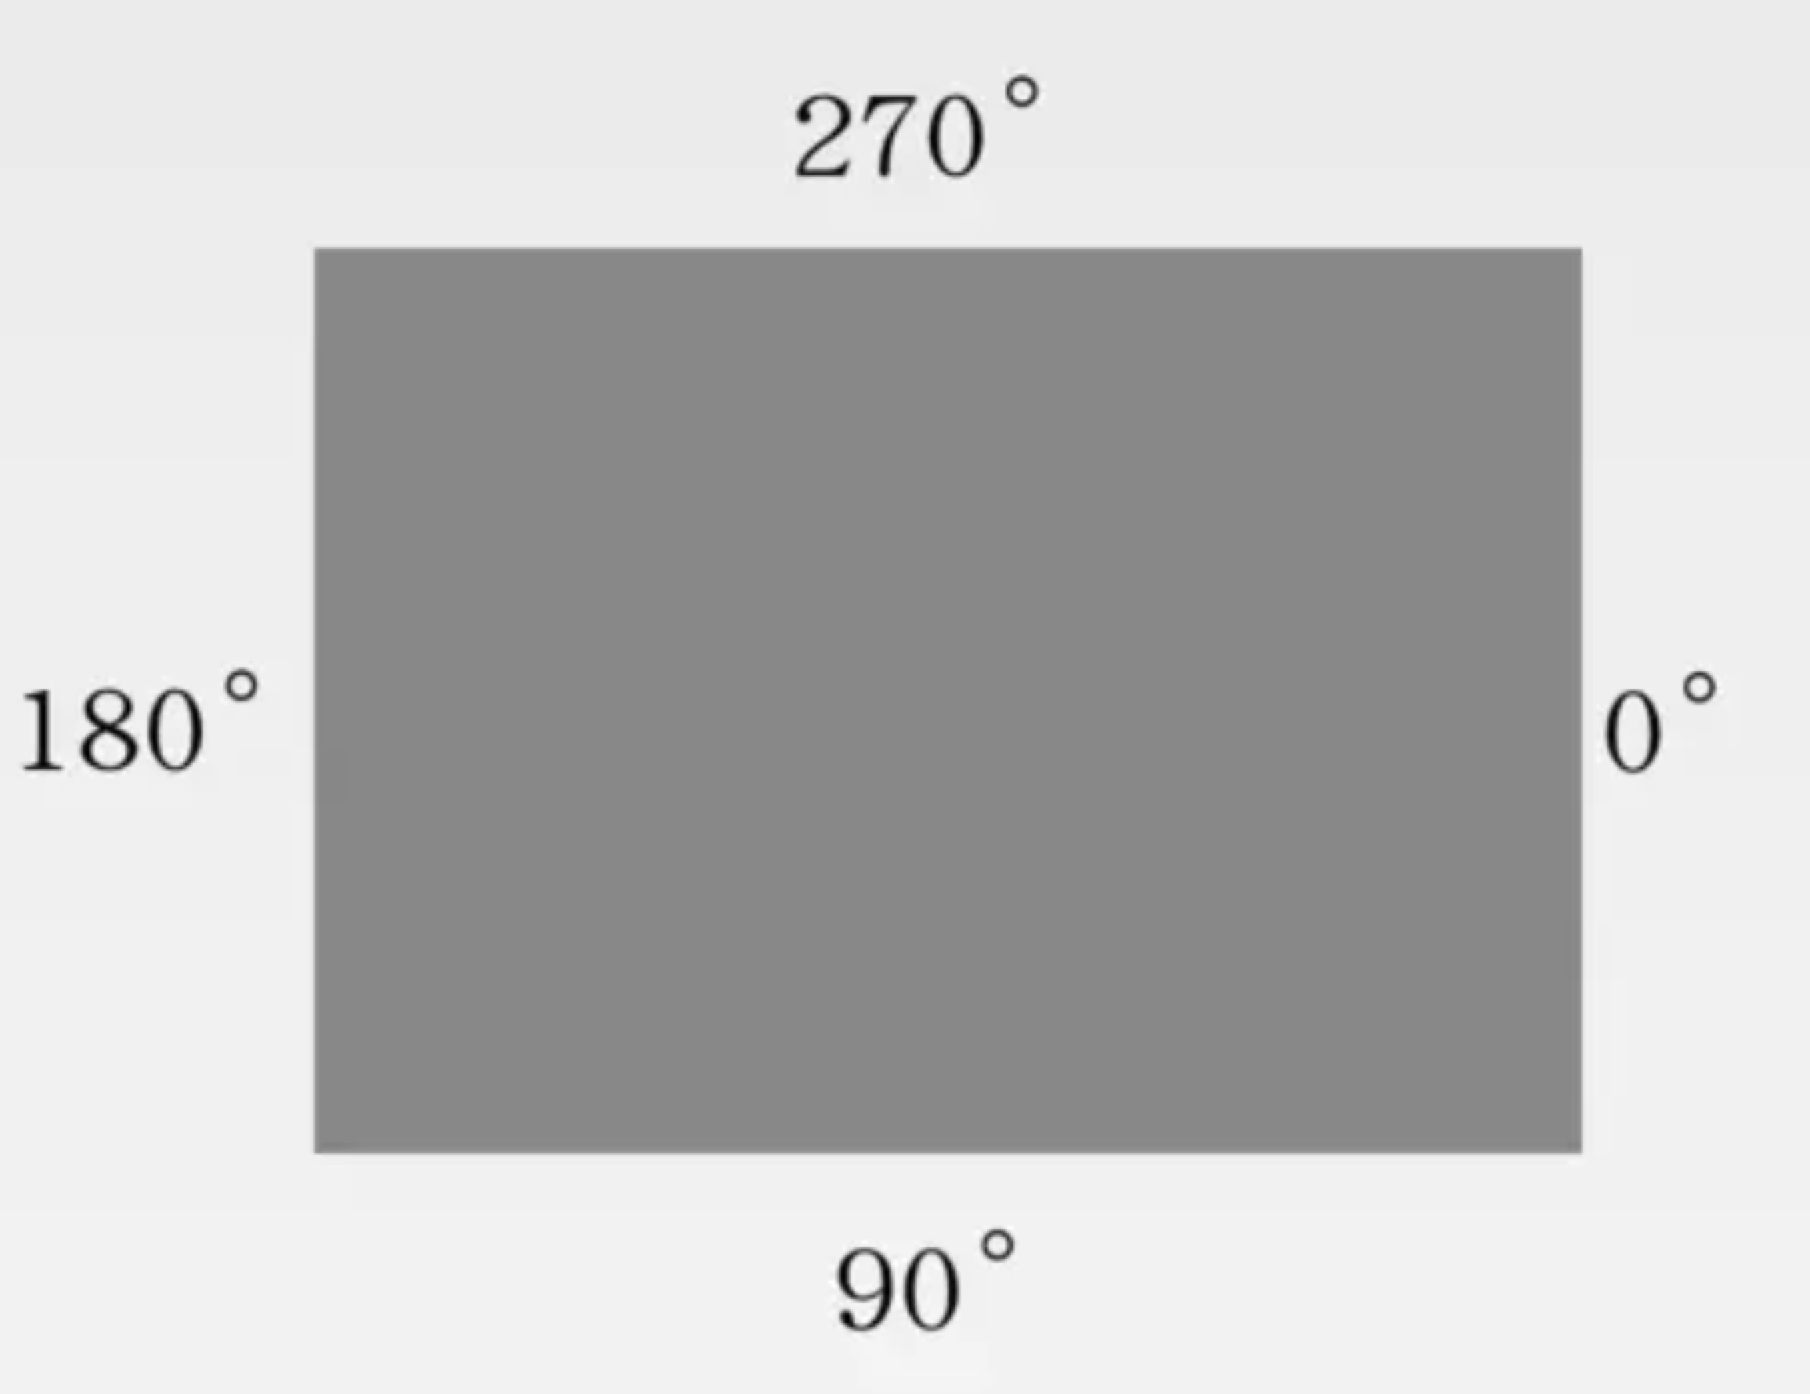
右边中间为 0° 方向,顺时针为正角度,逆时针负角度
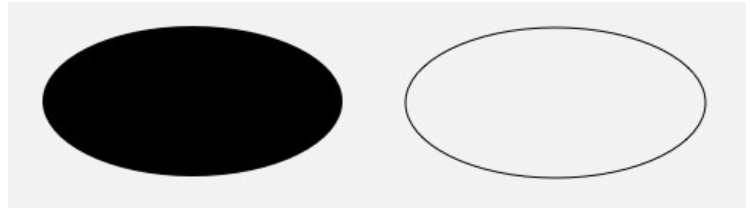
drawOval 画椭圆
drawOval(float left, float top, float right, float bottom, Paint paint
只能绘制横着的或者竖着的椭圆,不能绘制斜的(斜的倒是也可以,但不是直接使用 drawOval(),而是配合几何变换)。left, top, right, bottom 是这个椭圆的左、上、右、下四个边界点的坐标。
1
2
3
4
5
paint.setStyle(Style.FILL);
canvas.drawOval(50, 50, 350, 200, paint);

paint.setStyle(Style.STROKE);
canvas.drawOval(400, 50, 700, 200, paint);
重载方法
drawOval(RectF rect, Paint paint),让你可以直接填写 RectF 来绘制椭圆
drawPoint 画点
1
drawPoint(float x, float y, @NonNull Paint paint)
- x 和 y 是点的坐标。
- paint 点的大小可以通过
paint.setStrokeWidth(width)来设置;点的形状可以通过paint.setStrokeCap(cap)来设置:ROUND 画出来是圆形的点,SQUARE 或 BUTT 画出来是方形的点。
1
2
3
paint.setStrokeWidth(20);
paint.setStrokeCap(Paint.Cap.ROUND);
canvas.drawPoint(50, 50, paint);
1
2
3
paint.setStrokeWidth(20);
paint.setStrokeCap(Paint.Cap.SQUARE);
canvas.drawPoint(50, 50, paint);
有点像 FILL 模式下的 drawCircle() 和 drawRect() ?事实上确实是这样的,它们和 drawPoint() 的绘制效果没有区别
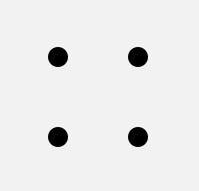
drawPoints 画点(批量)
drawPoints(float[] pts, int offset, int count, Paint paint) / drawPoints(float[] pts, Paint paint)
它和 drawPoint() 的区别是可以画多个点。
- pts 这个数组是点的坐标,每两个成一对;
- offset 表示跳过数组的前几个数再开始记坐标
- count 表示一共要绘制几个点。说这么多你可能越读越晕
1
2
3
float points = {0, 0, 50, 50, 50, 100, 100, 50, 100, 100, 150, 50, 150, 100};
// 绘制四个点:(50, 50) (50, 100) (100, 50) (100, 100)
canvas.drawPoints(points, 2 /* 跳过两个数,即前两个 0 */, 8 /* 一共绘制 8 个数(4 个点)*/, paint);
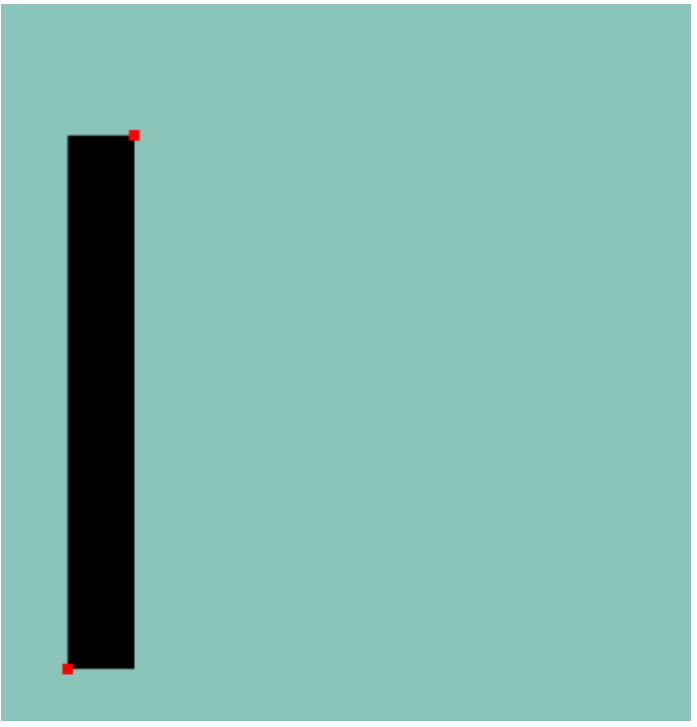
drawLine 画线
drawLine(float startX, float startY, float stopX, float stopY, Paint paint)
startX, startY, stopX, stopY 分别是线的起点和终点坐标。
1
canvas.drawLine(200, 200, 800, 500, paint);
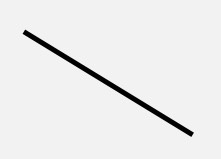
由于直线不是封闭图形,所以 setStyle(style) 对直线没有影响。
drawLines 画线(批量)
drawLines(float[] pts, int offset, int count, Paint paint) / drawLines(float[] pts, Paint paint)
drawLines() 是 drawLine() 的复数版。
1
2
3
val points = floatArrayOf(20F, 20F, 120F, 20F, 70F, 20F, 70F, 120F, 20F, 120F, 120F,
            120F, 150F, 20F, 250F, 20F, 150F, 20F, 150F, 120F, 250F, 20F, 250F, 120F, 150F, 120F, 250F, 120F)
canvas.drawLines(points, paint)

drawPath 路径
Canvas.drawPath 无效, paint 没有设置 paint.setStyle(Style.STROKE)
drawPath(Path path, Paint paint)
见 [[Path]] 章节
drawText 绘制文字
drawText(String text, float x, float y, Paint paint)
见 [[Paint#文字绘制]] 章节
drawPicture
drawBitmap 画 Bitmap
drawBitmap
drawBitmap(Bitmap bitmap, float left, float top, Paint paint)
- left 和 top 是要把 bitmap 绘制到的位置坐标
重载方法:
1
2
3
drawBitmap(Bitmap bitmap, Rect src, RectF dst, Paint paint)
drawBitmap(Bitmap bitmap, Rect src, Rect dst, Paint paint)
drawBitmap(Bitmap bitmap, Matrix matrix, Paint paint)
drawBitmap 还有一个兄弟方法 drawBitmapMesh(),可以绘制具有网格拉伸效果的 Bitmap。 drawBitmapMesh() 的使用场景较少。
drawBitmapMesh
drawBitmapMesh(Bitmap bitmap, int meshWidth, int meshHeight, float[] verts, int vertOffset, int[] colors, int colorOffset, Paint paint)
- bitmap:需要扭曲的原位图
- meshWidth/meshHeight:在横/纵向上把原位图划分为多少格
- verts:长度为
(meshWidth+1)*(meshHeight+2)的数组,他记录了扭曲后的位图各顶点 (网格线交点) 位置,虽然他是一个一维数组,但是实际上它记录的数据是形如(x0,y0),(x1,y1)..(xN,Yn)格式的数据,这些数组元素控制对 bitmap 位图的扭曲效果 - vertOffset:控制 verts 数组从第几个数组元素开始对 bitmap 进行扭曲 (忽略 verOffset 之前数据的扭曲效果)
1
2
3
4
5
6
7
8
9
10
11
12
13
14
15
16
17
18
19
20
21
22
23
24
25
26
27
28
29
30
31
32
33
34
35
36
37
38
39
40
41
42
43
44
45
46
47
48
49
50
51
52
53
54
55
56
57
58
59
60
61
62
63
64
65
66
67
68
69
70
71
72
73
74
75
76
77
78
79
80
81
public class DrawBitmapMeshView extends View {
    //将水平和竖直方向上都划分为20格
    private final int WIDTH = 20;
    private final int HEIGHT = 20;
    private final int COUNT = (WIDTH + 1) * (HEIGHT + 1);  //记录该图片包含21*21个点
    private final float[] verts = new float[COUNT * 2];    //扭曲前21*21个点的坐标
    private final float[] orig = new float[COUNT * 2];    //扭曲后21*21个点的坐标
    private Bitmap mBitmap;
    private float bH, bW;


    public DrawBitmapMeshView(Context context) {
        this(context, null);
    }

    public DrawBitmapMeshView(Context context, AttributeSet attrs) {
        super(context, attrs);
        init();
    }

    public DrawBitmapMeshView(Context context, AttributeSet attrs, int defStyleAttr) {
        super(context, attrs, defStyleAttr);
    }

    private void init() {
        mBitmap = BitmapFactory.decodeResource(getResources(), R.drawable.iv_2);
        bH = mBitmap.getWidth();
        bW = mBitmap.getHeight();
        int index = 0;
        //初始化orig和verts数组。
        for (int y = 0; y <= HEIGHT; y++) {
            float fy = bH * y / HEIGHT;
            for (int x = 0; x <= WIDTH; x++) {
                float fx = bW * x / WIDTH;
                orig[index * 2 + 0] = verts[index * 2 + 0] = fx;
                orig[index * 2 + 1] = verts[index * 2 + 1] = fy;
                index += 1;
            }
        }
        //设置背景色
        setBackgroundColor(Color.WHITE);
    }

    @Override
    protected void onDraw(Canvas canvas) {
        canvas.drawBitmapMesh(mBitmap, WIDTH, HEIGHT, verts
                , 0, null, 0, null);
    }

    //工具方法,用于根据触摸事件的位置计算verts数组里各元素的值
    private void warp(float cx, float cy) {
        for (int i = 0; i < COUNT * 2; i += 2) {
            float dx = cx - orig[i + 0];
            float dy = cy - orig[i + 1];
            float dd = dx * dx + dy * dy;
            //计算每个座标点与当前点(cx、cy)之间的距离
            float d = (float) Math.sqrt(dd);
            //计算扭曲度,距离当前点(cx、cy)越远,扭曲度越小
            float pull = 80000 / ((float) (dd * d));
            //对verts数组(保存bitmap上21 * 21个点经过扭曲后的座标)重新赋值
            if (pull >= 1) {
                verts[i + 0] = cx;
                verts[i + 1] = cy;
            } else {
                //控制各顶点向触摸事件发生点偏移
                verts[i + 0] = orig[i + 0] + dx * pull;
                verts[i + 1] = orig[i + 1] + dy * pull;
            }
        }
        //通知View组件重绘
        invalidate();
    }

    @Override
    public boolean onTouchEvent(MotionEvent event) {
        //调用warp方法根据触摸屏事件的座标点来扭曲verts数组
        warp(event.getX(), event.getY());
        return true;
    }

}
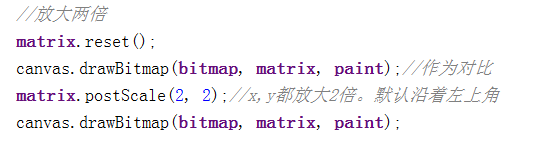
drawBitmap Matrix 绘图
缩放:postScale()
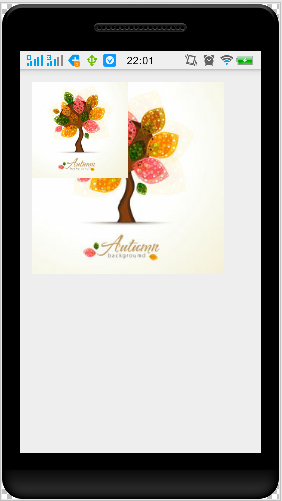
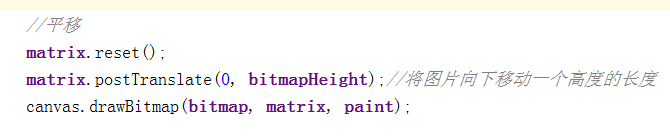
平移:postTranslate()

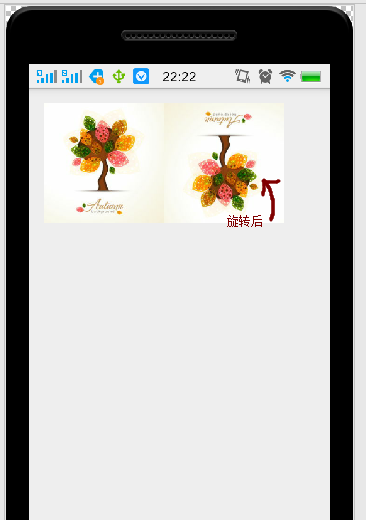
旋转:postRotate()

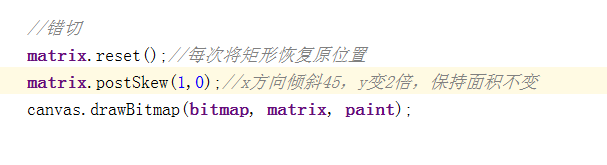
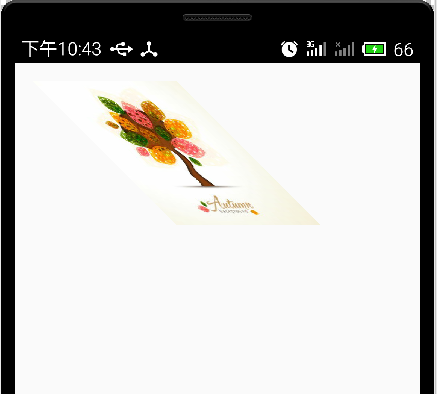
错切:postSkew()
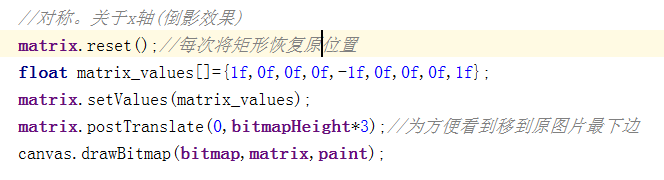
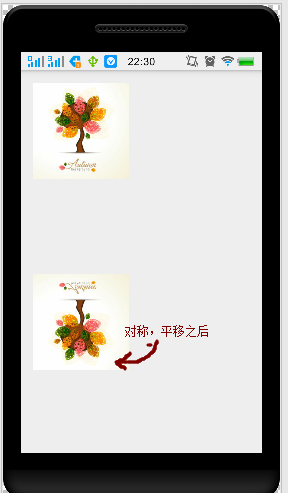
关于 x 轴对称:setValuses(values values)
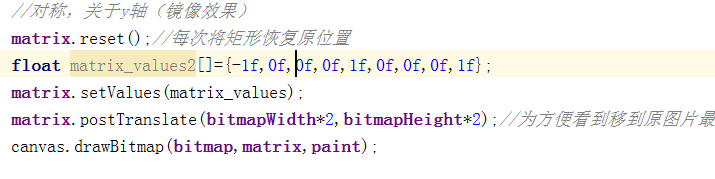
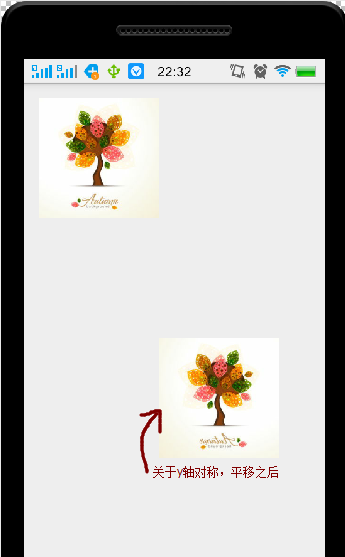
关于 y 轴对称:setValuses(values values)
Canvas 范围裁剪
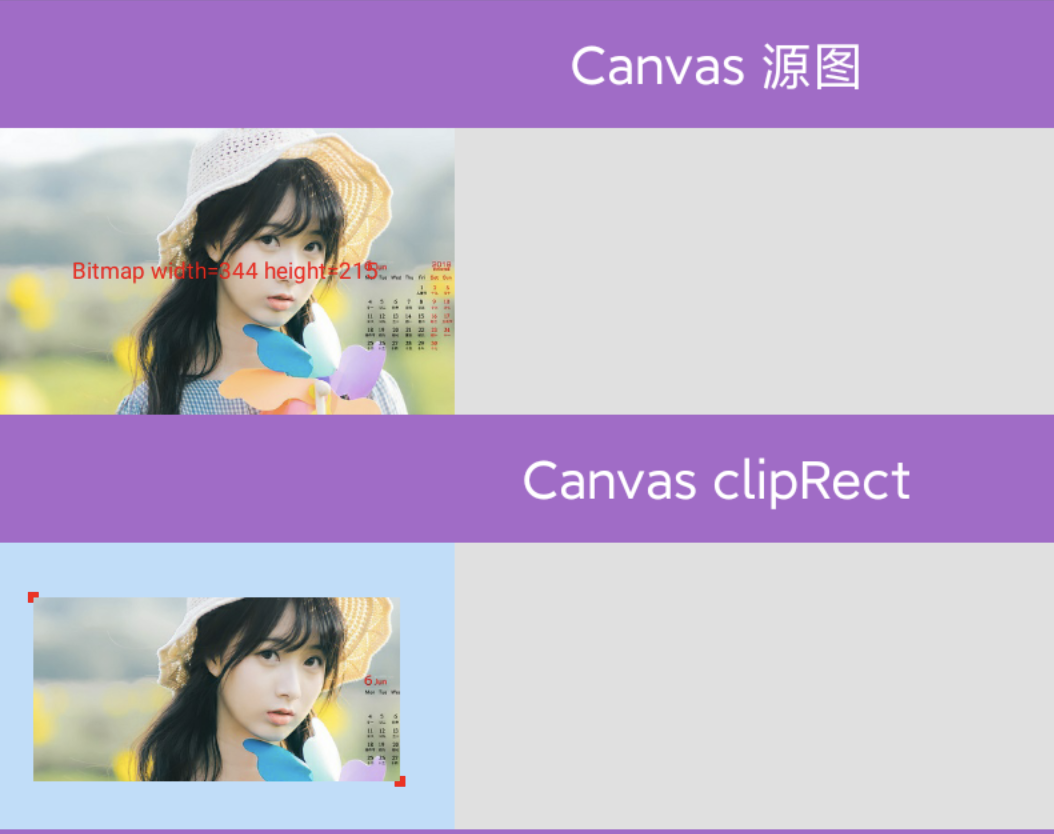
范围裁切有两个方法: clipRect() 和 clipPath()。裁切方法之后的绘制代码,都会被限制在裁切范围内。
在 Android 上是对 canvas(画布)上进行 clip 的,要在画图之前对 canvas 进行 clip,如果画图之后再对 canvas 进行 clip 不会影响到已经画好的图形。一定要记住 clip 是针对 canvas 而非图形。
clipRect
Rect
boolean clipRect(Rect rect)
- rect 表示距离左上角的坐标。使用的 OP 参数是
Region.Op.INTERSECT
1
2
3
4
public boolean clipRect(float left, float top, float right, float bottom)
public boolean clipRect(int left, int top, int right, int bottom)
public boolean clipRect(@NonNull Rect rect)
public boolean clipRect(@NonNull RectF rect)
1
2
3
4
5
6
7
8
9
10
11
12
private fun clipRect(canvas: Canvas) {
    canvas.save()
    val left = 10F.dp()
    val top = 15F.dp()
    val right = left + 100F.dp()
    val bottom = top + 50F.dp()
    canvas.clipRect(left, top, right, bottom)
    val x = 0f
    val y = 0f
    canvas.drawBitmap(bitmap, x, y, paint)
    canvas.restore()
}
记得要加上
Canvas.save()和Canvas.restore()来及时恢复绘制范围
所以完整代码是这样的:
1
2
3
4
canvas.save();
canvas.clipRect(left, top, right, bottom);
canvas.drawBitmap(bitmap, x, y, paint);
canvas.restore();
left/top/right/bottom Region.Op 过时
1
2
3
4
5
6
7
8
9
10
11
12
13
14
15
16
17
18
public enum Op {
    // A: 为我们先裁剪的区域
    // B: 为我们后裁剪的区域

    // A形状中不同于B的部分显示出来
    DIFFERENCE(0),
    // A和B交集的形状
    INTERSECT(1),
    // A和B的全集
    UNION(2),
    // A和B的全集形状,去除交集形状之后的部分
    XOR(3),
    // B形状中不同于A的部分显示出来
    REVERSE_DIFFERENCE(4),
    // 只显示B的形状
    REPLACE(5);
	// ...省略不相关代码
}
AndroidP 后,OP 参数只有
Region.Op#INTERSECT和Region.Op#DIFFERENC可用
Path
和 clipRect(Rect) 用法完全一样,只是把参数换成了 Path ,所以能裁切的形状更多一些;只留下 path 内的画布区域,而处于 path 范围之外的则不显示。
使用的 OP 参数是 Region.Op.INTERSECT
1
2
3
4
5
6
7
8
9
10
11
12
13
14
15
16
17
18
19
20
21
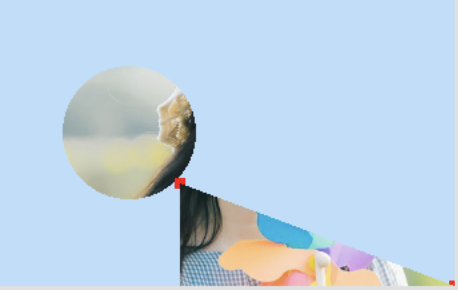
private fun clippath(canvas: Canvas) {
val x = 0f
val y = 0f
canvas.save()
val path1 = Path()
path1.addCircle(100F, 100F, 50F, Path.Direction.CCW)
val clipPathB1 = canvas.clipPath(path1)
canvas.drawBitmap(bitmap, x, y, paint)
canvas.restore()
canvas.save()
val path2 = Path()
path2.moveTo(50F.dp(), 50F.dp())
path2.lineTo(50F.dp(), 100F.dp())
path2.lineTo(width.toFloat(), height.toFloat())
path2.close()
val clipPathB2 = canvas.clipPath(path2)
canvas.drawBitmap(bitmap, x, y, paint)
canvas.restore()
}
示例:
1
2
3
4
5
6
7
8
9
canvas.save();
canvas.clipPath(path1);
canvas.drawBitmap(bitmap, point1.x, point1.y, paint);
canvas.restore();

canvas.save();
canvas.clipPath(path2);
canvas.drawBitmap(bitmap, point2.x, point2.y, paint);
canvas.restore();

Path Region.Op 过时了
同 [[#left/top/right/bottom Region.Op 过时]]
clipOutRect
boolean clipOutRect(Rect rect) / clipOutPath rect 和 path 外显示, AndroidO(API26) 可用
1
public boolean clipOutPath(@NonNull Path path) // 值得注意的是,该方法只能在API26版本以上调用
只留下 path 外 的画布区域,而处于 path 范围之内的则不显示。(与 clipPath 的作用范围正好相反)
低版本使用:
1
2
clipRect(rect, Region.Op.DIFFERENCE)
clipPath(mPath, Region.Op.DIFFERENCE)
1
2
3
4
5
6
7
8
9
10
11
12
13
14
15
16
private fun clipOutPath(canvas: Canvas) {
    canvas.save()
    val left = 10F.dp()
    val top = 15F.dp()
    val right = left + 100F.dp()
    val bottom = top + 50F.dp()
    if (Build.VERSION.SDK_INT >= Build.VERSION_CODES.O) {
        canvas.clipOutRect(left, top, right, bottom)
    } else {
        canvas.clipRect(left, top, right, bottom, Region.Op.DIFFERENCE)
    }
    val x = 0f
    val y = 0f
    canvas.drawBitmap(bitmap, x, y, paint)
    canvas.restore()
}
clipRegion 过时
Bitmap 上绘制东西(文字、图形等)
Bitmap 上绘制文字
1
2
3
4
5
6
7
8
9
10
11
12
13
14
15
16
17
18
19
20
21
22
23
24
25
26
27
28
29
30
31
32
33
34
35
36
37
38
39
40
41
42
43
44
45
46
47
48
49
50
51
52
53
54
55
56
57
58
59
60
61
62
63
64
65
66
67
68
69
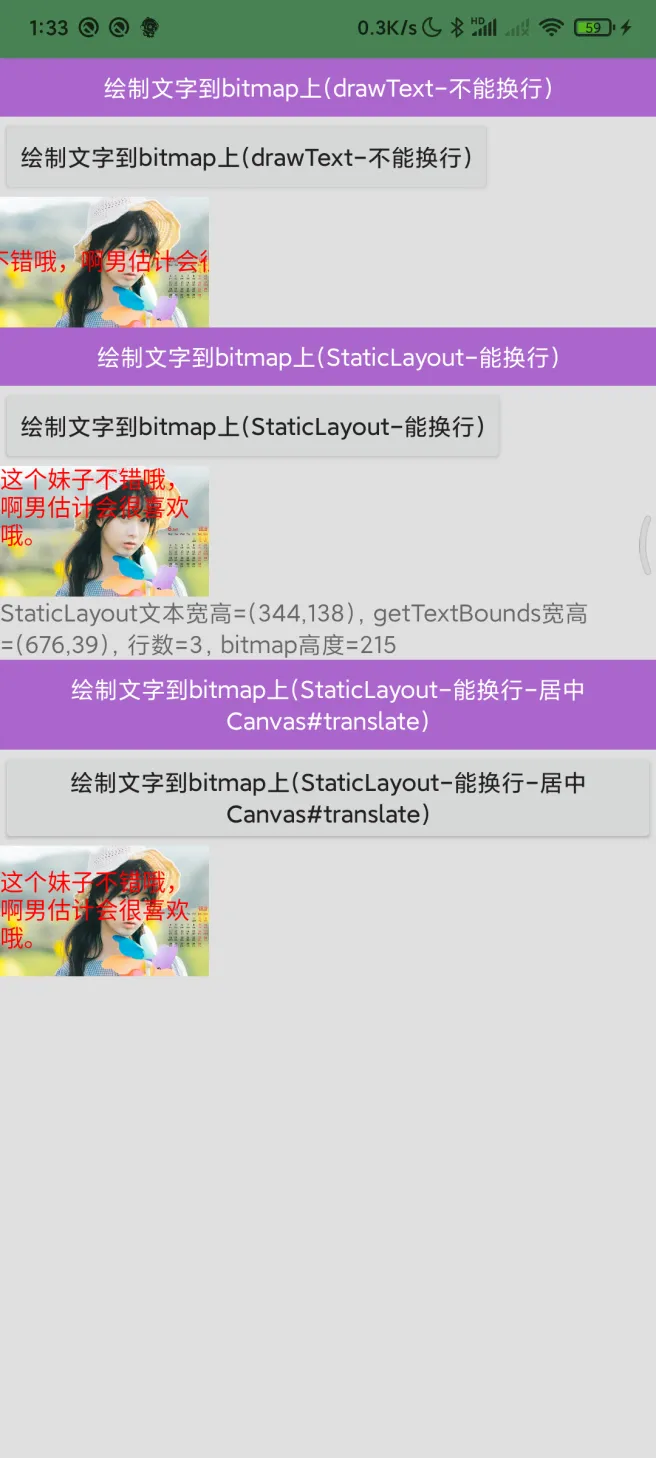
btn_draw_text_on_bitmap.setOnClickListener {
val paint = Paint()
paint.isAntiAlias = true
paint.isDither = true
paint.textSize = 14F.dp()
paint.color = Color.RED
val bitmap = BitmapFactory.decodeResource(resources, R.drawable.iv_0)
val mutableBitmap = bitmap.copy(bitmap.config, true)
val canvas = Canvas(mutableBitmap)
val x = mutableBitmap.width / 2 - paint.measureText(TEXT) / 2
val y = mutableBitmap.height / 2 - (paint.descent() + paint.ascent()) / 2
canvas.drawText(TEXT, x, y, paint)
iv_draw_text_on_bitmap.setImageBitmap(mutableBitmap)
}
btn_static_layout_text_on_bitmap.setOnClickListener {
val paint = TextPaint()
paint.isAntiAlias = true
paint.isDither = true
paint.textSize = 14F.dp()
paint.color = Color.RED
val bitmap = BitmapFactory.decodeResource(resources, R.drawable.iv_0)
val mutableBitmap = bitmap.copy(bitmap.config, true)
val canvas = Canvas(mutableBitmap)
val mStaticLayout = StaticLayout(TEXT, paint, canvas.width, Layout.Alignment.ALIGN_NORMAL, 1.0f, 0.0f, false)
mStaticLayout.draw(canvas)
val rectBounds = Rect()
paint.getTextBounds(TEXT, 0, TEXT.length, rectBounds)
val rectWidth = rectBounds.width()
val rectHeight = rectBounds.height()
val textWidth = mStaticLayout.width
val textHeight = mStaticLayout.height
tv_static_layout_text_on_bitmap.text = "StaticLayout文本宽高=(${textWidth},${textHeight}),getTextBounds宽高=(${rectWidth},${rectHeight}),行数=${mStaticLayout.lineCount},bitmap高度=${mutableBitmap.height}"
iv_static_layout_text_on_bitmap.setImageBitmap(mutableBitmap)
}
btn_static_layout_center_text_on_bitmap.setOnClickListener {
val paint = TextPaint()
paint.isAntiAlias = true
paint.isDither = true
paint.textSize = 14F.dp()
paint.color = Color.RED
val bitmap = BitmapFactory.decodeResource(resources, R.drawable.iv_0)
val mutableBitmap = bitmap.copy(bitmap.config, true)
val canvas = Canvas(mutableBitmap)
val mStaticLayout = StaticLayout(TEXT, paint, canvas.width, Layout.Alignment.ALIGN_NORMAL, 1.0f, 0.0f, false)
val dy = mutableBitmap.height / 2 - mStaticLayout.height / 2
canvas.save()
canvas.translate(0F, dy.toFloat())
mStaticLayout.draw(canvas)
canvas.restore()
iv_static_layout_tex_centert_on_bitmap.setImageBitmap(mutableBitmap)
}
获取 View 的 Bitmap
通过 canvas 复制 view 的 bitmap
1
2
3
4
5
6
7
8
9
10
11
12
13
14
15
fun getBitmapByCanvas(view: View): Bitmap {
    var width = view.width
    var height = view.height
    if (width == 0 || height == 0) {
        view.measure(View.MeasureSpec.makeMeasureSpec(0, View.MeasureSpec.UNSPECIFIED), View.MeasureSpec.makeMeasureSpec(0, View.MeasureSpec.UNSPECIFIED))
        width = view.measuredWidth
        height = view.measuredHeight
    }
    val bitmap = Bitmap.createBitmap(width, height, Bitmap.Config.ARGB_8888)
    val canvas = Canvas(bitmap)
    canvas.translate(-view.scrollX.toFloat(), -view.scrollY.toFloat())//我们在用滑动View获得它的Bitmap时候,获得的是整个View的区域(包括隐藏的),如果想得到当前区域,需要重新定位到当前可显示的区域
//        canvas.scale(0.5F,0.5F)
    view.draw(canvas)
    return bitmap
}
drawingCache 过期
1
2
3
4
5
6
7
8
fun getBitmapFromDrawingCache(view: View): Bitmap {
    view.isDrawingCacheEnabled = true
    view.measure(View.MeasureSpec.makeMeasureSpec(0, View.MeasureSpec.UNSPECIFIED), View.MeasureSpec.makeMeasureSpec(0, View.MeasureSpec.UNSPECIFIED))
    val bitmap = Bitmap.createBitmap(view.drawingCache)
    // 如果不调用这个方法,每次生成的bitmap相同
    view.isDrawingCacheEnabled = false;
    return bitmap
}
QMUIDrawableHelper
1
2
3
4
5
6
7
8
9
10
11
12
13
14
15
16
17
18
19
20
21
22
23
24
25
26
27
28
29
30
31
32
33
34
35
36
37
38
39
40
41
42
43
44
45
46
47
48
49
50
51
52
53
54
55
56
57
58
59
60
61
62
63
64
65
66
67
68
69
70
71
72
73
74
75
76
77
78
79
80
81
82
83
84
85
86
87
88
89
90
91
92
93
94
95
96
97
98
99
100
101
102
103
104
public class QMUIDrawableHelper {
private static final String TAG = QMUIDrawableHelper.class.getSimpleName();
// 节省每次创建时产生的开销,但要注意多线程操作synchronized
private static final Canvas sCanvas = new Canvas();
/**
* 从一个view创建Bitmap。 注意点:绘制之前要清掉 View 的焦点,因为焦点可能会改变一个 View 的 UI 状态。
* 来源:https://github.com/tyrantgit/ExplosionField
*
* @param view 传入一个 View,会获取这个 View 的内容创建 Bitmap。
* @param scale 缩放比例,对创建的 Bitmap 进行缩放,数值支持从 0 到 1。
*/
public static Bitmap createBitmapFromView(View view, float scale) {
if (view instanceof ImageView) {
Drawable drawable = ((ImageView) view).getDrawable();
if (drawable != null && drawable instanceof BitmapDrawable) {
return ((BitmapDrawable) drawable).getBitmap();
}
}
view.clearFocus();
int width = view.getWidth();
int height = view.getHeight();
if (width == 0 || height == 0) {
view.measure(View.MeasureSpec.makeMeasureSpec(0, View.MeasureSpec.UNSPECIFIED), View.MeasureSpec.makeMeasureSpec(0, View.MeasureSpec.UNSPECIFIED));
width = view.getMeasuredWidth();
height = view.getMeasuredHeight();
}
Bitmap bitmap = createBitmapSafely((int) (width * scale),
(int) (height * scale), Bitmap.Config.ARGB_8888, 1);
if (bitmap != null) {
synchronized (sCanvas) {
Canvas canvas = sCanvas;
canvas.setBitmap(bitmap);
canvas.save();
canvas.drawColor(Color.WHITE); // 防止 View 上面有些区域空白导致最终 Bitmap 上有些区域变黑
canvas.scale(scale, scale);
view.draw(canvas);
canvas.restore();
canvas.setBitmap(null);
}
}
return bitmap;
}
public static Bitmap createBitmapFromView(View view) {
return createBitmapFromView(view, 1f);
}
/**
* 从一个view创建Bitmap。把view的区域截掉leftCrop/topCrop/rightCrop/bottomCrop
*/
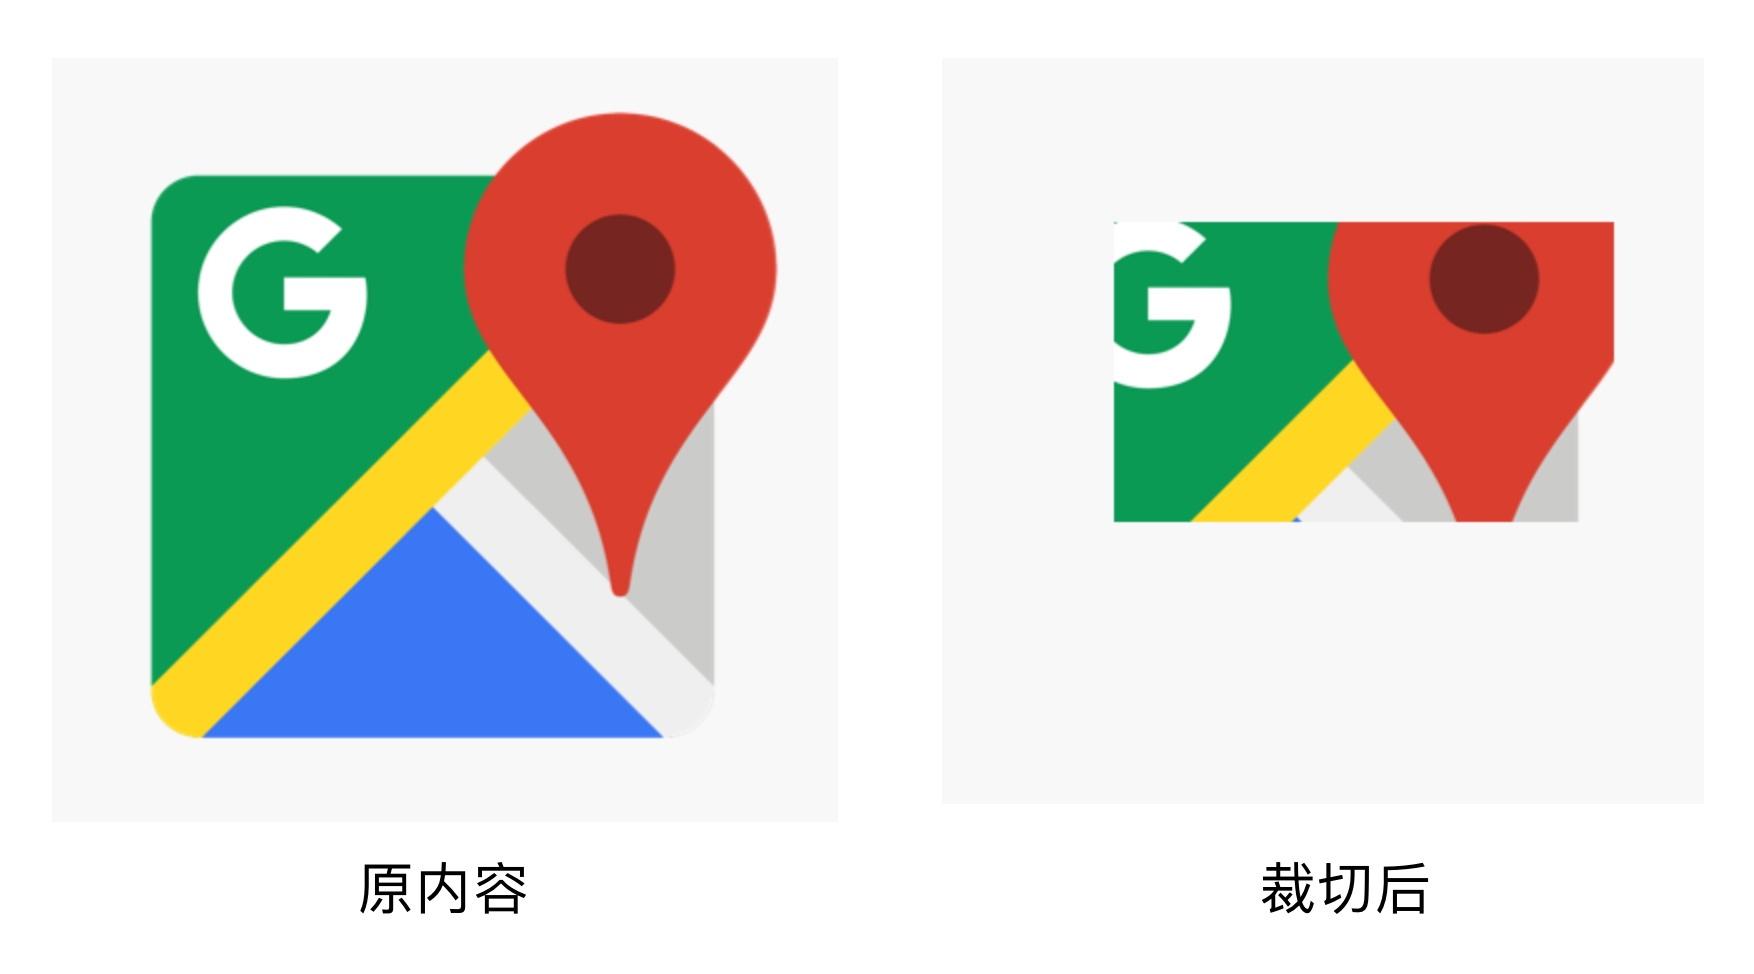
public static Bitmap createBitmapFromView(View view, int leftCrop, int topCrop, int rightCrop, int bottomCrop) {
Bitmap originBitmap = QMUIDrawableHelper.createBitmapFromView(view);
if (originBitmap == null) {
return null;
}
int width = view.getWidth();
int height = view.getHeight();
if (width == 0 || height == 0) {
view.measure(View.MeasureSpec.makeMeasureSpec(0, View.MeasureSpec.UNSPECIFIED), View.MeasureSpec.makeMeasureSpec(0, View.MeasureSpec.UNSPECIFIED));
width = view.getMeasuredWidth();
height = view.getMeasuredHeight();
}
Bitmap cutBitmap = createBitmapSafely(width - rightCrop - leftCrop, height - topCrop - bottomCrop, Bitmap.Config.ARGB_8888, 1);
if (cutBitmap == null) {
return null;
}
Canvas canvas = new Canvas(cutBitmap);
Rect src = new Rect(leftCrop, topCrop, width - rightCrop, height - bottomCrop);
Rect dest = new Rect(0, 0, width - rightCrop - leftCrop, height - topCrop - bottomCrop);
canvas.drawColor(Color.WHITE); // 防止 View 上面有些区域空白导致最终 Bitmap 上有些区域变黑
canvas.drawBitmap(originBitmap, src, dest, null);
originBitmap.recycle();
return cutBitmap;
}
/**
* 安全的创建bitmap。 如果新建 Bitmap 时产生了 OOM,可以主动进行一次 GC - System.gc(),然后再次尝试创建。
*
* @param width Bitmap 宽度。
* @param height Bitmap 高度。
* @param config 传入一个 Bitmap.Config。
* @param retryCount 创建 Bitmap 时产生 OOM 后,主动重试的次数。
* @return 返回创建的 Bitmap。
*/
public static Bitmap createBitmapSafely(int width, int height, Bitmap.Config config, int retryCount) {
try {
return Bitmap.createBitmap(width, height, config);
} catch (OutOfMemoryError e) {
e.printStackTrace();
if (retryCount > 0) {
System.gc();
return createBitmapSafely(width, height, config, retryCount - 1);
}
return null;
}
}
}