05.Vue2组件
Vue2 组件基础
Vue 自定义组件步骤
定义组件
- 定义组件:使用
Vue.extend(options)创建,其中 options 和 new Vue(options) 时传入的那个 options 几乎一样,但也有点区别;- el 不要写,最终所有的组件都要经过一个 vm 的管理,由 vm 中的 el 决定服务哪个容器。
- data 必须写成函数,避免组件被复用时,数据存在引用关系;不写成函数 console 中会报错。
- 以使用 name 配置项指定组件在开发者工具中呈现的名字
备注:使用 template 可以配置组件结构。
组件注册
组件名
在注册一个组件的时候,我们始终需要给它一个名字。我们强烈推荐遵循 W3C 规范中的自定义组件名 (字母全小写且必须包含一个连字符)。这会帮助你避免和当前以及未来的 HTML 元素相冲突。
你可以在 风格指南 中查阅到关于组件名的其它建议。
全局注册
Vue.component('组件名', 组件)
1
2
3
Vue.component('my-component-name', {
  // ... 选项 ...
})
这些组件是全局注册的。也就是说它们在注册之后可以用在任何新创建的 Vue 根实例 (new Vue) 的模板中。比如:
1
2
3
Vue.component('component-a', { /* ... */ })
Vue.component('component-b', { /* ... */ })
Vue.component('component-c', { /* ... */ })
使用:
1
2
3
4
5
6
<div id="app">
  <component-a></component-a>
  <component-b></component-b>
  <component-c></component-c>
</div>
new Vue({ el: '#app' })
局部注册
全局注册往往是不够理想的。比如,如果你使用一个像 webpack 这样的构建系统,全局注册所有的组件意味着即便你已经不再使用一个组件了,它仍然会被包含在你最终的构建结果中。这造成了用户下载的 JavaScript 的无谓的增加。
1
2
3
4
5
6
7
8
9
10
var ComponentA = { /* ... */ }
var ComponentB = { /* ... */ }
var ComponentC = { /* ... */ }
new Vue({
  el: '#app',
  components: {
    'component-a': ComponentA,
    'component-b': ComponentB
  }
})
对于 components 对象中的每个 property 来说,其 property 名就是自定义元素的名字,其 property 值就是这个组件的选项对象。
注意:局部注册的组件在其子组件中不可用。例如,如果你希望 ComponentA 在 ComponentB 中可用,则你需要这样写:
1
2
3
4
5
6
7
8
var ComponentA = { /* ... */ }

var ComponentB = {
  components: {
    'component-a': ComponentA
  },
  // ...
}
或者如果你通过 Babel 和 webpack 使用 ES2015 模块,那么代码看起来更像:
1
2
3
4
5
6
7
8
import ComponentA from './ComponentA.vue'

export default {
  components: {
    ComponentA
  },
  // ...
}
注意在 ES2015+ 中,在对象中放一个类似 ComponentA 的变量名其实是 ComponentA: ComponentA 的缩写,即这个变量名同时是:
- 用在模板中的自定义元素的名称
- 包含了这个组件选项的变量名
模块系统
在模块系统中局部注册
我们推荐创建一个 components 目录,并将每个组件放置在其各自的文件中。然后你需要在局部注册之前导入每个你想使用的组件。例如,在一个假设的 ComponentB.js 或 ComponentB.vue 文件中:
1
2
3
4
5
6
7
8
9
10
import ComponentA from './ComponentA'
import ComponentC from './ComponentC'

export default {
  components: {
    ComponentA,
    ComponentC
  },
  // ...
}
现在 ComponentA 和 ComponentC 都可以在 ComponentB 的模板中使用了。
基础组件的自动化全局注册
许多组件只是包裹了一个输入框或按钮之类的元素,是相对通用的。我们有时候会把它们称为基础组件,它们会在各个组件中被频繁的用到。
所以会导致很多组件里都会有一个包含基础组件的长列表:
1
2
3
4
5
6
7
8
9
10
11
import BaseButton from './BaseButton.vue'
import BaseIcon from './BaseIcon.vue'
import BaseInput from './BaseInput.vue'

export default {
  components: {
    BaseButton,
    BaseIcon,
    BaseInput
  }
}
如果你恰好使用了 webpack (或在内部使用了 webpack 的 Vue CLI 3+),那么就可以使用 require.context 只全局注册这些非常通用的基础组件。这里有一份可以让你在应用入口文件 (比如 src/main.js) 中全局导入基础组件的示例代码:
1
2
3
4
5
6
7
8
9
10
11
12
13
14
15
16
17
18
19
20
21
22
23
24
25
26
27
28
29
30
31
32
33
34
35
36
37
import Vue from 'vue'
import upperFirst from 'lodash/upperFirst'
import camelCase from 'lodash/camelCase'

const requireComponent = require.context(
  // 其组件目录的相对路径
  './components',
  // 是否查询其子目录
  false,
  // 匹配基础组件文件名的正则表达式
  /Base[A-Z]\w+\.(vue|js)$/
)

requireComponent.keys().forEach(fileName => {
  // 获取组件配置
  const componentConfig = requireComponent(fileName)

  // 获取组件的 PascalCase 命名
  const componentName = upperFirst(
    camelCase(
      // 获取和目录深度无关的文件名
      fileName
        .split('/')
        .pop()
        .replace(/\.\w+$/, '')
    )
  )

  // 全局注册组件
  Vue.component(
    componentName,
    // 如果这个组件选项是通过 `export default` 导出的,
    // 那么就会优先使用 `.default`,
    // 否则回退到使用模块的根。
    componentConfig.default || componentConfig
  )
})
记住:全局注册的行为必须在根 Vue 实例 (通过 new Vue) 创建之前发生。
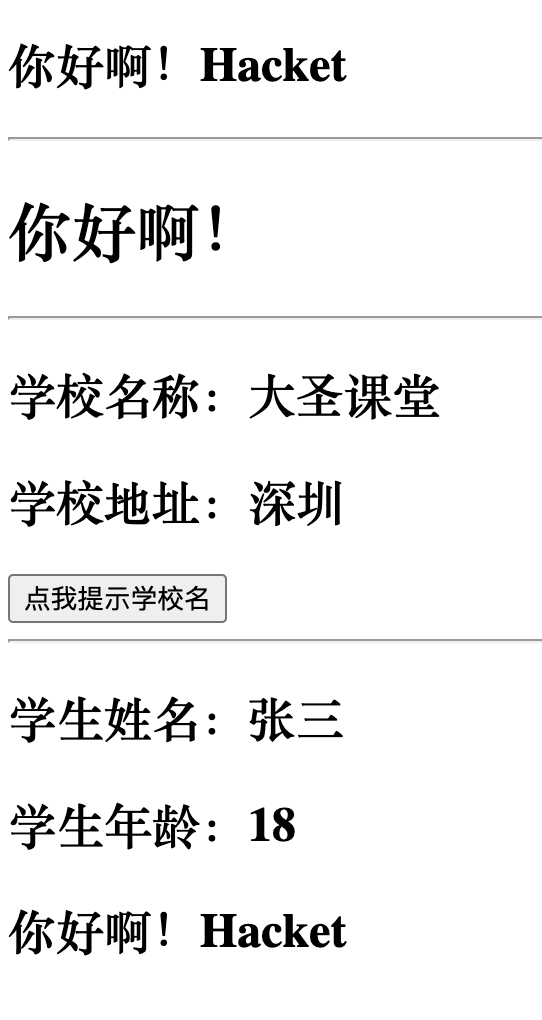
组件使用
和普通的 html 标签一样使用
组件的嵌套
1
2
3
4
5
6
7
8
9
10
11
12
13
14
15
16
17
18
19
20
21
22
23
24
25
26
27
28
29
30
31
32
33
34
35
36
37
38
39
40
41
42
43
44
45
46
47
48
49
50
51
52
53
54
55
56
57
58
59
60
61
62
63
64
65
66
67
68
69
70
71
72
73
74
75
76
77
78
79
80
81
82
83
84
85
86
87
88
89
90
91
92
93
94
95
96
97
<!DOCTYPE html>
<html>

<head>
	<meta charset="UTF-8" />
	<title>组件的嵌套</title>
	<!-- 引入Vue -->
	<script type="text/javascript" src="../js/vue.js"></script>
</head>

<body>
	<!-- 准备好一个容器-->
	<div id="root">

	</div>
</body>

<script type="text/javascript">
	Vue.config.productionTip = false //阻止 vue 在启动时生成生产提示。

	//定义student组件
	const student = Vue.extend({
		name: 'student',
		template: `
				<div>
					<h2>学生姓名:</h2>
					<h2>学生年龄:</h2>
				</div>
			`,
		data() {
			return {
				name: 'hacket',
				age: 21
			}
		}
	})

	//定义school组件
	const school = Vue.extend({
		name: 'school',
		template: `
				<div>
					<h2>学校名称:</h2>
					<h2>学校地址:</h2>
					<student></student>
				</div>
			`,
		data() {
			return {
				name: '大圣课堂',
				address: '深圳'
			}
		},
		// 注册组件(局部注册)
		components: {
			student
		}
	})

	// hello组件
	const hello = Vue.extend({
		template: `<h1></h1>`,
		data() {
			return {
				msg: '欢迎来到王者荣耀'
			}
		}
	})

	// 定义app组件
	const app = Vue.extend({
		template: `
				<div>
					<school></school>
					<hr>
					<hello></hello>
				</div>
			`,
		components: {
			school,
			hello
		}
	})


	//创建vm
	new Vue({
		template: '<app></app>',
		el: '#root',
		//注册组件(局部)
		components: {
			app
		}
	})
</script>

</html>
Vue 组件示例
示例:
1
2
3
4
5
6
7
8
9
10
11
12
13
14
15
16
17
18
19
20
21
22
23
24
25
26
27
28
29
30
31
32
33
34
35
36
37
38
39
40
41
42
43
44
45
46
47
48
49
50
51
52
53
54
55
56
57
58
59
60
61
62
63
64
65
66
67
68
69
70
71
72
73
74
75
76
77
78
79
80
81
82
83
84
85
86
87
88
89
90
91
92
93
94
95
96
97
98
99
100
101
102
103
104
105
106
107
108
109
110
111
112
113
114
115
116
117
118
119
120
121
122
123
124
125
126
<!DOCTYPE html>
<html>

<head>
	<meta charset="UTF-8" />
	<title>基本使用</title>
	<script type="text/javascript" src="../js/vue.js"></script>
</head>

<body>
	<!--
			Vue中使用组件的三大步骤:
				一、定义组件(创建组件)
				二、注册组件
				三、使用组件(写组件标签)

			一、如何定义一个组件?
				使用Vue.extend(options)创建,其中options和new Vue(options)时传入的那个options几乎一样,但也有点区别;
				区别如下:
						1.el不要写,为什么? ——— 最终所有的组件都要经过一个vm的管理,由vm中的el决定服务哪个容器。
						2.data必须写成函数,为什么? ———— 避免组件被复用时,数据存在引用关系。
				备注:使用template可以配置组件结构。

			二、如何注册组件?
				1.局部注册:靠new Vue的时候传入components选项
				2.全局注册:靠Vue.component('组件名',组件)

			三、编写组件标签:
				<school></school>
		-->
	<!-- 准备好一个容器-->
	<div id="root">
		<hello></hello>
		<hr>
		<h1></h1>
		<hr>
		<!-- 第三步:编写组件标签 -->
		<school></school>
		<hr>
		<!-- 第三步:编写组件标签 -->
		<student></student>
	</div>

	<div id="root2">
		<hello></hello>
	</div>
</body>

<script type="text/javascript">
	Vue.config.productionTip = false

	//第一步:创建school组件
	const school = Vue.extend({
		template: `
				<div class="demo">
					<h2>学校名称:</h2>
					<h2>学校地址:</h2>
					<button @click="showName">点我提示学校名</button>
				</div>
			`,
		// el:'#root', //组件定义时,一定不要写el配置项,因为最终所有的组件都要被一个vm管理,由vm决定服务于哪个容器。
		data() {
			return {
				schoolName: '大圣课堂',
				address: '深圳'
			}
		},
		methods: {
			showName() {
				alert(this.schoolName)
			}
		},
	})

	//第一步:创建student组件
	const student = Vue.extend({
		template: `
				<div>
					<h2>学生姓名:</h2>
					<h2>学生年龄:</h2>
				</div>
			`,
		data() {
			return {
				studentName: '张三',
				age: 18
			}
		}
	})

	//第一步:创建hello组件
	const hello = Vue.extend({
		template: `
				<div>
					<h2>你好啊!</h2>
				</div>
			`,
		data() {
			return {
				name: 'Hacket'
			}
		}
	})

	//第二步:全局注册组件
	Vue.component('hello', hello)

	//创建vm
	new Vue({
		el: '#root',
		data: {
			msg: '你好啊!'
		},
		//第二步:注册组件(局部注册)
		components: {
			school,
			student
		}
	})

	new Vue({
		el: '#root2',
	})
</script>

</html>
了解组件
ref 属性(Vue 中的 id)
- 被用来给元素或子组件注册引用信息(id 的替代者)
- 应用在 html 标签上获取的是真实 DOM 元素,应用在组件标签上是组件实例对象(vc)
- 使用方式:
- 打标识:
<h1 ref="xxx">…..</h1>或<School ref="xxx"></School> - 获取:
this.$refs.xxx
- 打标识:
示例:
1
2
3
4
5
6
7
8
9
10
11
12
13
14
15
16
17
18
19
20
21
22
23
24
25
26
27
28
29
30
31
32
33
34
35
36
37
<template>
  <div>
    <h1 v-text="msg" ref="title"></h1>
    <button @click="showDOM">点我输出上方的dom元素</button>
    <MySchool ref="school"></MySchool>
  </div>
</template>

<script>

  import MySchool from './components/School.vue'

  export default {
    name: 'App',
    data() {
      return {
        msg:"欢迎学习Vue"
      }
    },
    methods: {
      showDOM() {
        // 通过ref属性获取DOM元素
        console.log(this.$refs.title);
        // 通过ref属性获取School组件的实例对象
        console.log(this.$refs.school);

      }
    },
    components: {
      MySchool
    }
  }
</script>

<style>

</style>
mixin
功能:可以把多个组件共用的配置提取成一个混入对象
使用方式:
- 定义 mixin
1
2
3
4
5
6
7
8
9
{
  data() {
    // ...
  },
  methods:{
    // ...
  }
  // ...
}
- 使用 mixin
1
2
3
4
5
// 全局混入:
Vue.mixin(xxx)

// 局部混入:
mixins:['xxx']
示例:
- 定义 mixin.js
1
2
3
4
5
6
7
8
9
10
11
12
13
14
15
16
17
18
19
20
21
22
23
// 这个导出方法是用来导出多个方法的,如果只有一个方法,可以使用默认导出
export const hunhe = {
    methods: {
        showName() {
            console.log(this.name);
          }
    },
    mounted() {
        console.log('混合对象的钩子被调用');
    },
}

export const hunhe2 = {
    data() {
        return {
            x: 10,
            y: 20
        }
    }
}

// 默认导出
// export default mixin;
- 单个 Vue 引入
1
2
3
4
5
6
7
8
9
10
11
12
13
14
15
16
17
18
19
20
21
22
23
24
25
26
27
28
29
<template>
  <div class="demo">
    <h2 @click="showName">学生名称: </h2>
    <h2>学生性别:</h2>
    <hr>
  </div>
</template>
<script>
  // 引入一个混合对象mixin.js
  import {hunhe, hunhe2} from '../mixin.js'

  export default {
      name: 'Student',
      data() {
          return {
            name:'张三',
            sex:'男',
            x: 999
          }
      },
      mixins:[hunhe, hunhe2]
  }
</script>

<style>
  .demo {
    background-color: #f5f5f5;
  }
</style>
- 在 main.js 中引入
1
2
3
4
5
6
7
8
9
10
11
12
13
14
15
// 引入Vue
import Vue from 'vue'
// 引入App组件
import App from './App.vue'
// 引入路由
import {hunhe, hunhe2} from './mixin.js'

// 注册全局混合
Vue.mixin(hunhe)
Vue.mixin(hunhe2)

new Vue({
    el: '#app',
    render: h => h(App)
})
插件
- 功能:用于增强 Vue
- 本质:包含
install方法的一个对象,install 的第一个参数是 Vue,第二个以后的参数是插件使用者传递的数据。 - 定义插件:
1
2
3
4
5
6
7
8
9
10
11
12
13
14
对象.install = function (Vue, options) {
      // 1. 添加全局过滤器
      Vue.filter(....)

      // 2.定义全局指令局指令
      Vue.directive(....)

      // 3. 配置全局混入(合)
      Vue.mixin(....)

      // 4. 添加实例方法
      Vue.prototype.$myMethod = function () {...}
      Vue.prototype.$myProperty = xxxx
  }
- 使用插件
1
Vue.use(plugins, 参数xxx)
示例:
定义插件:plugins.js
1
2
3
4
5
6
7
8
9
10
11
12
13
14
15
16
17
18
19
20
21
22
23
24
25
26
27
28
29
30
31
32
33
34
35
36
37
38
export default {
	install(Vue,x,y,z){
		console.log(x,y,z)
		//全局过滤器
		Vue.filter('mySlice',function(value){
			return value.slice(0,4)
		})

		//定义全局指令
		Vue.directive('fbind',{
			//指令与元素成功绑定时(一上来)
			bind(element,binding){
				element.value = binding.value
			},
			//指令所在元素被插入页面时
			inserted(element,binding){
				element.focus()
			},
			//指令所在的模板被重新解析时
			update(element,binding){
				element.value = binding.value
			}
		})

		//定义混入
		Vue.mixin({
			data() {
				return {
					x:100,
					y:200
				}
			},
		})

		//给Vue原型上添加一个方法(vm和vc就都能用了)
		Vue.prototype.hello = ()=>{alert('你好啊')}
	}
}
使用插件:
1
2
3
4
5
6
7
8
9
10
11
12
13
14
15
16
//引入Vue
import Vue from 'vue'
//引入App
import App from './App.vue'
//引入插件
import plugins from './plugins'
//关闭Vue的生产提示
Vue.config.productionTip = false

//应用(使用)插件
Vue.use(plugins,1,2,3)
//创建vm
new Vue({
	el:'#app',
	render: h => h(App)
})
scoped 样式
- 作用:让样式在局部生效,防止冲突。
- 写法:
<style scoped>
1
2
3
4
5
<style scoped>
	.title{
		color: red;
	}
</style>
注意
获取 input 焦点
1
2
3
4
// 获取到编辑框的焦点
this.$nextTick(() => {
  this.$refs.editInput.focus();
});
插槽 slot
让父组件可以向子组件指定位置插入 html 结构,也是一种组件间通信的方式,适用于:父组件 -> 子组件
默认插槽
格式:
1
2
3
4
5
6
7
8
9
10
11
<!-- 父组件中: -->
  	<Category>
       <div>html结构1</div>
    </Category>
// 子组件中:
    <template>
        <div>
           <!-- 定义插槽 -->
           <slot>插槽默认内容...</slot>
        </div>
    </template>
示例:
- App.vue
1
2
3
4
5
6
7
8
9
10
11
12
13
14
15
16
17
18
19
20
21
22
23
24
25
26
27
28
29
30
31
32
33
34
35
36
37
<template>
  <div class="container">
    <Category title="美食">
      <img src="https://q1.qlogo.cn/g?b=qq&nk=11470226&s=640" width="200px" height="200px" alt="">
    </Category>
    <Category title="游戏">
      <ul>
        <li v-for="(item, index) in games" :key="index"></li>
      </ul>
    </Category>
    <Category title="电影">
      <img src="https://q1.qlogo.cn/g?b=qq&nk=2380321570&s=640" height="200px" width="200px" alt="">
    </Category>
  </div>
</template>
<script>
import Category from "./components/Category";
export default {
  name: "App",
  components: {
    Category
  },
  data() {
    return {
      foods: ['火锅', '烧烤', '小龙虾'],
      games: ['红色警戒', '穿越火线', '劲舞团'],
      films: ['《教父》', '《拆弹专家》', '《你好,李焕英》']
    }
  }
};
</script>
<style scoped>
.container {
  display: flex;
  justify-content: space-around;
}
</style>
- Category.vue
1
2
3
4
5
6
7
8
9
10
11
12
13
14
15
16
17
18
19
20
21
22
23
24
25
<template>
  <div class="category">
    <h3>分类</h3>
    <!-- 定义一个插槽,等待填充 -->
    <slot>我是一个默认值,当使用者没有传递具体结构时,我会出现</slot>
  </div>
</template>

<script>
export default {
  name: "Category",
  props: ["title"],
};
</script>
<style>
.category {
  background-color: skyblue;
  width: 200px;
  height: 300px;
}
h3 {
  text-align: center;
  background-color: yellow;
}
</style>

具名插槽
格式:
用 slot="xxx" 或者 v-slot:xxx 指定插槽
1
2
3
4
5
6
7
8
9
10
11
12
13
14
15
16
17
18
父组件中:
    <Category>
        <template slot="center">
          <div>html结构1</div>
        </template>

        <template v-slot:footer>
           <div>html结构2</div>
        </template>
    </Category>
子组件中:
    <template>
        <div>
           <!-- 定义插槽 -->
           <slot name="center">插槽默认内容...</slot>
           <slot name="footer">插槽默认内容...</slot>
        </div>
    </template>
示例:
1
2
3
4
5
6
7
8
9
10
11
12
13
14
15
16
17
18
19
20
21
22
23
24
25
26
27
28
29
30
31
32
33
34
35
36
37
38
39
40
41
42
43
44
45
46
47
48
49
50
51
52
53
54
55
56
57
58
59
60
61
62
63
64
65
66
67
68
69
70
71
72
73
74
75
76
77
78
79
80
81
82
83
84
85
86
87
88
89
90
91
92
93
94
95
96
97
98
<!-- App.vue -->
<template>
  <div class="container">
    <Category title="美食">
      <img slot="center" src="https://q1.qlogo.cn/g?b=qq&nk=11470226&s=640" width="200px" height="200px" alt="" />
      <div class="foot" slot="footer">
        <a href="#">更多美食</a>
      </div>
    </Category>

    <Category title="游戏">
      <ul slot="center">
        <li v-for="(item, index) in games" :key="index"></li>
      </ul>

      <div class="foot" slot="footer">
        <a href="#">单机游戏</a>
        <a href="#">网络游戏</a>
      </div>
    </Category>

    <Category title="电影">
      <img slot="center" src="https://q1.qlogo.cn/g?b=qq&nk=2380321570&s=640" height="200px" width="200px" alt="" />

      <!-- v-slot时template专用的,所以下面两种方法都行 -->
      <!-- <template slot="footer"> -->
      <template v-slot:footer>
        <div class="foot">
          <a href="#">经典</a>
          <a href="#">热门</a>
          <a href="#">推荐</a>
        </div>
        <h4>欢迎前来观影</h4>
      </template>
    </Category>
  </div>
</template>

<script>
import Category from "./components/Category";
export default {
  name: "App",
  components: {
    Category,
  },
  data() {
    return {
      foods: ["火锅", "烧烤", "小龙虾"],
      games: ["红色警戒", "穿越火线", "劲舞团"],
      films: ["《教父》", "《拆弹专家》", "《你好,李焕英》"],
    };
  },
};
</script>

<style scoped>
.container,
.foot {
  display: flex;
  justify-content: space-around;
}

h4 {
  text-align: center;
}
</style>


<!-- Category.vue -->
<template>
  <div class="category">
    <h3>分类</h3>
    <!-- 定义一个插槽,等待填充 -->
    <slot name="center">我是一个默认值,当使用者没有传递具体结构时,我会出现</slot>

    <slot name="footer">我是footer卡槽</slot>
  </div>
</template>

<script>
export default {
  name: "Category",
  props: ["title"],
};
</script>

<style>
.category {
  background-color: skyblue;
  width: 200px;
  height: 400px;
}

h3 {
  text-align: center;
  background-color: yellow;
}
</style>

作用域插槽
数据在组件的自身,但根据数据生成的结构需要组件的使用者来决定。(games 数据在 Category 组件中,但使用数据所遍历出来的结构由 App 组件决定)
示例:
- Category.vue
1
2
3
4
5
6
7
8
9
10
11
12
13
14
15
16
17
18
19
20
21
22
23
24
25
26
27
28
29
30
31
32
33
<template>
	<div class="category">
		<h3>分类</h3>
		<slot :games="games" msg="hello">我是默认的一些内容</slot>
	</div>
</template>
<script>
export default {
	name: 'Category',
	props: ['title'],
	data() {
		return {
			games: ['红色警戒', '穿越火线', '劲舞团', '超级玛丽'],
		}
	},
}
</script>
<style scoped>
.category {
	background-color: skyblue;
	width: 200px;
	height: 300px;
}
h3 {
	text-align: center;
	background-color: orange;
}
video {
	width: 100%;
}
img {
	width: 100%;
}</style>
- App.vue
1
2
3
4
5
6
7
8
9
10
11
12
13
14
15
16
17
18
19
20
21
22
23
24
25
26
27
28
29
30
31
32
33
34
35
36
37
38
39
40
<template>
	<div class="container">
		<Category title="游戏">
			<template scope="hacket">
				<ul>
					<li v-for="(g, index) in hacket.games" :key="index"></li>
				</ul>
			</template>
		</Category>
		<Category title="游戏">
			<template scope="{games}">
				<ol>
					<li style="color:red" v-for="(g, index) in games" :key="index"></li>
				</ol>
			</template>
		</Category>
		<Category title="游戏">
			<template slot-scope="{games}">
				<h4 v-for="(g, index) in games" :key="index"></h4>
			</template>
		</Category>
	</div>
</template>
<script>
import Category from './components/Category'
export default {
	name: 'App',
	components: { Category },
}
</script>
<style scoped>
.container,
.foot {
	display: flex;
	justify-content: space-around;
}
h4 {
	text-align: center;
}
</style>

- 在父组件中,分别定义了两个
<Category>组件,并向其传递了不同的模板。模板都使用了slot-scope或scope来指定变量名并向子组件传递数据。 - 在子组件中,定义了一个
games数组,并将该数组通过slot传递给父组件。父组件可以在模板内部使用slot-scope或scope指定的变量名来访问该数组,并生成不同的内容。 - 具体来说,第一个模板使用了
<ul>和<li>标签来生成一个无序列表,循环遍历了scopeData.games数组并将每个元素作为列表项展示;而第二个模板则使用了<h4>标签来生成一个标题,同样循环遍历了scopeData.games数组并将每个元素作为一个标题展示。 - 最终,在子组件的渲染过程中,父组件会根据不同的模板来生成不同的内容,从而实现了子组件内容的自定义。
- 总之,作用域插槽提供了一种非常灵活的机制,可以帮助我们将组件的渲染逻辑与组件本身解耦,实现更加清晰和高效的代码。
slot-scope和scope是相同的关键字,并具有相同的作用。在最新版 vue 2.x 中,为了提供更加一致的语法,Vue 团队已经废弃了scope,而选择使用slot-scope来定义插槽的作用域。
组件间通信
prop
父子间
- 功能:让组件接收外部传过来的数据
- 传递数据(父组件传递数据给子组件):
<Demo name="xxx"/> - 子组件接收数据:
- 第一种方式(只接收):
props:['name'] - 第二种方式(限制类型):
props:{name:String} - 第三种方式(限制类型、限制必要性、指定默认值):
- 第一种方式(只接收):
1
2
3
4
5
6
7
props:{
  name:{
    type:String, // 类型
    required:true, // 必要性
    default:'老王' // 默认值
  }
}
注意:props 是只读的,Vue 底层会监测你对 props 的修改,如果进行了修改,就会发出警告,若业务需求确实需要修改,那么请复制 props 的内容到 data 中一份,然后去修改 data 中的数据。
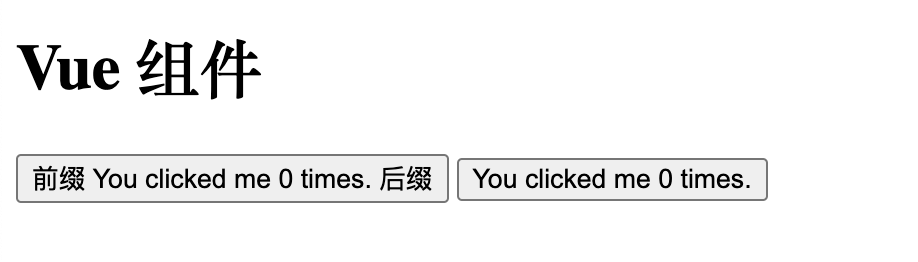
官网示例:通过 Prop 向子组件传递数据
Prop 是你可以在组件上注册的一些自定义 attribute。当一个值传递给一个 prop attribute 的时候,它就变成了那个组件实例的一个 property;
通过 props 来定义
一个组件默认可以拥有任意数量的 prop,任何值都可以传递给任何 prop。
1
2
3
4
5
6
7
8
9
10
11
12
13
14
15
16
17
18
19
20
21
22
23
24
25
26
27
28
29
30
31
32
33
34
35
36
37
38
39
40
41
<!DOCTYPE html>
<html>
<head>
    <meta charset="UTF-8" />
    <title>基本使用</title>
    <script type="text/javascript" src="../js/vue.js"></script>
</head>
<body>
    <h1>Vue 组件</h1>
    <div id="root">
        <button-counter v-bind:title="title" :prefix="prefix" :suffix='suffix'></button-counter>
        <button-counter2></button-counter2>
    </div>
</body>
<script>
    // 定义一个名为 button-counter 的新组件
    // 全局注册
    const button_counter = Vue.extend({
        data: function () {
            return {
                count: 0
            }
        },
        props: ['prefix', 'suffix'],
        template: '<button v-on:click="count++">  You clicked me 9 times. </button>',
    })
    Vue.component('button-counter', button_counter)
    // 局部注册
    new Vue({
        el: '#root',
        data: {
            title: "这是title",
            prefix: '前缀',
            suffix: '后缀'
        },
        components: {
            'button-counter2': button_counter
        }
    })
</script>
</html>
prop 示例
1
2
3
4
5
6
7
8
9
10
11
12
13
14
15
16
17
18
19
20
21
22
23
24
25
26
27
28
29
30
31
32
33
34
35
36
37
38
39
40
41
42
43
44
45
46
47
48
49
50
51
52
53
<template>
  <div class="demo">
    <h1></h1>
    <h2>学生名称: </h2>
    <h2>学生性别:</h2>
    <h2>学生年龄:</h2>
    <hr>
    </div>
</template>
<script>
  export default {
    name: 'Student',
    data() {
      return {
        msg: '欢迎学习Vue',
      }
    },
    // 通过props属性接收父组件传递过来的数据
    // props: ['name', 'sex', 'age']  简单接收

    // 接收父组件传递过来的数据,并且指定数据类型
    // props:{
    //   name:String,
    //   age:Number,
    //   sex:String
    // }
    // 接收父组件传递过来的数据,并且指定数据类型,是否必须传递
    props: {
      name: {
        // 指定数据类型
        type: String,
        // 是否必须传递
        require: true
      },
      age:{
        // 指定数据类型
        type:Number,
        // 默认值
        default:18
        // 一般required和default不同时使用,因为required为true时,default无效
      },
      sex:{
        type:String,
        require:true
      }
    }
  }
</script>
<style>
  .demo {
    background-color: #f5f5f5;
  }
</style>
子传父
父组件传递一个函数过来,子组件通过 prop 接收,调用父组件的函数。
父组件 App.vue 定义好函数:
1
2
3
4
5
6
7
8
9
10
11
12
13
14
15
16
17
18
19
20
21
22
23
24
25
<template>
  <div id="root">
    <div class="todo-container">
      <div class="todo-wrap">
        <MyHeader :addTodo="addTodo"></MyHeader>
      </div>
    </div>
  </div>
</template>
<script>
import MyHeader from "./components/MyHeader.vue";

export default {
  name: "App",
  methods: {
    // 添加todo
    addTodo(todo) {
      this.todos.unshift(todo);
    }
  },
  components: {
    MyHeader
  },
};
</script>
子组件通过 prop 接收并调用函数实现子向父组件传递数据:
1
2
3
4
5
6
7
8
9
10
11
12
13
14
15
16
17
18
19
20
21
22
23
24
25
26
27
28
29
30
31
32
33
34
35
36
<template>
  <div class="todo-header">
    <input
      type="text"
      placeholder="请输入你的任务名称,按回车键确认"
      @keyup.enter="add"
    />
  </div>
</template>
<script>
// 引入nanoid
import { nanoid } from "nanoid";
export default {
  name: "MyHerder",
  methods: {
    add(e) {
      // 判断用户是否输入了内容
      if (e.target.value.trim().length === 0) {
        alert("输入的内容不能为空");
        return;
      }
      // 将用户的输入,包装成为一个todo对象
      const todoObj = {
        id: nanoid(),
        title: e.target.value,
        done: false,
      };
      // 将todoObj传递给App
      this.addTodo(todoObj);
      // 清空用户的输入
      e.target.value = "";
    },
  },
  props: ["addTodo"],
};
</script>
自定义事件
自定义事件步骤
父组件是使用 props 传递数据给子组件,但如果子组件要把数据传递回去,就需要使用自定义事件
我们可以使用 v-on 绑定自定义事件, 每个 Vue 实例都实现了事件接口 (Events interface),即:
- 使用
@eventName或$on(eventName)父组件中监听事件@eventName方式
1
2
3
4
5
6
7
8
9
10
11
12
13
14
15
16
17
18
19
20
21
22
23
24
25
26
27
28
29
30
31
32
33
34
35
36
37
38
39
40
41
42
43
44
45
46
47
48
49
50
51
52
53
54
55
56
<!-- 通过父组件给子组件绑定一个自定义事件实现:子给父传递数据(第一种写法,使用@或v-on) -->
<Student @hacket="getStudentName" @demo="m1"/>

// Student.vue
  <template>
	<div class="student">
		<h2>学生姓名:</h2>
		<h2>学生性别:</h2>
		<h2>当前求和为:</h2>
		<button @click="add">点我number++</button>
		<button @click="sendStudentlName">把学生名给App</button>
		<button @click="unbind">解绑atguigu事件</button>
		<button @click="death">销毁当前Student组件的实例(vc)</button>
	</div>
</template>

<script>
	export default {
		name:'Student',
		data() {
			return {
				name:'张三',
				sex:'男',
				number:0
			}
		},
		methods: {
			add(){
				console.log('add回调被调用了')
				this.number++
			},
			sendStudentlName(){
				//触发Student组件实例身上的atguigu事件
				this.$emit('atguigu',this.name,666,888,900)
				// this.$emit('demo')
				// this.$emit('click')
			},
			unbind(){
				this.$off('atguigu') //解绑一个自定义事件
				// this.$off(['atguigu','demo']) //解绑多个自定义事件
				// this.$off() //解绑所有的自定义事件
			},
			death(){
				this.$destroy() //销毁了当前Student组件的实例,销毁后所有Student实例的自定义事件全都不奏效。
			}
		},
	}
</script>

<style lang="less" scoped>
	.student{
		background-color: pink;
		padding: 5px;
		margin-top: 30px;
	}
</style>
$on(eventName)方式
1
2
this.$refs.student.$on('atguigu', this.getStudentName) // 绑定自定义事件
// this.$refs.student.$once('atguigu', this.getStudentName) // 绑定自定义事件(一次性)
- 使用
$emit(eventName)子组件中触发事件:可带参数
1
2
3
4
5
<!-- 带参数 -->
this.$emit('atguigu', this.name, 666,888,900)
// 不带参数
// this.$emit('demo')
// this.$emit('click')
- 使用
$off()解绑事件:可解绑一个、多个 (数组) 和所有的事件
1
2
3
this.$off('atguigu') // 解绑一个自定义事件
// this.$off(['atguigu', 'demo']) // 解绑多个自定义事件
// this.$off() // 解绑所有的自定义事件
- 使用
$destroy()销毁
1
this.$destroy() // 销毁了当前Student组件的实例,销毁后所有Student实例的自定义事件全都不奏效。
示例:
1
2
3
4
5
6
7
8
9
10
11
12
13
14
15
16
17
18
19
20
21
22
23
24
25
26
27
28
29
30
31
32
33
34
35
<div id="app">
    <div id="counter-event-example">
      <p></p>
      <button-counter v-on:increment="incrementTotal"></button-counter>
      <button-counter v-on:increment="incrementTotal"></button-counter>
    </div>
</div>

<script>
Vue.component('button-counter', {
  template: '<button v-on:click="incrementHandler"></button>',
  data: function () {
    return {
      counter: 0
    }
  },
  methods: {
    incrementHandler: function () {
      this.counter += 1
      this.$emit('increment')
    }
  },
})
new Vue({
  el: '#counter-event-example',
  data: {
    total: 0
  },
  methods: {
    incrementTotal: function () {
      this.total += 1
    }
  }
})
</script>
自定义组件上使用原生事件
如果你想在某个组件的根元素上监听一个原生事件。可以使用 .native 修饰 v-on 。例如:
1
<my-component v-on:click.native="doTheThing"></my-component>
在自定义组件上用原生事件,不加.native 会认为是自定义事件
自定义事件小结
- 一种组件间通信的方式,适用于:子组件→父组件
- 绑定自定义事件
- 在父组件中:
<Demo @hacket="test"/>或<Demo v-on:hacket="test"/> - 在父组件中:
$.on(eventName, 参数)
- 在父组件中:
1
2
3
4
<Demo ref="demo"/>
mounted(){
     this.$refs.xxx.$on('atguigu',this.test)
}
- 若想让自定义事件只能触发一次,可以使用
once修饰符,或$once方法 - 触发自定义事件:
this.$emit('hacket', 数据) - 解绑自定义事件
this.$off('hacket') - 组件上也可以绑定原生 DOM 事件,需要使用
@eventName.native="xxx"修饰符 - 注意:通过
this.$refs.xxx.$on('haket', 回调)绑定自定义事件时,回调要么配置在 methods 中要么用箭头函数,否则 this 指向会出问题(this 需要时 app 的 Vue 对象,不能是子最近的 VueComponent 对象)
事件总线 bus
参考自定义事件,实现一个事件总线下面几步骤:
- 需要一个全局的对象让所有的组件拿到,通过给 Vue.propotype 添加一个实例;如何让事件总线也能用
$emit和$on方法呢?添加到 Vue.prototype 上。 - 发送事件:
this.$bus.$emit(xxx) - 接收事件:
this.$bus.$on(xxx)
Vue 总线原理:
1
2
3
4
5
6
7
new Vue({
	el:'#app',
	render: h => h(App),
	beforeCreate() {
		Vue.prototype.$bus = this	// 安装全局总线
	}
})
示例:
1
2
3
4
5
6
7
8
9
10
11
12
13
14
15
16
17
18
19
20
21
22
23
24
25
26
27
28
29
30
31
32
33
34
35
36
37
38
39
40
41
42
43
44
45
46
47
48
49
50
<!-- 发送方 -->
<template>
	<div class="student">
		<h2>学生姓名:</h2>
		<h2>学生性别:</h2>
		<button @click="sendStudentName">把学生名给School组件</button>
	</div>
</template>
<script>
	export default {
		name:'Student',
		data() {
			return {
				name:'张三',
				sex:'男',
			}
		},
		methods: {
			sendStudentName() {
				this.$bus.$emit('sendStudentName', this.name)
			}
		}
	}
</script>
<!-- 接收方 -->
<template>
	<div class="school">
		<h2>学校名称:</h2>
		<h2>学校地址:</h2>
	</div>
</template>
<script>
	export default {
		name:'School',
		data() {
			return {
				name:'大圣课堂',
				address:'深圳',
			}
		},
		mounted() {
			this.$bus.$on('sendStudentName', (data) => {
				console.log('我是School组件,我收到了数据', data)
			})
		},
		beforeDestroy() {
			this.$bus.$off('sendStudentName')
		}
	}
</script>
事件订阅和发布 pubsub-js
安装:
1
npm i pubsub-js
发布 publish:
1
2
3
4
5
6
7
8
9
10
11
12
13
14
15
16
17
18
19
20
21
22
23
24
25
<template>
  <div>
    <h2>学生姓名:</h2>
    <h2>学生年龄:</h2>
    <button @click="sendStudentName">把学生名给School组件</button>
  </div>
</template>

<script>
import pubsub from 'pubsub-js'
export default {
  name: "StudentName",
  data() {
    return {
      name: "hacket",
      age: 21,
    };
  },
  methods: {
    sendStudentName() {
      pubsub.publish("sendStudentName", this.name);
    },
  },
};
</script>
订阅:
1
2
3
4
5
6
7
8
9
10
11
12
13
14
15
16
17
18
19
20
21
22
23
24
25
26
27
28
29
30
31
32
<template>
  <div class="demo">
    <!--  组件模板 -->
    <h2>学校名称:</h2>
    <h2>学校地址:</h2>
    <div ref="school_rev"></div>
  </div>
</template>

<script>
import pubsub from 'pubsub-js'
export default {
  name: "SchoolName",
  data() {
    return {
      schoolName: "大圣课堂",
      address: "深圳南山",
    };
  },
  mounted() {
    // 使用pubsub订阅消息
    this.sendStudentNamePubsubId =  pubsub.subscribe("sendStudentName", (msg, data) => {
      console.log("mounted:监听到sendStudentName数据", msg, data);
      this.$refs.school_rev.innerHTML = data;
    });
  },
  beforeDestroy() {
    // 取消订阅
    pubsub.unsubscribe(this.sendStudentNamePubsubId);
  },
};
</script>
vuex 框架
可实现多组件之间通信
具体见:Vuex 章节
Vuex
事件小结
- Vue 自带的 prop,可用于父给子传递数据;如果子需要传数据给父,需要用函数来传递;兄弟之间不能传递数据
- 自定义事件
VueComponent
- 每次调用 Vue.extend,返回的都是一个全新的 VueComponent
- Vue 管理多个 VueComponent
非单文件组件
嵌入到 html 中去
缺点:样式不能跟着组件走
单文件组件
单个 xxx.Vue 文件,很适合组件化