04. App Widget问题总结
UI 问题
图片相关
支持 url 加载图片吗?
不行,可以使用 app 本地图片,或者 app 下载好图片 bitmap,然后 set
支持的图片格式,gif,webp?
支持 PNG, WEBP 等
不支持动图 gif
图片尺寸问题
2:1 的图片,需要展示在 4x2 的小组件中,如何保证图片比例不拉伸填充满小组件
解决: 设置图片 adjustViewBounds=true
1
2
3
4
5
6
7
8
9
10
11
12
13
14
15
16
17
<?xml version="1.0" encoding="utf-8"?>
<FrameLayout xmlns:android="http://schemas.android.com/apk/res/android"
    xmlns:tools="http://schemas.android.com/tools"
    android:layout_width="match_parent"
    android:layout_height="@dimen/app_search_widget_height"
    android:orientation="vertical"
    tools:layout_width="match_parent">

    <ImageView
        android:id="@+id/iv_main_bg"
        android:layout_width="match_parent"
        android:layout_height="wrap_content"
        android:adjustViewBounds="true"
        android:background="@drawable/shape_app_widget_promotion_main_doudi_bg"
        android:src="@drawable/ic_appwidget_promotion_doudi"
        tools:ignore="ContentDescription" />
</FrameLayout>
代码:
1
2
3
4
5
6
7
8
9
10
11
12
13
14
15
16
17
18
19
20
21
private suspend fun handleNoDataFromLocal(
	context: Context,
	remoteViews: RemoteViews
) {
	remoteViews.apply {
		// 主背景圆角处理
		setRoundedImageBitmap(
			context = context,
			viewId = R.id.iv_main_bg,
			bgResource = R.drawable.ic_appwidget_promotion_doudi,
			width = width(),
			height = height(),
			radius = appWidgetBgRadius
		)
		// 背景deeplink
		setPromotionItemOnclickPending(
			context = context,
			viewId = R.id.iv_main_bg,
		)
	}
}
图片下载问题,bitmap 回收问题
通过 Fresco 下载图片后,要注意 bitmap 回收的问题
- copy 一份
1
2
3
4
5
6
7
8
9
10
11
12
13
14
15
16
17
18
19
20
21
22
23
24
25
private suspend fun loadImageSuspend(url: String, imageCorner: Float, @DrawableRes maskResId: Int): Bitmap {
	val postProcessor = if (imageCorner != 0f) {
		RoundedCornerPostprocessor(imageCorner, maskResId)
	} else null
	return suspendCancellableCoroutine { cont ->
		val loadConfig = SImageLoader.LoadConfigTemplate.DEFAULT.getConfig().copy(
			isNeedCut = true,
			customBitmapProcessor = postProcessor,
			onImageLoadListener = object : OnImageLoadListener {
				override fun onFailure(url: String, throwable: Throwable) {
					cont.resumeWithException(throwable)
				}

				override fun onImageDecodeSuccess(url: String, bitmap: Bitmap) {
					// 图片decode完成,这里需要copy一份,否则协程回调回去后,bitmap可能已经被fresco内部recycled。
					cont.resume(bitmap.copy(bitmap.config, true))
				}
			}
		)
		SImageLoader.load(
			url = url,
			loadConfig = loadConfig
		)
	}
}
图片 OOM 问题
解决 1
- 后端下发的图片尺寸小点
- 下载的图片如果过大,容易 OOM,如果是 Fresco,指定
resizeOptions
示例代码:
1
2
3
4
5
6
7
8
9
10
11
12
13
14
15
16
17
18
19
20
21
22
23
24
25
26
27
28
29
30
31
32
33
34
35
36
37
38
39
40
41
42
43
44
45
46
47
48
49
50
51
suspend fun fetchImageWithSize(
    imgUrl: String?,
    imageCorner: Float = 0f,
    scaleType: ScalingUtils.ScaleType = ScalingUtils.ScaleType.FIT_XY,
    resizeWith: Int,
    resizeHeight: Int,
): Bitmap? =
    runCatching {
        suspendCancellableCoroutine<Bitmap?> { continuation ->
            if (imgUrl == null) {
                continuation.resume(null)
                return@suspendCancellableCoroutine
            }

            val uri = Uri.parse(imgUrl)

            val imageRequestBuilder = ImageRequestBuilder.newBuilderWithSource(uri)

            if (resizeWith != 0 && resizeHeight != 0) {
                imageRequestBuilder.resizeOptions = ResizeOptions(resizeWith, resizeHeight)
            }

            val imageRequest = imageRequestBuilder.build()

            val imagePipeline = Fresco.getImagePipeline()
            val dataSource = imagePipeline.fetchDecodedImage(imageRequest, AppContext.application)

            dataSource.subscribe(
                object : BaseBitmapDataSubscriber() {
                    override fun onNewResultImpl(bitmap: Bitmap?) {
                        if (bitmap != null && !bitmap.isRecycled) {
                            continuation.resume(bitmap.copy(bitmap.config, true))
                        } else {
                            continuation.resume(null)
                        }
                    }

                    override fun onFailureImpl(dataSource: DataSource<CloseableReference<CloseableImage>>) {
                        continuation.resume(null)
                    }
                },
                CallerThreadExecutor.getInstance()
            )

            continuation.invokeOnCancellation {
                dataSource.close()
            }
        }
    }.onFailure {
        L.e("fetchImageAsBitmap failed ${it.message}", it)
    }.getOrNull()
解决 2
如果通过方法 1 还没有彻底解决,那么可采用局部更新 partiallyUpdateAppWidget() 下载一张图片就更新,避免一次将多个 bitmap 全部更新
App Widget 布局适配
如何确定 widget 尺寸
- 为 Android 12 及以上定义
targetCellWidth和targetCellHeight或者所有版本定义minWidth和minHeight;如果不指定minXXX和targetXXX,默认是1x1尺寸,这样就会出现尺寸太小,不能完整地展示出内容。 - Android 主屏幕为用户提供了一个可用空间网格,他们可以在其中放置小部件和图标。该网格可能因设备而异;例如,许多手机提供
5x4网格,而平板电脑可以提供更大的网格。 - 添加小部件后,它会拉伸以在水平和垂直方向上占据最小数量的单元格,以满足运行 Android 12 或更高版本的设备上的
targetCellWidth和targetCellHeight的约束,或运行 Android 11(API 级别 30)或更低版本的设备上的minWidth和minHeight限制。
cell 的宽度和高度以及应用于小部件的自动 margin 的大小可能因设备而异。考虑到您想要占用的网格单元数,请使用下表粗略估计典型 5x4 网格手机中小部件的最小尺寸(Piexl 4 手机):
| Number of cells (width x height) | Available size in portrait mode (dp) | Available size in landscape mode (dp) |
|---|---|---|
| 1 x 1 | 57 x 102 dp | 127 x 51 dp |
| 2 x 1 | 130 x 102 dp | 269 x 51 dp |
| 3 x 1 | 203 x 102 dp | 412 x 51 dp |
| 4 x 1 | 276 x 102 dp | 554 x 51 dp |
| 5 x 1 5×1 | 349 x 102 dp | 697 x 51 dp |
| 5 x 2 | 349 x 220 dp | 697 x 117 dp |
| 5 x 3 | 349 x 337 dp | 697 x 184 dp |
| 5 x 4 | 349 x 455 dp | 697 x 250 dp |
| … | … | … |
| n x m | (73 n - 16) x (118 m - 16) | (142 n - 15) x (66 m - 15) |
- 在xml 文件夹中同时配置了
minWidth/minHeight和targetCellWidth/targetCellHeight,有的手机是去 minWidth 生效,targetCellWidth 不生效 - 需要在
xml定义minXXX,在xml-v31中定义targetXXX
Android 11 及以下 cell 计算公式(粗略)
- 尺寸大小最终以 cell 数据来显示,但定义时为 dp,会进行拉伸
- 单元格数转换基本工式 size = 70 x cells - 30
- 如:1 格 = 70 x 1 - 30 = 40 dp
- 最小尺寸定义时最好不要超过 4 个单元格就是 250 dp
示例 1:4 x 2
250dpx110dp,但在一加Ace2v手机上展示的是5x2,改成240dpx110dp就是4x2了
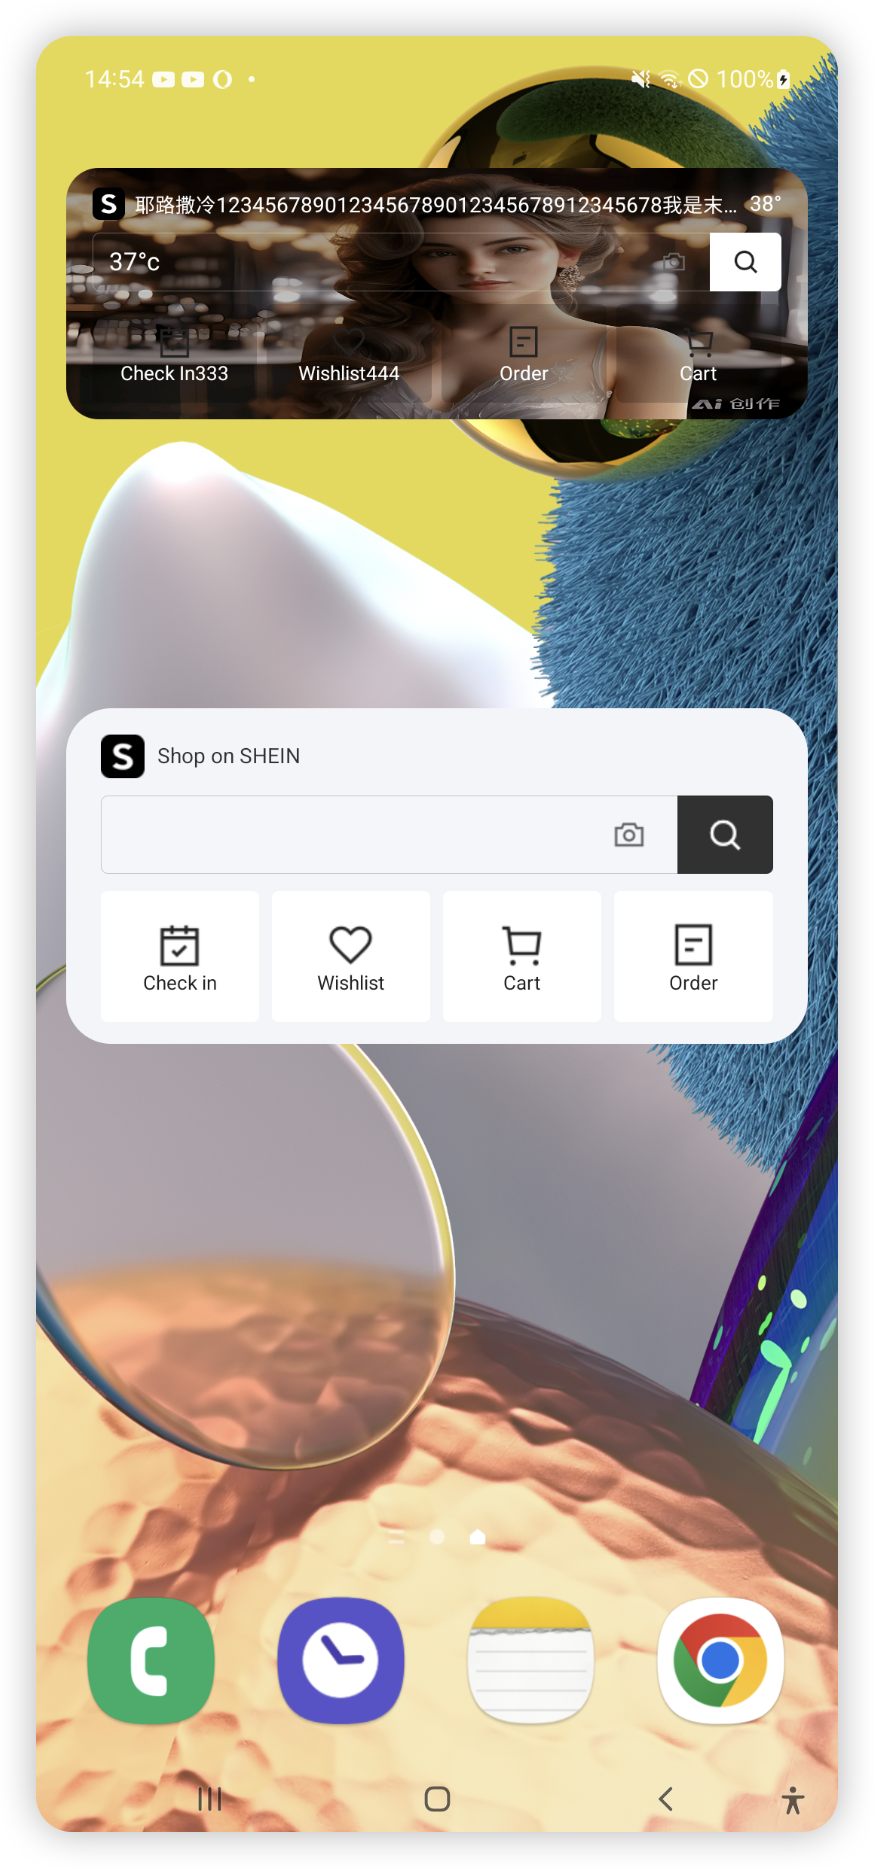
布局适配问题
问题 1:(一加、Pixel 6、三星 A 51) 不同的手机,高度不一样,导致 UI 适配很差
淘宝方案:
固定宽高尺寸,从上往下摆,下面多余的部分空白
竖屏(等比例):
横屏(等比例):
方案 1:固定尺寸
和淘宝一样,固定宽高尺寸,过宽的部分空白。内容是多少,圆角就裁剪多少
下面是 三星 A51 手机效果
优点:
- 开发简单,一套布局即可,直接写死 dp
缺点:
- 直接写死的 dp,在不同手机效果差异很大,上面的三星手机将近 1 半的空间是空白
方案 2:等比例,LinearLayout weight
尽可能的用 LinearLayout 的 weight,包括控件的大小,margin;一定程序上可以适配,但开发量大
优点:
- 开发简单,一套布局
缺点:
- 会嵌套用到 LinearLayout 的 weight,性能差
- 等比例的分配,在部分手机效果也是很差的
方案 3:基于 sw 适配(推荐)
- 基于 GitHub PhoneScreenMatch: 屏幕适配方案 基于 base=360 dp 生成 dimen
- 宽高 margin/padding 都是用生成的 dimen
layout-land不能引用该 dimen ,不然会展示不下,直接写死宽高
三星 A 51 适配后的效果(竖屏),上面的是未适配的,下面的基于 sw 适配后的效果:
横屏: 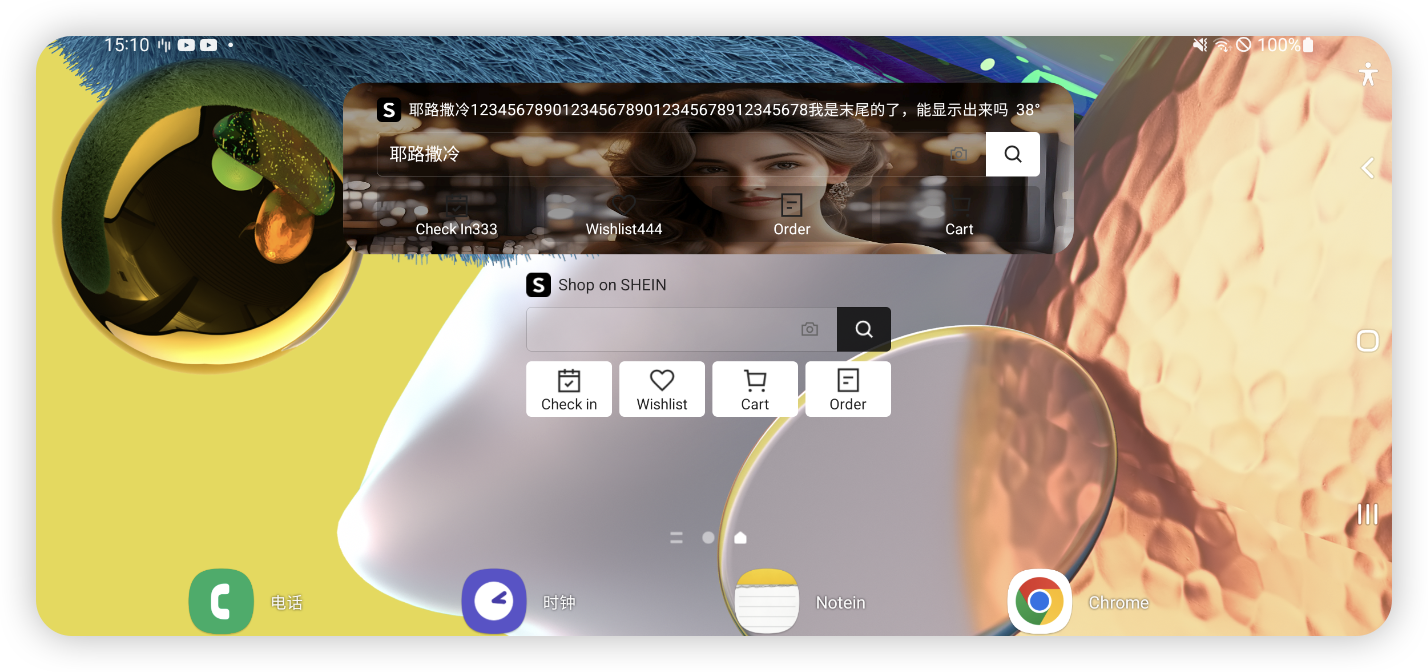
疑问: appwidget-provider 中的 minWidget 是否需要基于 sw 来做适配?
优点:
- 开发简单,一套布局,只需要把要用到尺寸写入的 dimen 中即可
缺点:
- sw 只能基于一个方向来做适配,目前是做的竖屏,如果是横屏,就会展示不出来,横屏需要单独适配
layout-land
多套布局
横屏适配
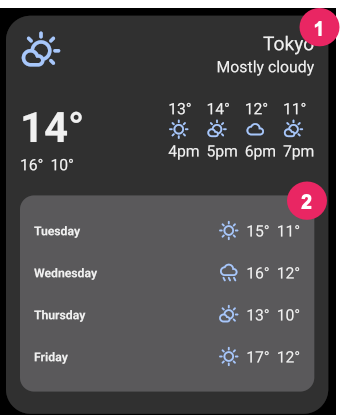
Google 的天气预报 Widget 在转屏后布局依然很好,而且看样子像是一个新的布局文件,于是在做应用时也想抓到转屏事件,然后加载一个新的 layout 文件。可是测试发现 AppWidgetProvider 的几个方法都接受不到转屏事件,于是在网上搜啊搜啊,终于发现,要解决这个问题,至于要在工程中新建两个文件夹就能解决,分别是:
layout-port(竖屏时使用)layout-land(横屏时使用)
分别写两个同名的布局文件,当然内容要根据横竖屏加以区分,放到两个文件夹中,然后像往常一样使用这个布局文件就行了,Android 会根据横竖屏情况分别加载这两个文件夹中的布局文件。
多套布局适配
Android12 之前
在 Android 12 之前如果想适配不同宽高下显示不同布局的话需要重写下 onAppWidgetOptionsChanged() 方法,然后从中获取到当前小部件的最小宽高,根据宽高的不同就可以进行布局适配了。
1
2
3
4
5
6
7
8
9
10
11
12
13
14
15
16
17
18
19
20
21
22
23
24
25
26
27
28
29
30
31
32
33
34
35
36
37
38
39
40
41
42
43
44
45
46
47
48
49
50
51
52
53
54
55
56
57
58
59
60
override fun onAppWidgetOptionsChanged(
    context: Context,
    appWidgetManager: AppWidgetManager,
    appWidgetId: Int,
    newOptions: Bundle
) {
    super.onAppWidgetOptionsChanged(context, appWidgetManager, appWidgetId, newOptions)
    // See the dimensions and
    val options = appWidgetManager.getAppWidgetOptions(appWidgetId)
    // 获取小部件最小的宽高
    val minWidth = options.getInt(AppWidgetManager.OPTION_APPWIDGET_MIN_WIDTH)
    val minHeight = options.getInt(AppWidgetManager.OPTION_APPWIDGET_MIN_HEIGHT)
    // 计算小部件的占的格数
    val rows: Int = getCellsForSize(minHeight)
    val columns: Int = getCellsForSize(minWidth)
    Log.e("rows:$rows   columns:$columns")
    updateAppWidget(context, appWidgetManager, appWidgetId, rows, columns)
}
/**
 * 返回给定大小的小部件所需的单元格数。 根据官方文档中写的计算小部件格数的方法进行定义的
 * @param size 以 dp 为单位的小部件大小。
 * @return 单元格数量的大小。
 */
fun getCellsForSize(size: Int): Int {
    var n = 2
    while (70 * n - 30 < size) {
        ++n
    }
    return n - 1
}

// 或者下面的
override fun onAppWidgetOptionsChanged(context: Context, appWidgetManager: AppWidgetManager, appWidgetId: Int, newOptions: Bundle) {
    super.onAppWidgetOptionsChanged(context, appWidgetManager, appWidgetId, newOptions)
    val options = appWidgetManager.getAppWidgetOptions(appWidgetId)

    val minWidth = options.getInt(AppWidgetManager.OPTION_APPWIDGET_MIN_WIDTH)
    val minHeight = options.getInt(AppWidgetManager.OPTION_APPWIDGET_MIN_HEIGHT)

    val rows: Int = getWidgetCellsM(minHeight)
    val columns: Int = getWidgetCellsN(minWidth)
    updateAppWidget(context, appWidgetManager, appWidgetId, rows, columns)
}

fun getWidgetCellsN(size: Int): Int {
    var n = 2
    while (73 * n - 16 < size) {
        ++n
    }
    return n - 1
}

fun getWidgetCellsM(size: Int): Int {
    var m = 2
    while (118 * m - 16 < size) {
        ++m
    }
    return m - 1
}
// 其中的计算公式,n x m:(73n-16)x(118m-16)就是文档中提到的算法。
但是这种方案有一个致命的问题,那就是不同的 ROM 的计算方式完全不一样,有可能在 Vivo 上一个格子的高度只有 80,但是在 Pixel 中,一个格子就是 100,所以,在不同的设备上显示的 n x m 不一样,也是很正常的事。
也正是因为这样的问题,如果不是只在 Android 12+ 的设备上使用,那么通常都是固定好 Widget 的大小,避免使用动态布局,这也是没办法的权衡之举。
Android12 之后
在 Android 12 之后,可以通过响应式布局来进行适配,首先需要创建一组不同尺寸的布局,然后调用 updateAppWidget() 函数,并传入一组布局,当小部件尺寸发生变化时,系统会自动更改布局。
1
2
3
4
5
6
7
8
9
10
11
12
13
14
15
internal fun updateAppWidget(context: Context, appWidgetManager: AppWidgetManager, appWidgetId: Int, widgetData: AppWidgetData) {
    val views41 = RemoteViews(context.packageName, R.layout.new_app_widget41).also { updateView(it, context, appWidgetId, widgetData) }
    val views42 = RemoteViews(context.packageName, R.layout.new_app_widget42).also { updateView(it, context, appWidgetId, widgetData) }
    val views21 = RemoteViews(context.packageName, R.layout.new_app_widget21).also { updateView(it, context, appWidgetId, widgetData) }
    val viewMapping: Map<SizeF, RemoteViews> = mapOf(
        SizeF(180f, 110f) to views21,
        SizeF(270f, 110f) to views41,
        SizeF(270f, 280f) to views42
    )
    appWidgetManager.updateAppWidget(appWidgetId, RemoteViews(viewMapping))
}

private fun updateView(remoteViews: RemoteViews, context: Context, appWidgetId: Int, widgetData: AppWidgetData) {
    remoteViews.setTextViewText(R.id.xxx, widgetData.xxx)
}
它的核心就是 RemoteViews(viewMapping),通过这个就可以动态适配当前用户选择的尺寸。
报错: java.lang.RuntimeException: RemoteViews specifying separate layouts for orientation or size cannot be modified. Instead, fully configure each layouts individually before constructing the combined layout. 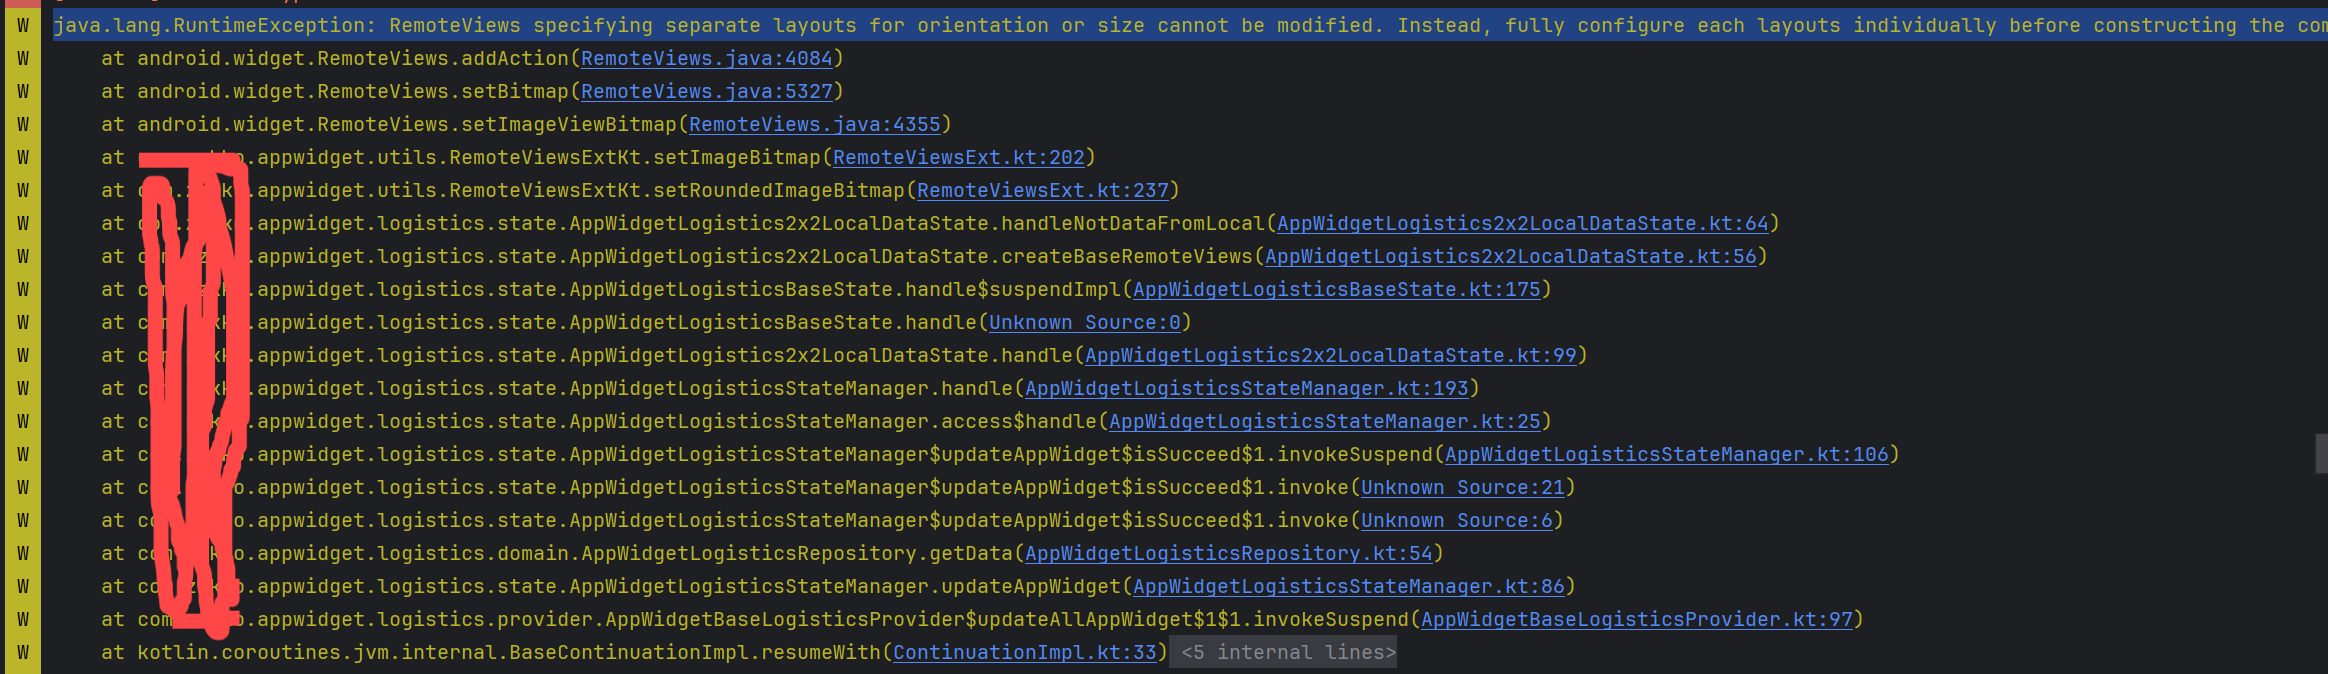 原因: Android12 不同尺寸定义了不同的布局,更新布局的元素时,需要在对应尺寸的布局上更新, 解决:
1
2
3
4
5
6
7
8
9
10
11
12
13
14
15
16
17
18
19
20
21
22
23
24
25
26
if (Build.VERSION.SDK_INT >= Build.VERSION_CODES.S) {
	val normalRemoteViews =
		RemoteViews(
			context.packageName,
			R.layout.layout_app_widget_logistics_2x2_local_data,
		).apply {
			// 需要在这更新
			handleNotDataFromLocal(context, this, "viewMapping-normal")
		}
	val smallRemoteViews = RemoteViews(
		context.packageName,
		R.layout.layout_app_widget_logistics_2x2_local_data_133x133
	).apply {
		// 需要在这更新
		handleNotDataFromLocal(context, this, "viewMapping-small")
	}
	val viewMapping: Map<SizeF, RemoteViews> = mapOf(
		SizeF(155.dp.toFloat(), 155.dp.toFloat()) to normalRemoteViews,
		SizeF(133.dp.toFloat(), 133.dp.toFloat()) to smallRemoteViews,
	)
	RemoteViews(viewMapping) // 不能用这个RemoteViews更新,否则报错
} else {
	RemoteViews(context.packageName, singleLayoutId()).apply {
		handleNotDataFromLocal(context, this, "single")
	}
}
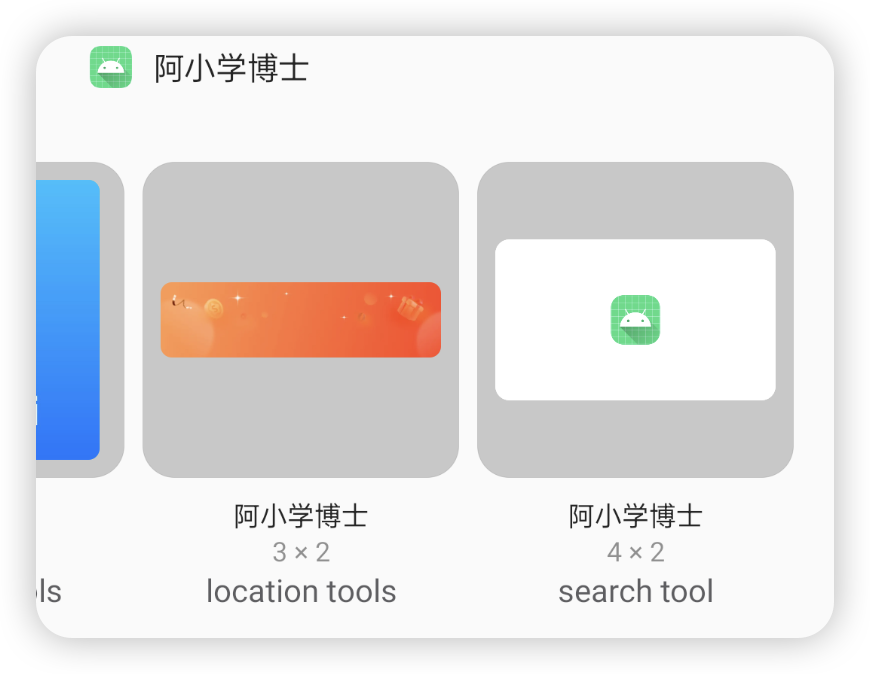
5 格手机 cell 占不满问题
问题: targetCellWidth 如果写死成 4 格,但有的手机是 5 格,会出现有 1 格空着的
解决: 在 xml-v31 中,minWidth 和 targetCellWidth 都填上,targetCellWidth 填成 5,这样在 5 格的手机可以占满宽度,在 4 格的手机根据 minWidth 适配成 4 格
1
2
3
4
5
6
7
8
9
10
11
12
<?xml version="1.0" encoding="utf-8"?>
<appwidget-provider xmlns:android="http://schemas.android.com/apk/res/android"
    android:description="@string/appwidget_search_tool_description"
    android:initialLayout="@layout/layout_app_widget_search_tool"
    android:minWidth="300dp"
    android:minHeight="120dp"
    android:previewImage="@drawable/appwidget_preview_search_tool"
    android:previewLayout="@layout/layout_app_widget_search_tool"
    android:targetCellWidth="4"
    android:targetCellHeight="2"
    android:updatePeriodMillis="1800000"
    android:widgetCategory="home_screen" />
minWidth 适配及如何选择?
minWidth 太大
minWidth太大,有的手机会显示不出 widget
minWidth 如何定义?
5x2 如何写 minWidth 和 minHeight
1
2
3
4
android:minWidth="300dp"
android:minHeight="120dp"
android:targetCellWidth="5"
android:targetCellHeight="2"
问题: 在 Pixel4a 手机,Android11,会适配成 5x3 导致 height 过高,留白太多。 解决: minHeight 改为 100dp
UI 适配问题
Widget 可以实现渐变、圆角
存在的问题:
- 圆角问题,Android 12 以下需要自己处理
- 格数问题,比如
4x2手机,有的手机能撑满,有的手机有 5 格就撑不满
背景问题
ImageView
1
2
3
4
5
6
7
8
9
10
11
12
13
14
15
16
17
18
19
20
21
22
23
24
25
26
class ExampleAppWidgetProvider : AppWidgetProvider() {
    override fun onUpdate(context: Context, appWidgetManager: AppWidgetManager, appWidgetIds: IntArray) {
        for (appWidgetId in appWidgetIds) {
            updateAppWidget(context, appWidgetManager, appWidgetId)
        }
    }

    companion object {
        fun updateAppWidget(context: Context, appWidgetManager: AppWidgetManager, appWidgetId: Int) {
            val views = RemoteViews(context.packageName, R.layout.example_appwidget)

            // 使用 Bitmap 更新 ImageView
            CoroutineScope(Dispatchers.Main).launch {
                // 从网络加载或资源文件加载 Bitmap
                val bitmap: Bitmap = getBitmapFromResources(context, R.drawable.ic_launcher_foreground)
                // val bitmap: Bitmap = getBitmapFromUrl(context, "https://example.com/image.png") // 示例从网络加载

                // 更新 ImageView
                views.setImageViewBitmap(R.id.widget_imageview, bitmap)

                // 更新 App Widget
                appWidgetManager.updateAppWidget(appWidgetId, views)
            }
        }
    }
}
其他控件
如果是 LinearLayout 调用 setImageViewBitmap 会报错:
android. Widget. RemoteViews ` $ActionException: android.widget.RemoteViews$ `ActionException: view: android. Widget. LinearLayout doesn’t have method: setImageBitmap (class android. Graphics. Bitmap)
在 App Widget 中,确实无法通过 RemoteViews 直接调用 setBackgroundBitmap 等方法来设置 LinearLayout 的背景 Bitmap。RemoteViews 对于其支持的方法有严格的限制。
因此,您需要一个替代方案以在 LinearLayout 上设置背景图像。这个替代方案通常包括将 ImageView 作为 LinearLayout 的背景,然后通过更新这个 ImageView 来实现更新背景的效果。
android. Widget. RemoteViews $ActionException: android.widget.RemoteViews$ ActionException: view: android. Widget. LinearLayout doesn’t have method: setImageBitmap (class android. Graphics. Bitmap)
Widget 动画不支持
- widget 不支持动画,如果一定要实现动画,可以开子线程循环刷新 bitmap。
Widget 里面还要加动画。由于 RemoteViews 里面不能实现正常的 View 动画,所以,Widget 里面的动画基本都是通过类似「帧动画」的方式来实现的,即将动画抽成一帧一帧的图,然后通过 Animator 来进行切换,从而实现动画效果,群友给出了一篇比较好的实践,大家可以参考参考,我就不卷了。
Widget 的动画实现
- Android 桌面小组件使用-Stars-One的杂货小窝
- Android-桌面小组件RemoteViews播放动画 - 掘金
- Android-自定义桌面小部件【搞定小米MIUI小部件】 - 掘金
- GitHub - ellisonchan/NewAppWidget
自定义 View 的支持
将要绘制的的内容,通过 bitmap 承载,绘制好后传递给 RemoteViews。
1
2
3
4
5
6
7
8
9
10
11
12
13
14
private fun drawCanvas(remoteViews: RemoteViews, index: Int) {
    val width = context.resources.getDimensionPixelSize(R.dimen.widget_canvas_width)
    val height = context.resources.getDimensionPixelSize(R.dimen.widget_canvas_height)
    val bitmap = Bitmap.createBitmap(width, height, Bitmap.Config.ARGB_8888)
    val canvas = Canvas(bitmap)
    val paint = Paint().apply {
        this.color = Color.argb(115, 194, 108, 57)
        this.strokeWidth = 2f
        this.style = Paint.Style.STROKE
    }
 canvas.drawLine(0f, height/2f, width.toFloat(), height/2f, paint)
 remoteViews.setImageViewBitmap(
        R.id.widget_canvas, bitmap)
}
Android-自定义桌面小部件【搞定小米MIUI小部件】 - 掘金
TextView 问题
字体问题
小组件没有设置字体的 API,android:fontFamily="@font/raidercrusader3d" xml 设置也不支持
TextView 富文本问题
在 Android 中,可以使用 RemoteViews 来更新 App Widget 的视图。但是,由于 RemoteViews 的限制,无法直接使用 SpannableString 和 setSpan 方法来更新 TextView 中部分文本的样式。
解决 1: 使用 HTML 实现文本样式更改
解决 2: 多个 TextView 组装
货币格式化问题
如 ¥1,234,
在三星 S21 手机展示的是 ¥1.234
原因: 写死了高度,逗号裁剪成了点
Rounded corners 圆角
Android 12 及以上
Android 12 引入了以下系统参数来设置 widget 圆角的半径:
system_app_widget_background_radius: 小部件背景的角半径,永远不会大于 28 dp。system_app_widget_inner_radius: 小部件内任何视图的圆角半径。这比背景半径正好小 8 dp,以便在使用 8 dp 填充时很好地对齐。
以下示例显示了一个小部件,该小部件使用 system_app_widget_background_radius 作为小部件的角,使用 system_app_widget_inner_radius 作为小部件内部的视图。
- 1、widget 的圆角
- 2、widget 内部 view 的圆角
圆角的重要注意事项:
- 第三方 Launcher 和设备制造商可以将
system_app_widget_background_radius参数覆盖为小于 16dp。system_app_widget_inner_radius参数始终比system_app_widget_background_radius的值小 8 dp。 - 如果您的 widget 不使用
@android:id/background或定义根据outlineclip 其内容的背景 - 将android:clipToOutline设置为true- Launcher 会自动识别背景并使用圆角最大为 16 dp 的矩形来 clip widget。请参阅确保您的 widget 与 Android 12 兼容 Ensure your widget is compatible with Android 12
Android 12 以下
为了使 widget 与以前版本的 Android 兼容,我们建议定义自定义属性并使用自定义主题来覆盖 Android 12 的这些属性,如以下示例 XML 文件所示:
values/attrs.xml
1
2
3
<resources>
  <attr name="backgroundRadius" format="dimension" />
</resources>
values/styles.xml
1
2
3
4
5
<resources>
  <style name="MyWidgetTheme">
    <item name="backgroundRadius">@dimen/my_background_radius_dimen</item>
  </style>
</resources>
values-31/styles.xml
1
2
3
4
5
<resources>
  <style name="MyWidgetTheme" parent="@android:style/Theme.DeviceDefault.DayNight">
    <item name="backgroundRadius">@android:dimen/system_app_widget_background_radius</item>
  </style>
</resources>
/drawable/my_widget_background.xml
1
2
3
4
5
<shape xmlns:android="http://schemas.android.com/apk/res/android"
  android:shape="rectangle">
  <corners android:radius="?attr/backgroundRadius" />
  ...
</shape>
/layout/my_widget_layout.xml
1
2
3
<LinearLayout xmlns:android="http://schemas.android.com/apk/res/android"
  ...
  android:background="@drawable/my_widget_background" />
圆角不显示问题
圆角显示不完整
一加ACE2V 手机,自动圆角裁剪的不对,代码如下:
1
2
3
4
5
val bg = BitmapFactory.decodeResource(
	context.resources,
	R.drawable.bg_add_item_coupon_top
)
setImageBitmap(R.id.iv_main_bg, bg)
解决: 手动加上圆角,区分 Android12 和 Android12 以下
1
2
3
4
5
6
7
8
9
10
11
12
13
<!--values/dimens-->
<dimen name="app_widget_background_radius_dimen">21dp</dimen>

<!--values-v31/dimens-->
<dimen name="app_widget_background_radius_dimen">@android:dimen/system_app_widget_background_radius</dimen>

<!--背景 drawable:-->
<?xml version="1.0" encoding="utf-8"?>
<shape xmlns:android="http://schemas.android.com/apk/res/android"
    android:shape="rectangle">
    <corners android:radius="@dimen/app_widget_background_radius_dimen" />
    <solid android:color="@color/app_widget_search_bg_default" />
</shape>
注意: Android12 外边框的圆角,默认是 16dp,有的是 21dp,Android 14 是 28dp,怎么选?
1
2
3
4
5
6
<!-- System-provided radius for the background view of app widgets. The resolved value of this resource may change at runtime. -->
<dimen name="system_app_widget_background_radius">16dp</dimen>
<!-- System-provided radius for inner views on app widgets. The resolved value of this resource may change at runtime. -->
<dimen name="system_app_widget_inner_radius">8dp</dimen>
<!-- System-provided padding for inner views on app widgets. The resolved value of this resource may change at runtime. @removed -->
<dimen name="__removed_system_app_widget_internal_padding">16dp</dimen>
网络图片圆角处理的不对
问题 1:圆角显示不对
分析: view 的尺寸是 155dp x 155dp,图片的尺寸是 1697x388,scaleType 是 ScaleType.FIT_XY
通过 Fresco 下载后,处理成圆角后,再通过 FIT_XY 设置到 View 上就展示出来上面的效果
解决: 不用 Fresco 的 RoundedCornerPostprocessor 处理圆角,而是先下载好图片得到 Bitmap,先按指定的 width 和 height 缩放图片,再裁剪圆角,这样就可以避免不是 ImageView 比例的图片经过这样处理后,也能很好的展示,并且圆角显示也很完整
1
2
3
4
5
6
7
8
9
10
11
12
13
14
15
16
17
18
19
20
21
22
23
24
25
26
27
28
29
30
31
32
33
object BitmapUtils {
    fun resizeAndCornerBitmap(bitmap: Bitmap, w: Int, h: Int, radius: Float): Bitmap {
        return createCornerBitmap(resizeImage(bitmap, w, h), radius)
    }
    private fun resizeImage(bitmap: Bitmap, w: Int, h: Int): Bitmap {
        val width = bitmap.getWidth()
        val height = bitmap.getHeight()
        val scaleWidth = w.toFloat() / width
        val scaleHeight = h.toFloat() / height
        val matrix = Matrix()
        matrix.postScale(scaleWidth, scaleHeight)
        // if you want to rotate the Bitmap
        // matrix.postRotate(45);        return Bitmap.createBitmap(
            bitmap, 0, 0, width,
            height, matrix, true
        )
    }
    private fun createCornerBitmap(bitmap: Bitmap, radius: Float): Bitmap {
        // 给bitmap添加圆角
        val output = Bitmap.createBitmap(bitmap.width, bitmap.height, Bitmap.Config.ARGB_8888)
        output.eraseColor(Color.TRANSPARENT)
        val outputCanvas = Canvas(output)
        val paint = Paint()
        paint.isAntiAlias = true
        paint.shader = BitmapShader(bitmap, Shader.TileMode.CLAMP, Shader.TileMode.CLAMP)

        if (radius != 0f) {
            val rect = RectF(0f, 0f, bitmap.width.toFloat(), bitmap.height.toFloat())
            outputCanvas.drawRoundRect(rect, radius, radius, paint)
        }
        return output
    }
}
问题 2:图片裁剪导致内容过于靠边
问题效果: 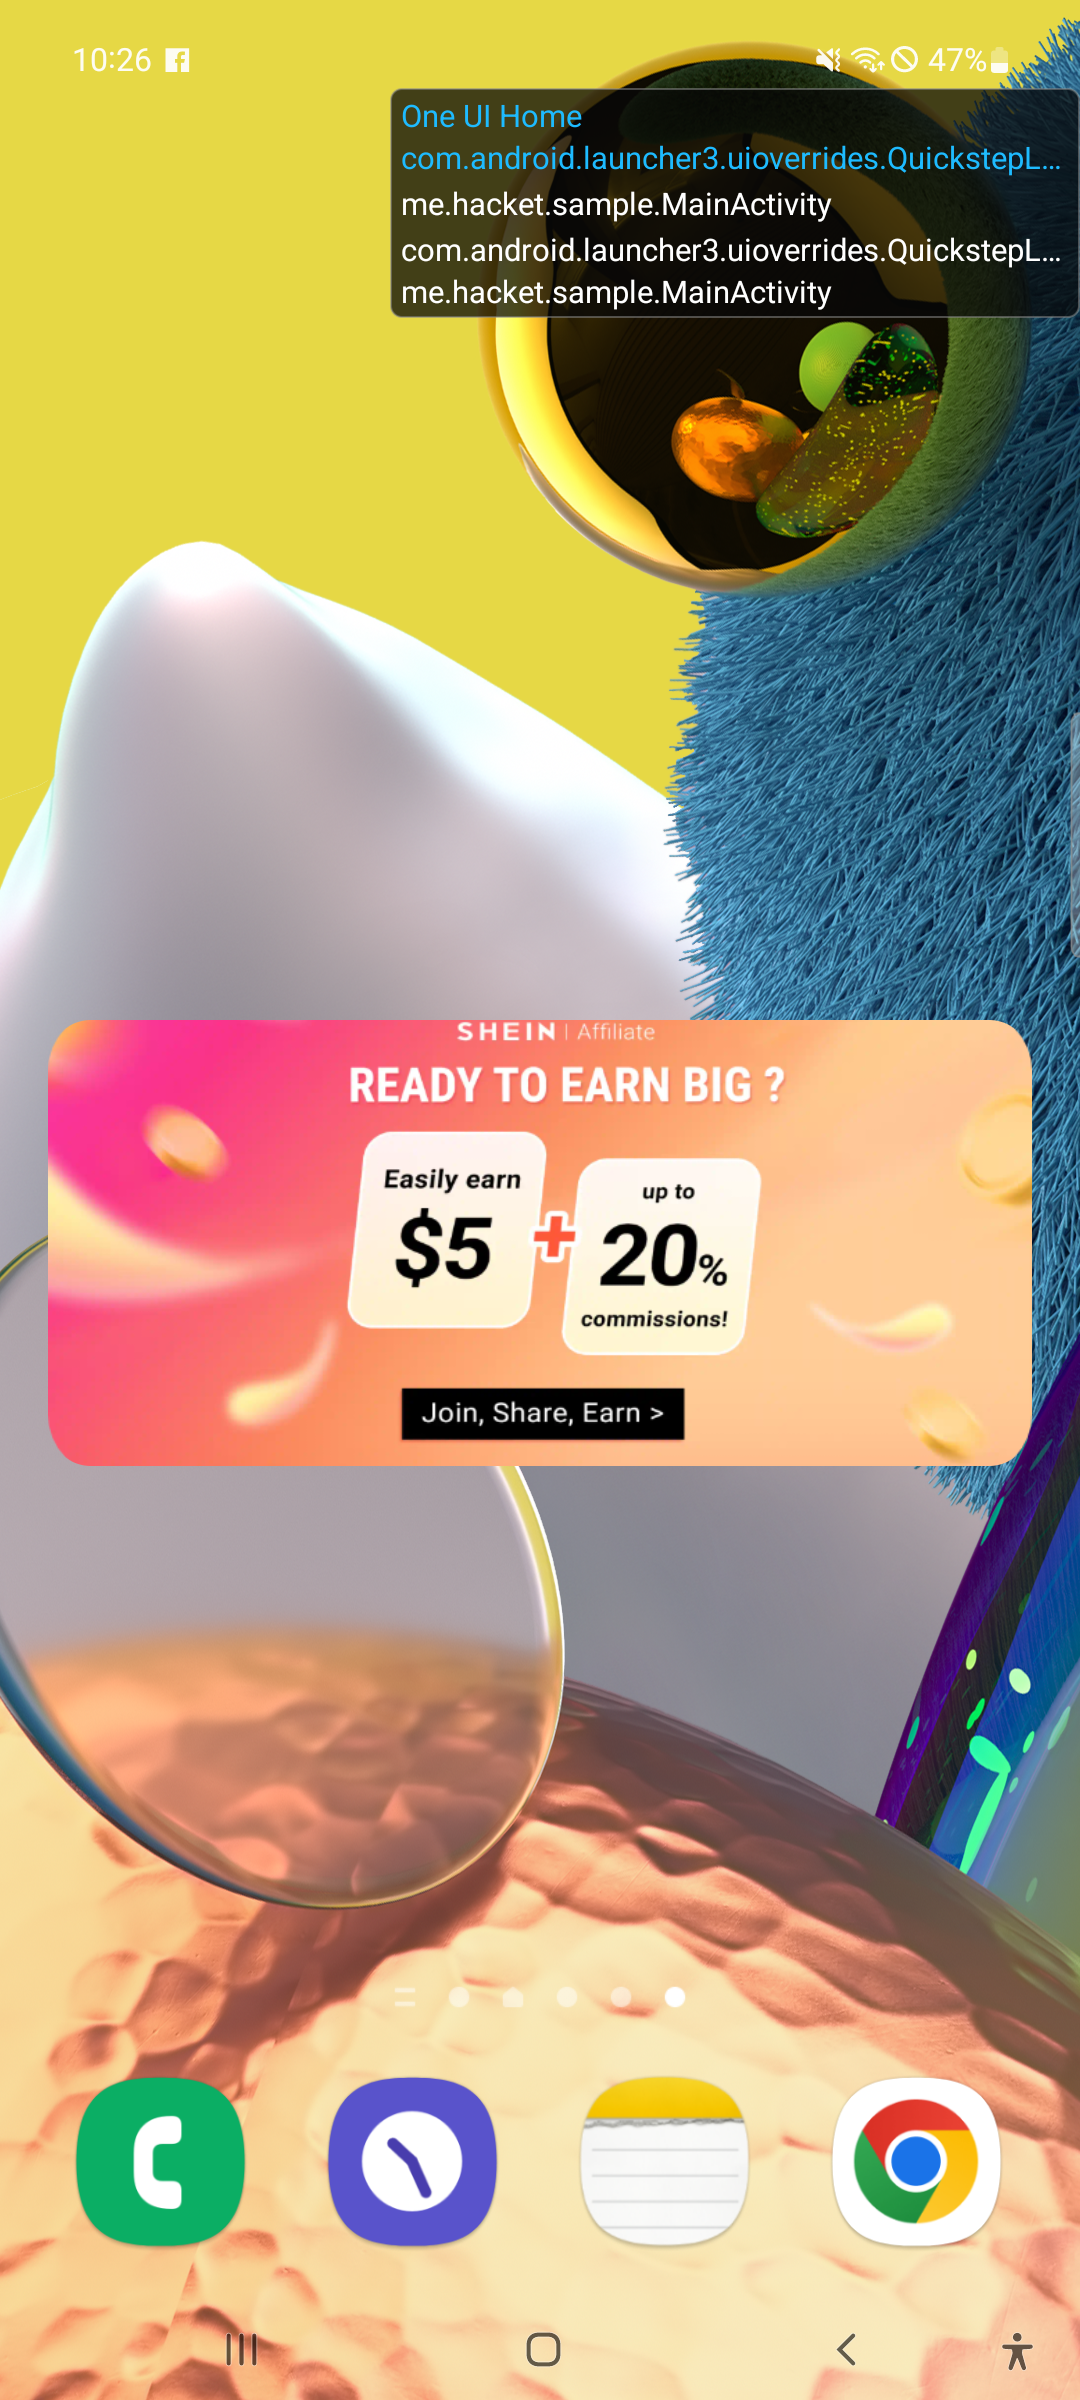
问题效果代码:
- 直接按照 width 和 height 裁剪 bitmap
- ImageView 的 scaleType 设置为 centerCrop
1
2
3
4
5
6
7
8
9
10
11
12
13
14
15
16
17
18
19
20
21
22
23
24
25
26
27
28
29
30
31
32
33
34
35
36
37
38
39
40
41
42
43
44
45
46
47
48
49
50
51
52
53
54
55
56
57
58
59
60
61
62
63
64
65
66
67
68
69
70
71
72
73
74
75
76
77
78
79
80
81
82
83
84
85
86
87
88
89
90
91
92
93
94
95
96
97
98
99
100
101
102
103
104
105
106
107
108
109
110
111
112
113
114
115
116
117
118
119
120
121
122
123
internal suspend fun RemoteViews?.setRoundedImageBitmap(
    context: Context,
    @IdRes viewId: Int,
    @DrawableRes bgResource: Int,
    width: Int,
    height: Int,
    radius: Float = appWidgetBgRadius
): RemoteViews? {
    if (this == null) {
        return null
    }
    try {
        // 解析资源图片
        val drawable = ContextCompat.getDrawable(context, bgResource)
        drawableToCornerBitmap(
            drawable,
            width,
            height,
            radius,
            radius,
            radius,
            radius
        )?.let { bitmap ->
            setImageBitmap(viewId, bitmap)
        }
    } catch (e: Exception) {
        // ignore
        L.printStackTrace(e)
    }
    return this
}
suspend fun drawableToCornerBitmap(
    drawable: Drawable?,
    width: Int,
    height: Int,
    leftTopRadius: Float = 0f,
    rightTopRadius: Float = 0f,
    leftBottomRadius: Float = 0f,
    rightBottomRadius: Float = 0f
): Bitmap? {
    // suspendCancellableCoroutine try catch 会导致异常被吞掉,所以需要在内部处理异常
    var tempBitmap: Bitmap? = null
    var bitmap: Bitmap? = null
    return runCatching {
        suspendCancellableCoroutine<Bitmap?> { continuation ->

            drawable ?: return@suspendCancellableCoroutine continuation.resume(null)
            // 根据指定的宽高创建一个空的Bitmap
            tempBitmap = Bitmap.createBitmap(width, height, Bitmap.Config.ARGB_8888)
            tempBitmap?.let { origin ->
                // 使用Canvas和上面创建的Bitmap初始化,以便Drawable能够把自己绘制到Bitmap上
                val canvas = Canvas(origin)

                // 设置Drawable的边界
                drawable.setBounds(0, 0, width, height)

                // 将Drawable绘制到Canvas上,进而绘制到Bitmap上
                drawable.draw(canvas)
                origin.takeIf { !it.isRecycled }?.also {
                    // 给bitmap添加圆角
                    bitmap =
                        Bitmap.createBitmap(origin.width, origin.height, Bitmap.Config.ARGB_8888)
                    bitmap?.eraseColor(Color.TRANSPARENT)
                    val outputCanvas = Canvas(bitmap!!)
                    val paint = Paint()
                    paint.isAntiAlias = true
                    paint.shader =
                        BitmapShader(origin, Shader.TileMode.CLAMP, Shader.TileMode.CLAMP)
                    // 创建Path对象
                    val path = Path()
                    val rect = RectF(0f, 0f, origin.width.toFloat(), origin.height.toFloat())

                    // 添加带圆角的矩形到路径
                    val radii = floatArrayOf(
                        leftTopRadius, leftTopRadius,   // 左上角
                        rightTopRadius, rightTopRadius,                       // 右上角
                        rightBottomRadius, rightBottomRadius,                       // 右下角
                        leftBottomRadius, leftBottomRadius                        // 左下角
                    )
                    path.addRoundRect(rect, radii, Path.Direction.CW)

                    // 裁剪画布,只在路径定义的区域绘制
                    outputCanvas.clipPath(path)

                    // 绘制原始的Bitmap到裁剪后的画布上
                    outputCanvas.drawBitmap(origin, 0f, 0f, null)
                    bitmap?.let {
                        continuation.resume(it.copy(it.config, true))
                    } ?: run {
                        continuation.resume(null)
                    }
                } ?: continuation.resumeWithException(Throwable("the bitmap is recycled"))
            }
            continuation.invokeOnCancellation {
                bitmap?.recycle()
                tempBitmap?.recycle()
            }
        }
    }.onFailure {
        L.e("drawableToCornerBitmap failed ${it.message}", it)
        bitmap?.recycle()
        tempBitmap?.recycle()
    }.getOrNull()
}

// 主背景圆角处理
setRoundedImageBitmap(
	context = context,
	viewId = R.id.iv_main_bg,
	bgResource = R.drawable.ic_appwidget_promotion_doudi,
	width = width(),
	height = height(),
	radius = appWidgetBgRadius
)

<ImageView
    android:id="@+id/iv_main_bg"
    android:layout_width="match_parent"
    android:layout_height="wrap_content"
    android:adjustViewBounds="true"
    android:scaleType="centerCrop"
    android:src="@drawable/ic_appwidget_promotion_doudi"
    tools:ignore="ContentDescription" />
解决思路:
- 先将图片指定
inJustDecodeBounds=false按控件的宽高缩放,再裁剪圆角 - ImageView 设置 scaleType 为 fitXY
代码:
1
2
3
4
5
6
7
8
9
10
11
12
13
14
15
16
17
18
19
20
21
22
23
24
25
26
27
28
29
30
31
32
33
34
35
36
37
38
39
40
41
42
43
44
45
46
47
48
49
50
51
52
53
54
55
56
57
58
59
60
61
62
63
64
65
66
67
68
69
70
71
72
73
74
75
76
77
78
79
80
81
82
83
84
85
86
87
88
89
90
91
92
93
94
95
96
97
98
99
100
101
102
103
val bm = BitmapUtils.decodeBitmapFromResource(
	context.resources,
	R.drawable.ic_appwidget_promotion_doudi,
	width(),
	height()
)
BitmapUtils.resizeAndCornerBitmap(
	bm,
	width(),
	height(),
	appWidgetBgRadius
).let {
	setImageViewBitmap(R.id.iv_main_bg, it)
}

object BitmapUtils {

    fun resizeAndCornerBitmap(bitmap: Bitmap, w: Int, h: Int, radius: Float): Bitmap {
        return createCornerBitmap(resizeImage(bitmap, w, h), radius)
    }

    private fun resizeImage(bitmap: Bitmap, w: Int, h: Int): Bitmap {
        val width = bitmap.getWidth()
        val height = bitmap.getHeight()
        val scaleWidth = w.toFloat() / width
        val scaleHeight = h.toFloat() / height
        val matrix = Matrix()
        matrix.postScale(scaleWidth, scaleHeight)
        // if you want to rotate the Bitmap
        // matrix.postRotate(45);
        return Bitmap.createBitmap(
            bitmap, 0, 0, width,
            height, matrix, true
        )
    }

    private fun createCornerBitmap(bitmap: Bitmap, radius: Float): Bitmap {
        // 给bitmap添加圆角
        val output = Bitmap.createBitmap(bitmap.width, bitmap.height, Bitmap.Config.ARGB_8888)
        output.eraseColor(Color.TRANSPARENT)
        val outputCanvas = Canvas(output)
        val paint = Paint()
        paint.isAntiAlias = true
        paint.shader = BitmapShader(bitmap, Shader.TileMode.CLAMP, Shader.TileMode.CLAMP)

        if (radius != 0f) {
            val rect = RectF(0f, 0f, bitmap.width.toFloat(), bitmap.height.toFloat())
            outputCanvas.drawRoundRect(rect, radius, radius, paint)
        }
        return output
    }


    fun decodeBitmapFromResource(
        res: Resources,
        resId: Int,
        reqWidth: Int,
        reqHeight: Int
    ): Bitmap {
        // 第一次解析将inJustDecodeBounds设置为true,目的是从图片中取宽高
        val options = BitmapFactory.Options().apply {
            inJustDecodeBounds = true
        }

        BitmapFactory.decodeResource(res, resId, options)

        // 计算inSampleSize
        options.inSampleSize = calculateInSampleSize(options, reqWidth, reqHeight)

        // 使用获取到的inSampleSize再次解析图片
        options.inJustDecodeBounds = false
        return BitmapFactory.decodeResource(res, resId, options)
    }

    private fun calculateInSampleSize(
        options: BitmapFactory.Options,
        reqWidth: Int,
        reqHeight: Int
    ): Int {
        // 原始图片的宽高
        val (height: Int, width: Int) = options.run { outHeight to outWidth }
        var inSampleSize = 1

        if (height > reqHeight || width > reqWidth) {
            val halfHeight: Int = height / 2
            val halfWidth: Int = width / 2

            while (halfHeight / inSampleSize >= reqHeight && halfWidth / inSampleSize >= reqWidth) {
                inSampleSize *= 2
            }
        }

        return inSampleSize
    }
}
<ImageView
    android:id="@+id/iv_main_bg"
    android:layout_width="match_parent"
    android:layout_height="wrap_content"
    android:adjustViewBounds="true"
    android:scaleType="fitXY"
    android:src="@drawable/ic_appwidget_promotion_doudi"
    tools:ignore="ContentDescription" />
**解决后效果:

圆角适配处理原则
- Android 12 及以上,外边的圆角不自己处理,交给系统处理,避免不同系统的 radius 不一致,导致 UI 问题
- Android 12 以下自己处理圆角,本地资源,远程资源
小组件 RTL 适配
Widget 预览问题
预览图片大小问题
android:previewImage
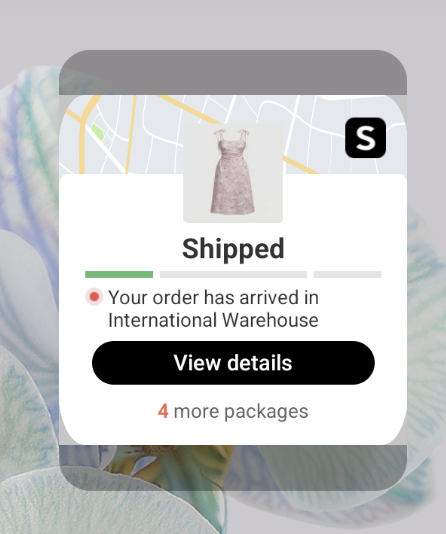
示例:不同预览图片大小效果
- previewImage: 247 x 259,原图 50% 2 x 2 (前 Pixel 6,后三星 A 51)
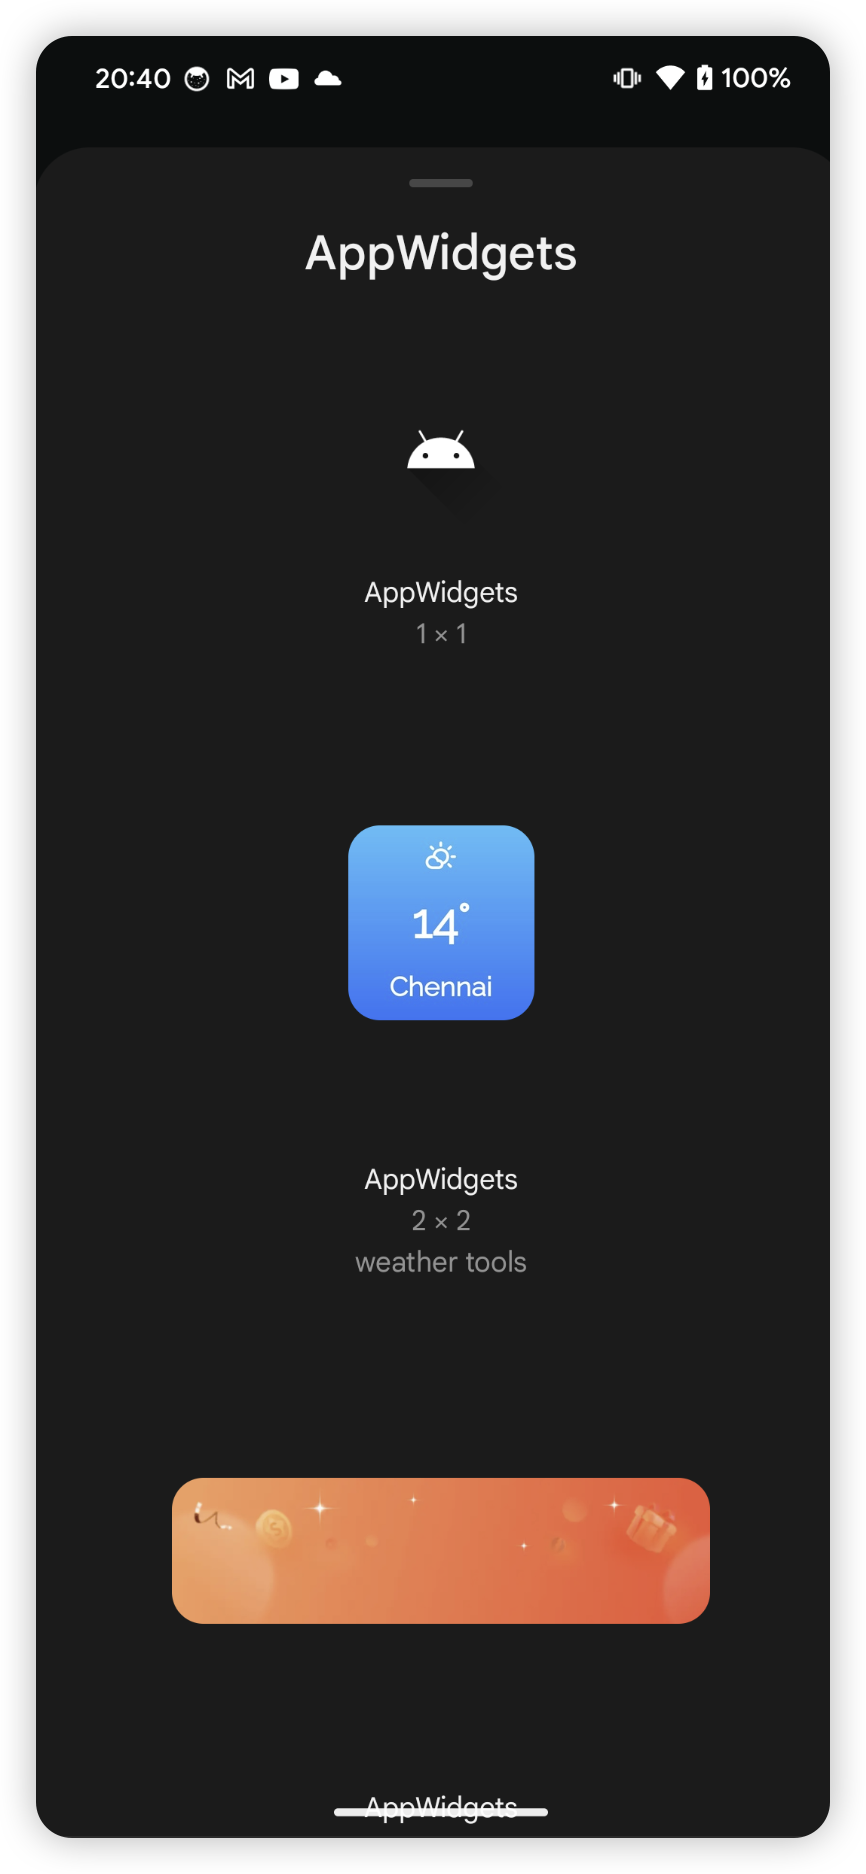

- 100%
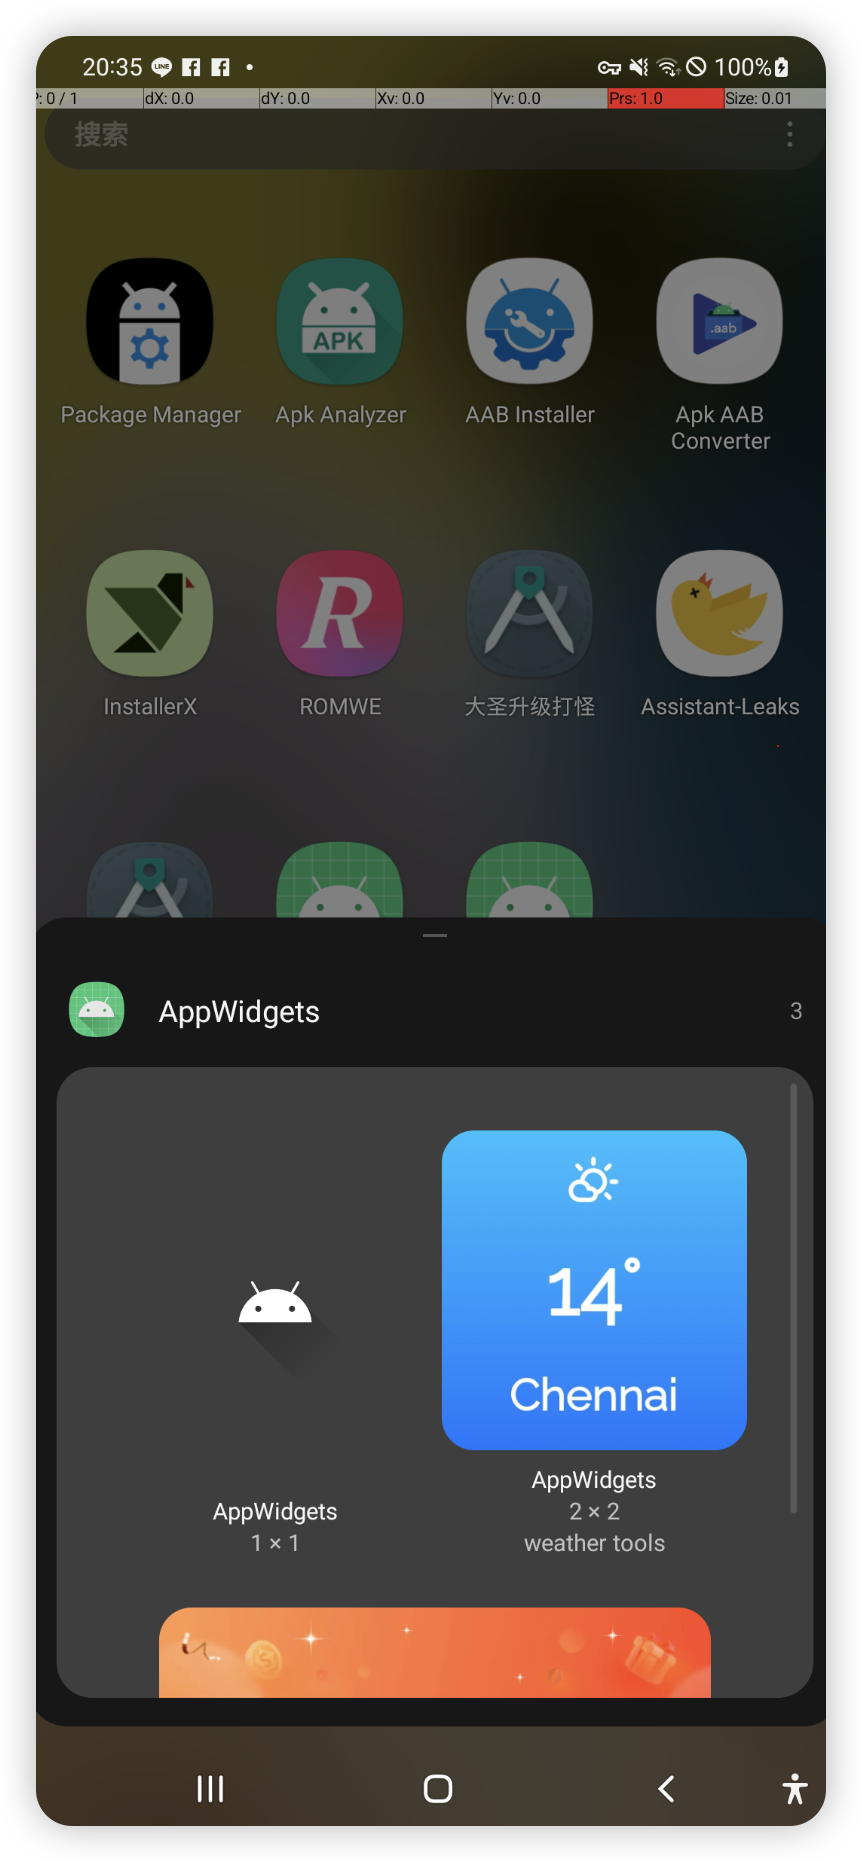
- 25%
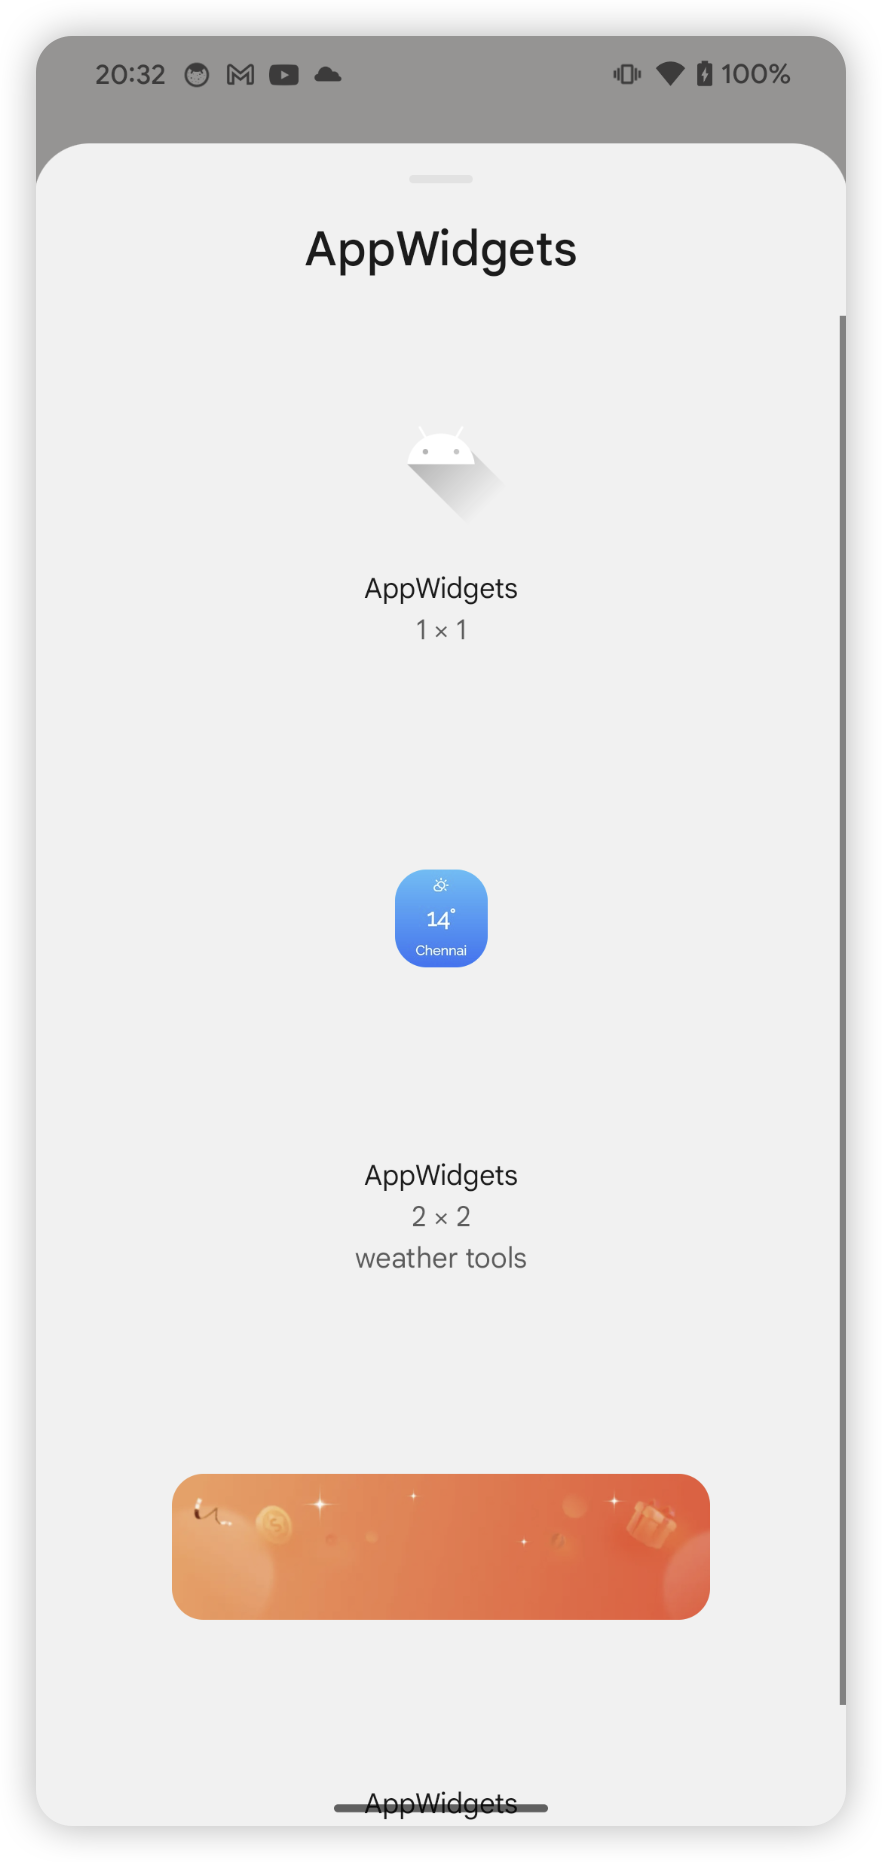
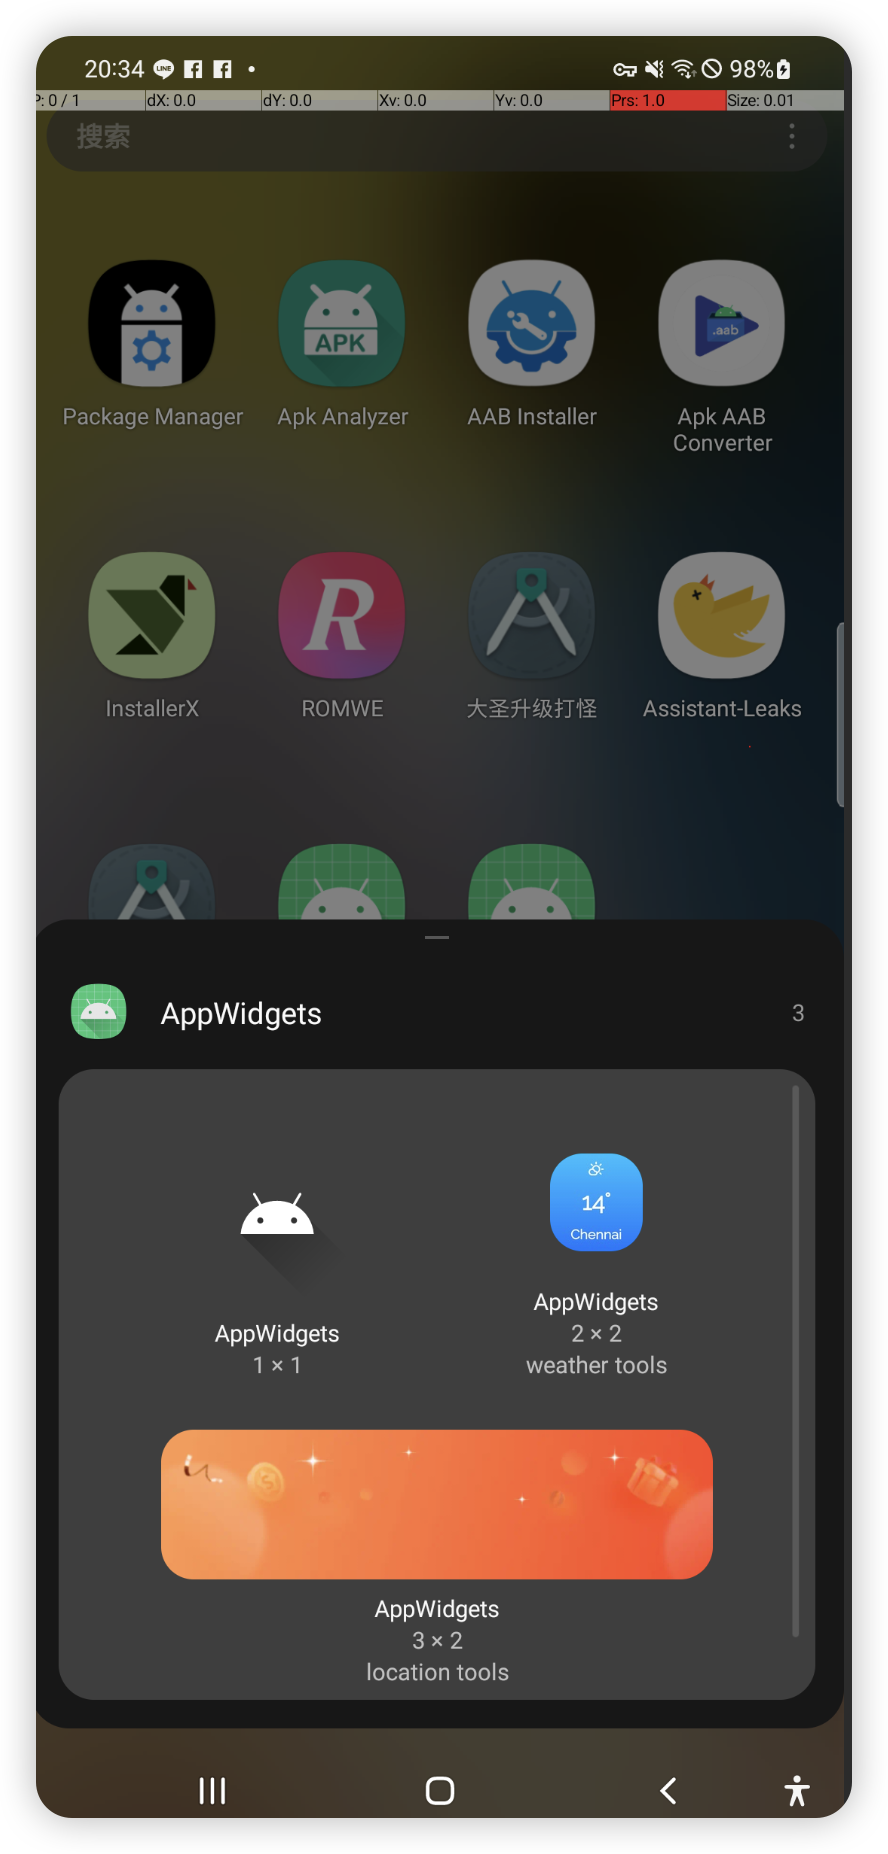
- 长图
长图会被裁剪,从上到下开始裁剪
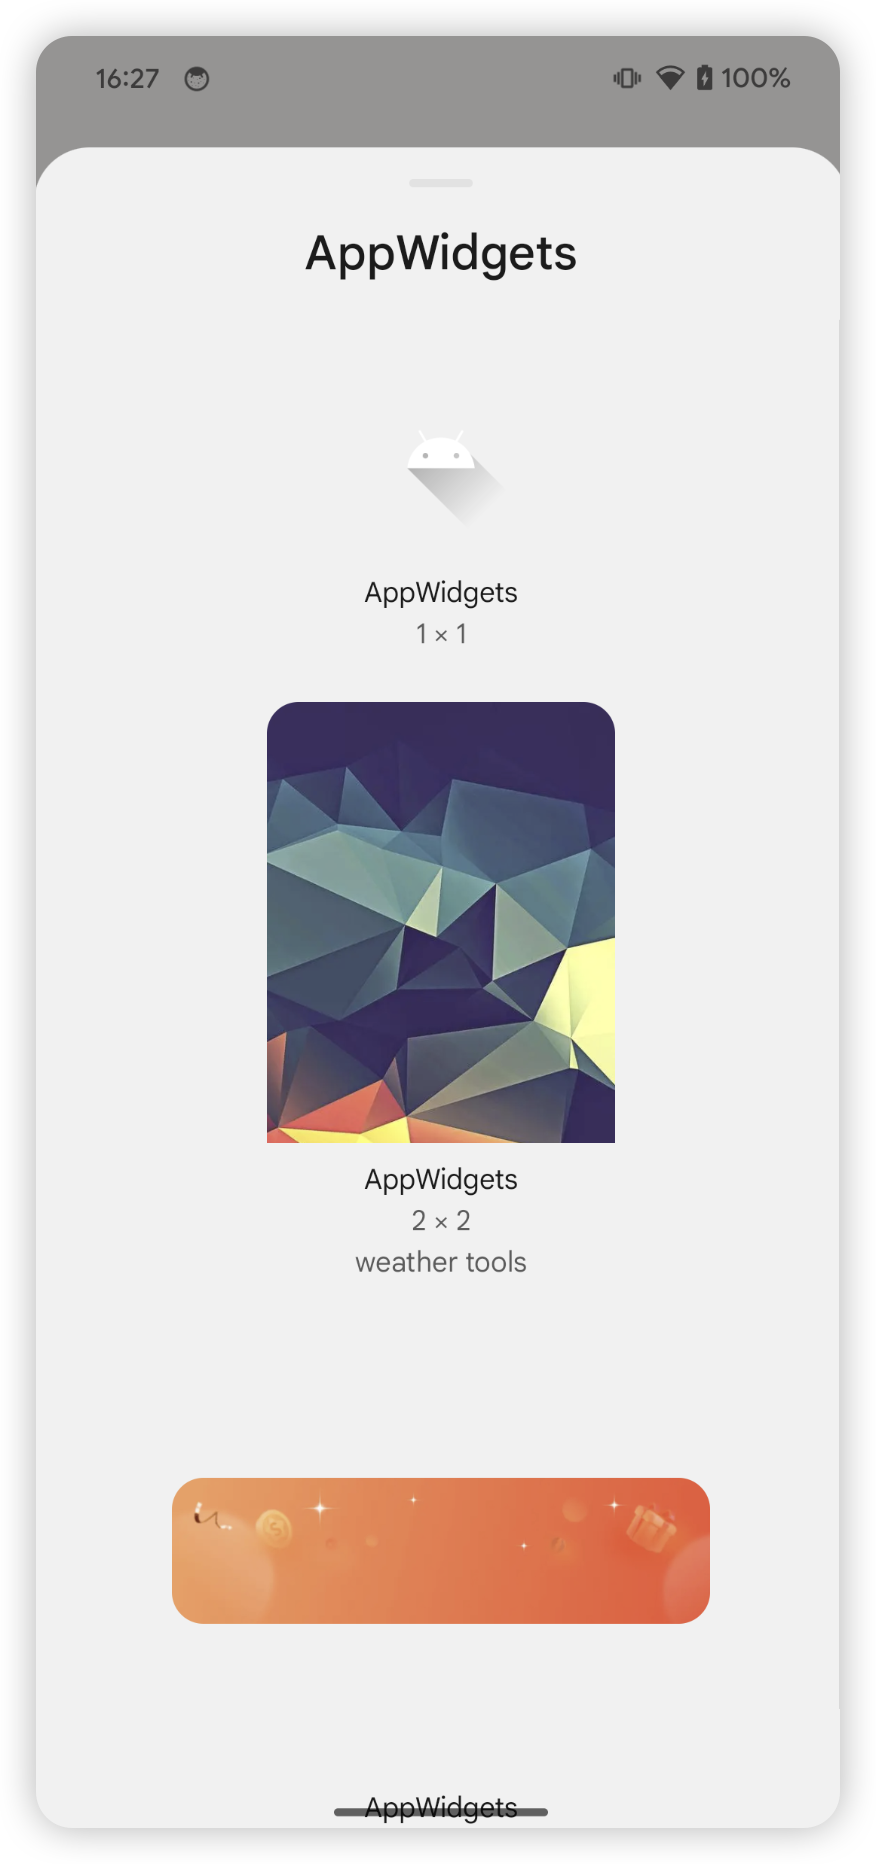
预览图片选择: 尽可能大,长图会被裁剪
预览布局 (Android 12 及 +)
previewLayout 和 previeImage 同时存在
android:previewLayout
预览布局的尺寸是什么?
预览布局和预览图片同时存在,优先预览布局
xml-v31 只设置了 previewLayout,展示的还是 App icon
- 添加了
xml-v31,只添加了previewLayout,添加小组件的预览页面展示的是 App icon,previewLayout没有生效 - 有的手机 previewLayout 和 previewImage 同时存在的话,还是会选择 previewImage,如一加 Ace2V
OPPO Android13 ColorOS 13.1:
解决: 在 xml-v31 的 appwidget-provider 中同时添加 previewImage 和 previewLayout,解决部分魔改系统不兼容只设置 previewLayout 的问题
Widget 预览不见了
如下配置在 Google Pixel Fold 添加小组件展示不出来:
1
2
3
4
5
6
7
8
9
10
11
<?xml version="1.0" encoding="utf-8"?>
<appwidget-provider xmlns:android="http://schemas.android.com/apk/res/android"
    android:description="@string/xxx_KEY_APP_22196"
    android:initialLayout="@layout/layout_app_widget_search_tool"
    android:minWidth="359dp"
    android:minHeight="120dp"
    android:previewLayout="@layout/layout_app_widget_search_tool"
    android:targetCellWidth="5"
    android:targetCellHeight="2"
    android:updatePeriodMillis="0"
    android:widgetCategory="home_screen" />
问题: 在 Google Fold 手机,minWidth 设置的太大了,在添加小组件的入口,找不到该小组件
解决: minWidget 设置的小一点,改成 300dp即可
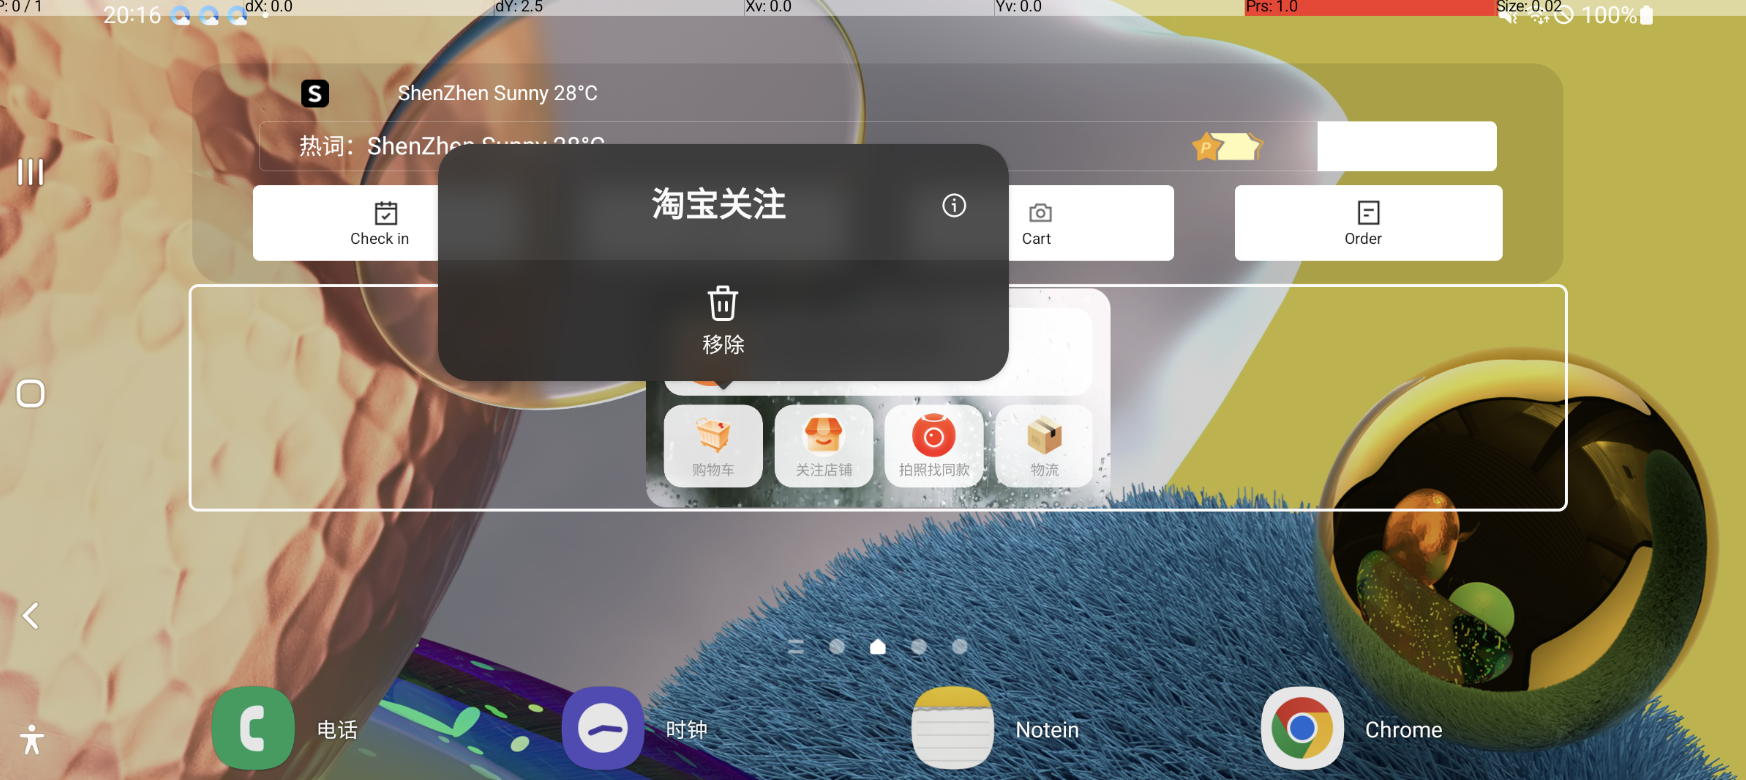
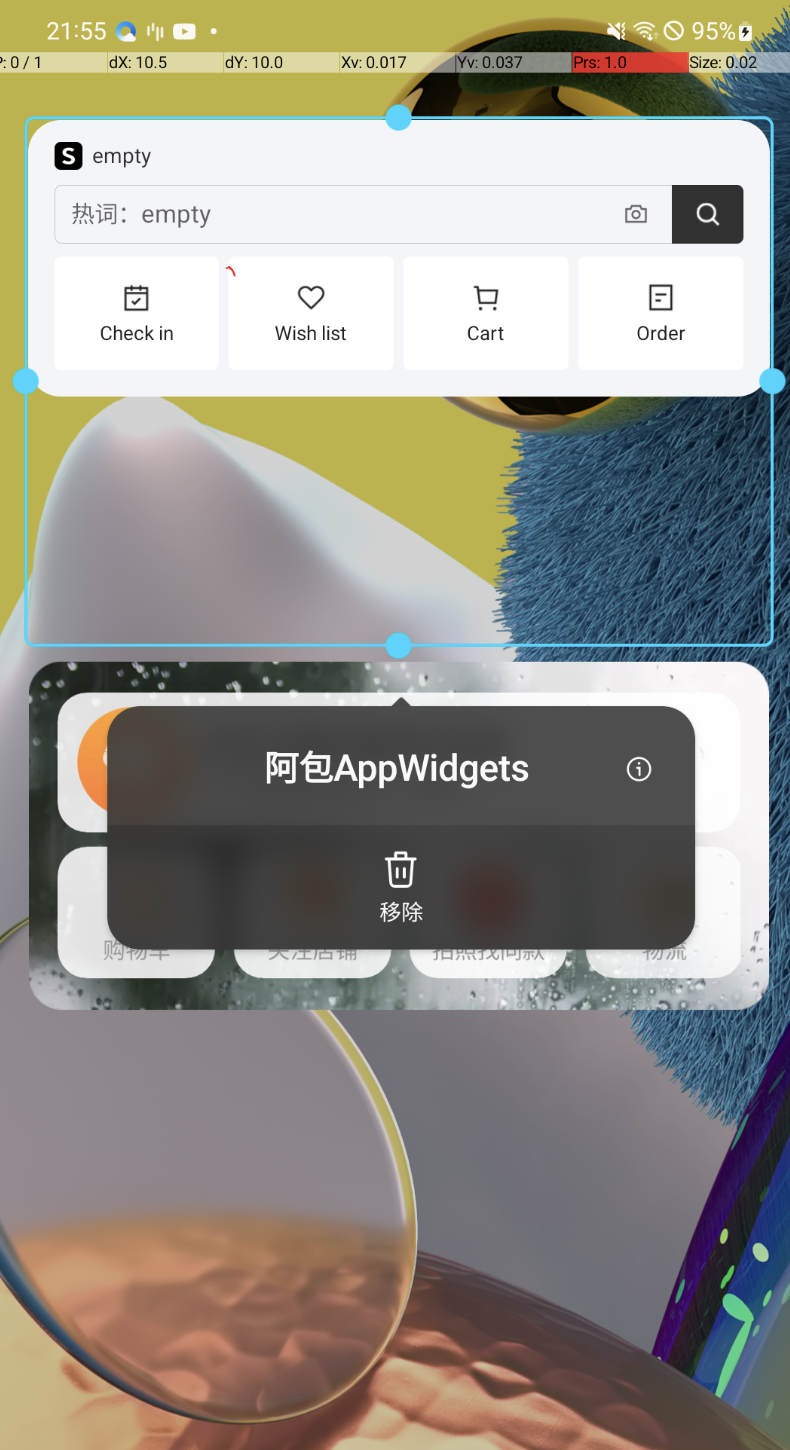
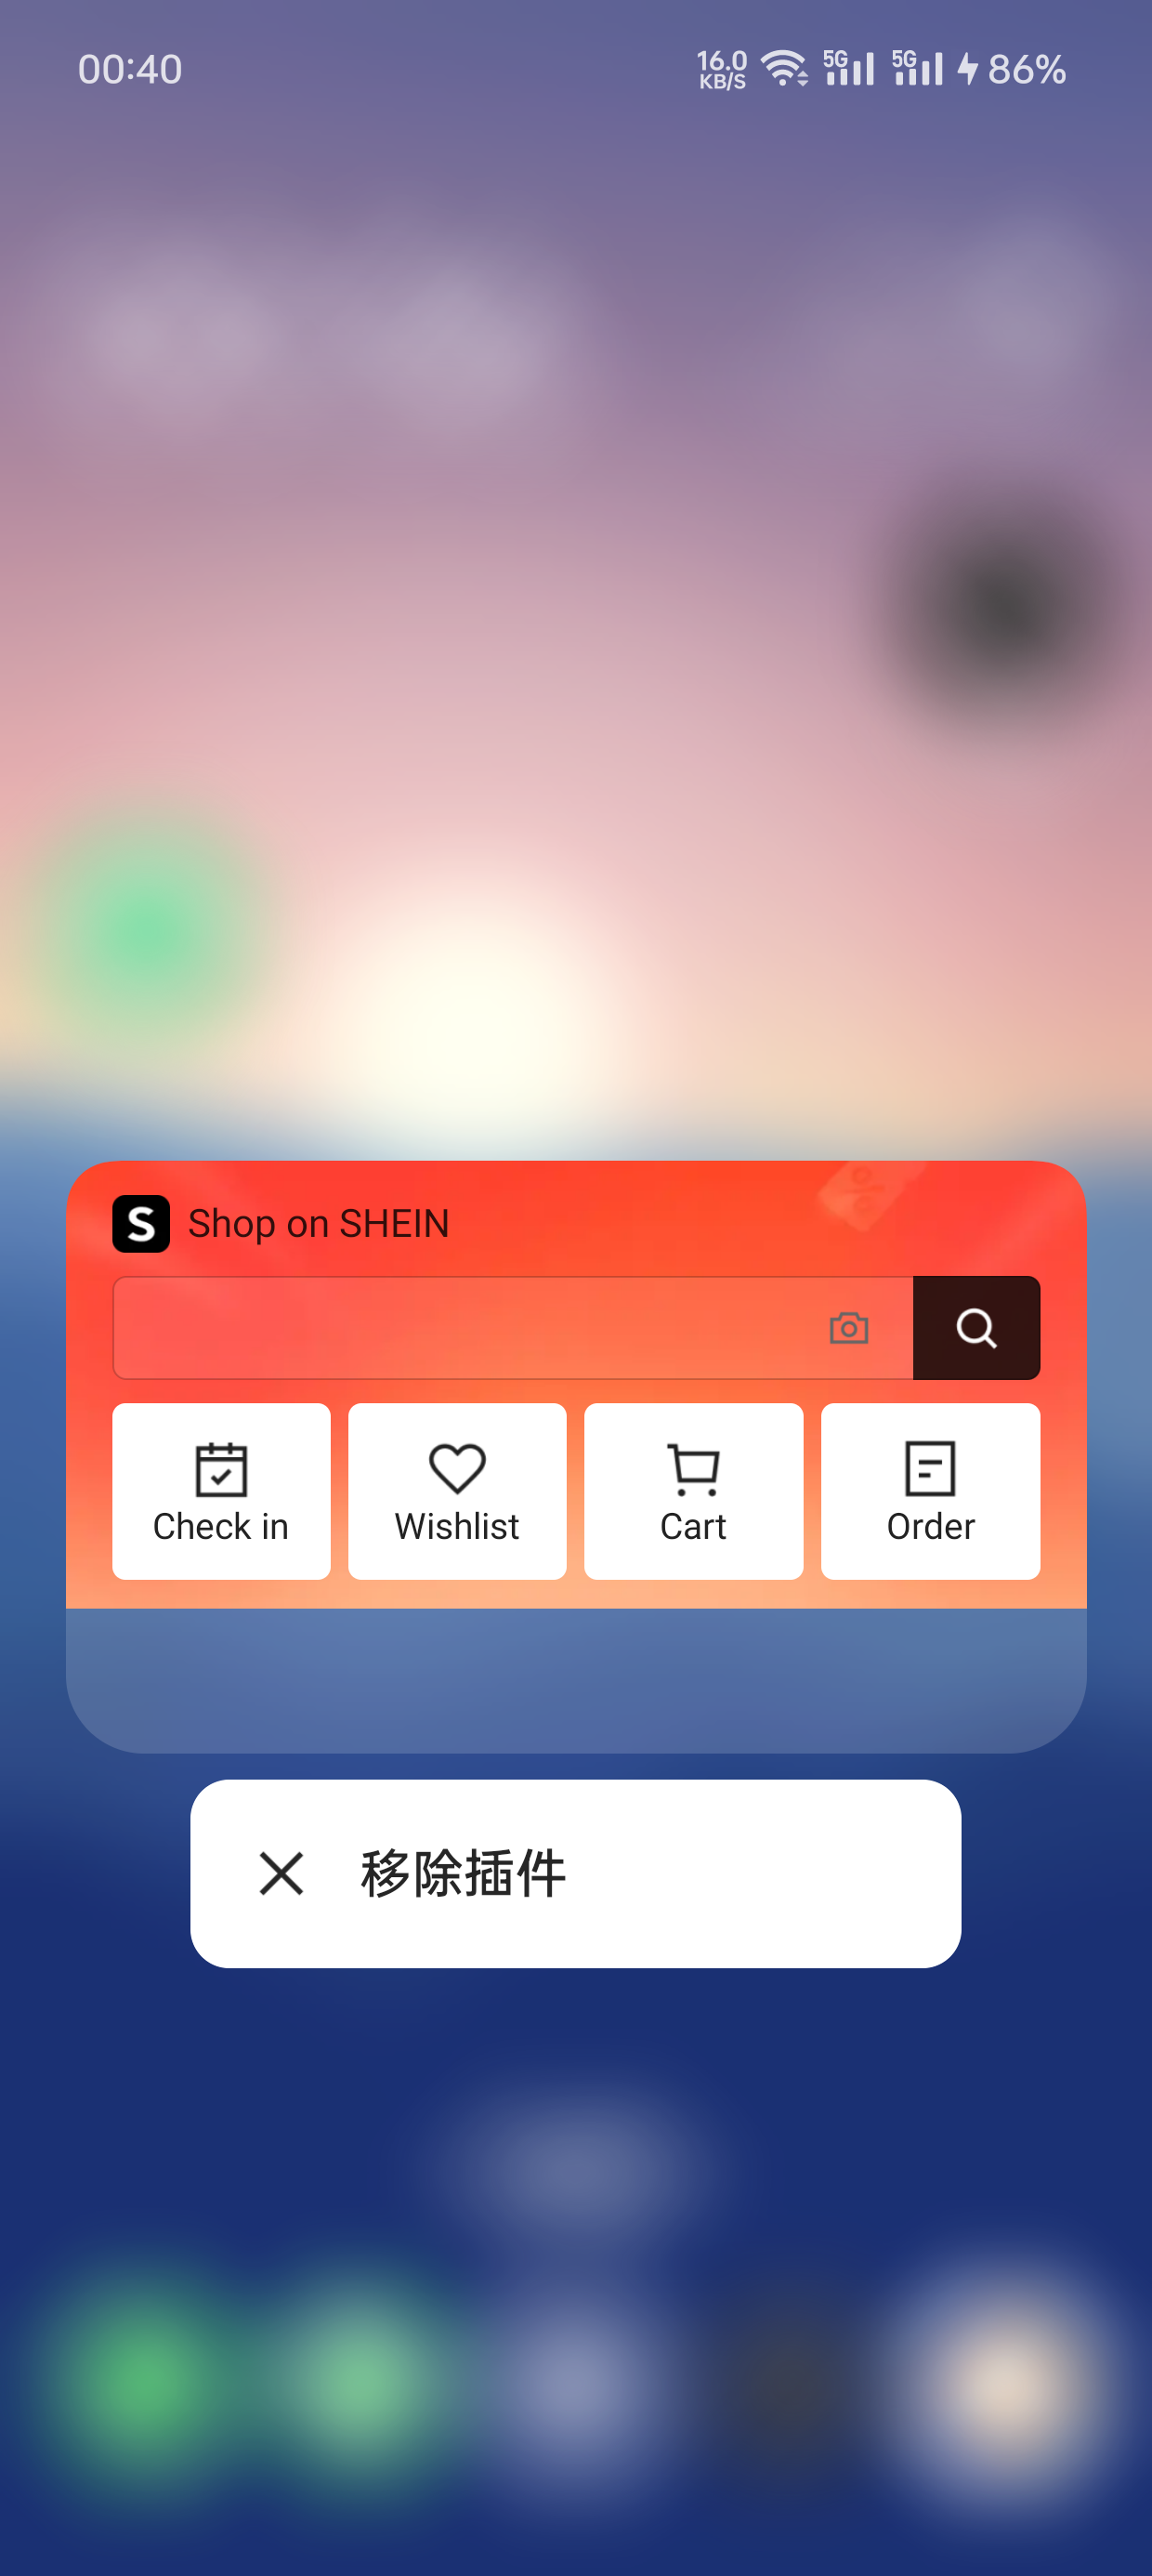
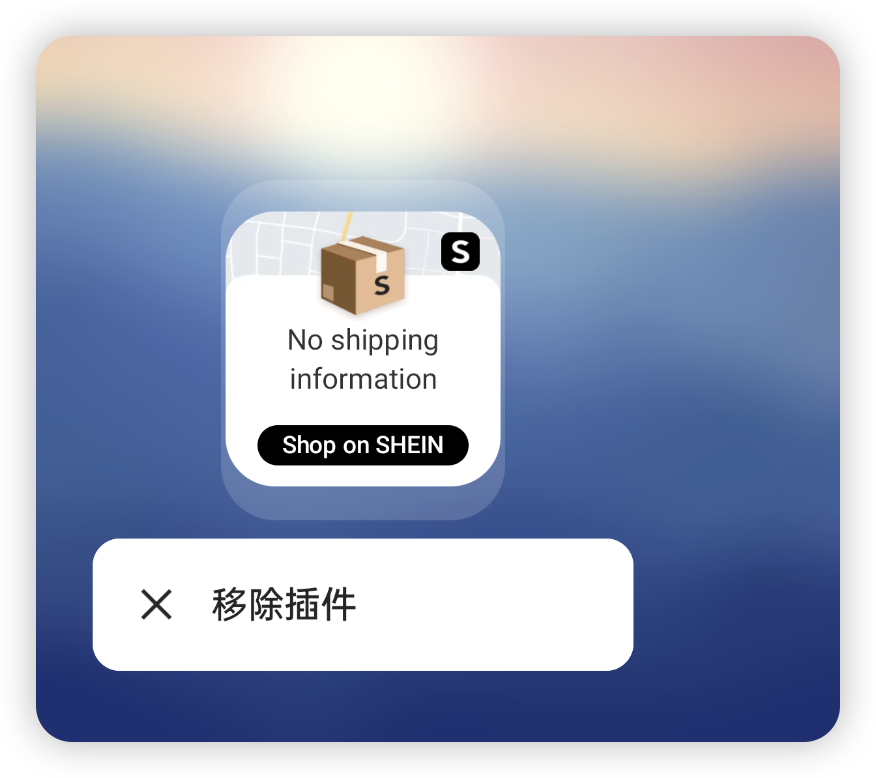
桌面长按 app widget 图标,裁剪了
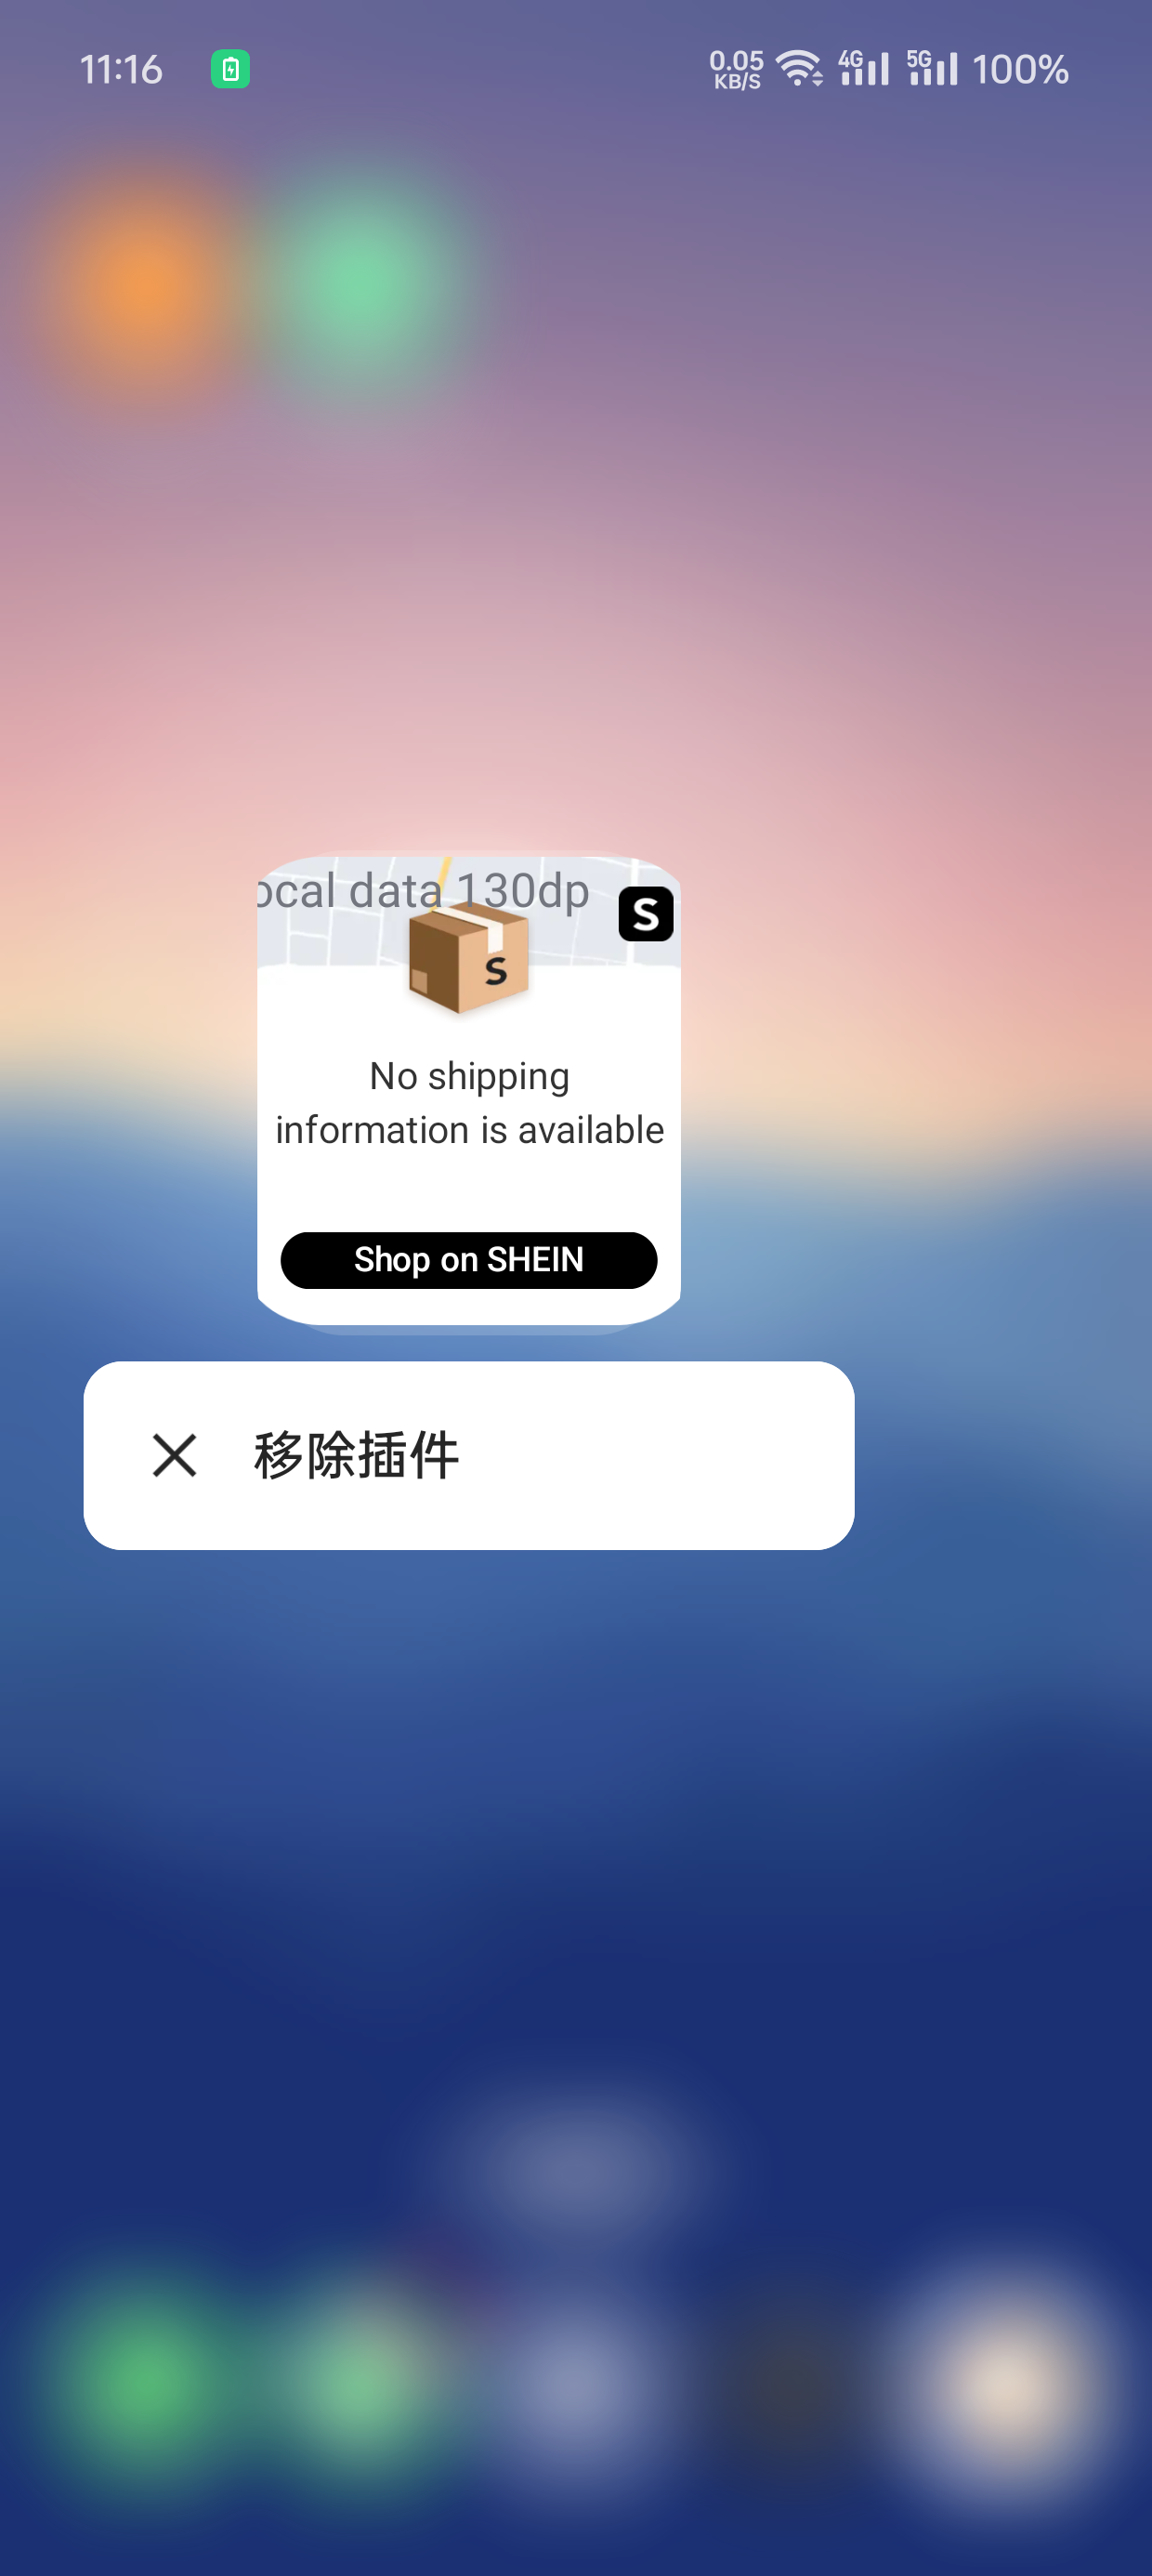
原因: 在国内一加 Ace 2V 2x2 小组件的尺寸 (150x150dp) 过大了,显示不下来
解决: 小组件的宽高指定小点,改成 130x130dp
解决后:
事件处理
点击事件如何处理?
1 个 widget 内,多个 view 的点击事件处理
多个 widget 时,widget 内的 button 点击事件处理
只有最后一个设置了 click 事件的 widget 才响应?
广播也是同一个?
通过广播添加的点击事件无效
在用 setOnClickPendingIntent() 方法设置点击事件发送 Broadcast 时,不能直接 new Intent(action)
1
2
Intent intent = new Intent(ACTION_CLICK_UPDATE_WIDGET);
views.setOnClickPendingIntent(R.id.widget_layout, PendingIntent.getBroadcast(context, 0, intent, 0));
上面这种写法在应用退出后在有些手机上收不到广播,然后换成下面这种写法:
1
2
3
Intent layout = new Intent(context, GoldWidgetProvider.class);
layout.setAction(ACTION_CLICK_UPDATE_WIDGET);
views.setOnClickPendingIntent(R.id.widget_layout, PendingIntent.getBroadcast(context, 0, layout, 0));
Widget 添加的点击事件失效
问题 1:多个 widget 点击事件失效
问题: 先后添加 2 个 widget,给 1 个按钮添加点击事件,存在 1 个 widget 可以点击按钮,另外 1 个点击不了按钮。然后滑动屏幕到另外一屏,再滑回来,2 个 widget 又可以点击了
问题手机: OnePlusAce2V 国行
问题 2:部分手机点击事件失效
- nova 9 手机设置的点击事件失效,点击 widget 直接拉起 app
- 部分手机点击事件失效,点击 widget 无响应
问题 3:强制 kill 进程
点击小组件无效,pixel 6
问题分析
原因 1:setOnClickPendingIntent 被覆盖掉
RemoteViews full update 设置了 setOnClickPendingIntent ,后续的更新把 setOnClickPendingIntent 给丢失了,导致点击事件失效
原因 2:onUpdate 执行 2 次
首次添加 widget,AppWidgetProvider 的 onUpdate 会执行 2 次,如果第 2 次 onUpdate 更新判断了不更新 widget,可能导致 setOnClickPendingIntent 失效导致点击事件无效。
触摸事件?
不支持触摸事件
正方形图片
因为受限于 RemoteViews 的缘故,想要实现正方形的小部件可没那么容易,以至于一些主流应用的 APP Widget 也不是一个完美的正方形。
面小部件在桌面所占的空间受 minWidth 和 minHeight 与 targetCellWidth 和 targetCellHeight 共同影响。
因为我们设置的 targetCellWidth 和 targetCellHeight 都是 2,所以会占用桌面 2x2 的空间。
但是 2x2 的空间可能只有 100dpx150dp。
因为 View 的大小大于桌面空间的大小,所以最终会被缩小,缩小到能展示得下的宽高。
直接代码写死?
1
2
3
4
5
6
<FrameLayout xmlns:android="http://schemas.android.com/apk/res/android"
    android:layout_width="100dp"
    android:layout_height="100dp"
    android:background="@color/white">
    <TextView />
</FrameLayout>
从结果可以看到,虽然是正方形,但是宽度却没有充满整个空间,也就是说,我们浪费了一些空间。
用 ImageView 的 setAdjustViewBounds
1
2
3
4
5
6
7
8
// #ImageView
/**
 * 如果您希望ImageView调整其边界以保持drawable宽高比,则将其设置为 true
 */
public void setAdjustViewBounds(boolean adjustViewBounds) {
	// ···
}
// 将ImageView的adjustViewBounds设置true,他就会调整自己的宽高,让他的宽高比跟drawable的宽高保持一致。
代码:
1
2
3
4
5
6
7
<ImageView xmlns:android="http://schemas.android.com/apk/res/android"
    android:layout_width="match_parent"
    android:layout_height="wrap_content"
    android:layout_gravity="center"
    android:adjustViewBounds="true"
    android:background="@color/teal_200"
    android:src="@drawable/square_white" />
- 问题 1: Exactly 显示不对,一个配置成 wrap_content 【APP Widget】Android怎么实现正方形桌面小部件? - 掘金
- 问题 2: 横屏时,显示不对 【APP Widget】Android怎么实现正方形桌面小部件? - 掘金
数据更新问题
网络请求放哪?
尽量不要直接在 AppWidgetProvider 中进行网络请求,和耗时操作。onReceive() 10 秒内得做完。
- 在 AppWidgetProvider 中进行网络请求,当未开启 APP 情况下,会请求失败抛出
SocketTimeoutException异常。这一点很重要,很多系统都会限制在后台程序里静态广播的网络请求。如果有需要,请开启 Service,在 Service 中进行网络请求。 - 由于 AppWidgetProvider 优先级很低,代表当前进程容易被系统回收,所以尽量不要再 AppWidgetProvider 中进行耗时操作,否则可能会出现 AppWidgetProvider 中的任务未执行完进程就已经被系统回收。建议耗时操作开启 Service 执行。
- 用 WorkManager 做请求?
如何更新 widget 数据
定时刷新是 widget 最核心的问题,启动后台服务 的方式已经过时了,Android8 之后,后台服务限制越来越严格,在主 App 被杀死的情况下,已经连偷偷启动后台服务都做不到了,什么守护线程,什么广播唤起,都不管用了
方案:
- Widget 自带:
updatePeriodMillis - 前台服务
- WorkManager:在
AppWidgetProvider的onEnabled时,安排一个 periodic 任务;在onDisabled时,取消 periodic 任务
应用内主动更新 Widget
当 App 活着的时候,可以主动来更新 Widget,而且有两种方式可以实现,一种是通过广播 ACTION_APPWIDGET_UPDATE,触发 Widget 的 update 回调,从而进行更新:
1
2
3
4
5
val manager = AppWidgetManager.getInstance(this)
val ids = manager.getAppWidgetIds(ComponentName(this, XXXWidget::class.java))
val updateIntent = Intent(AppWidgetManager.ACTION_APPWIDGET_UPDATE)
updateIntent.putExtra(AppWidgetManager.EXTRA_APPWIDGET_IDS, ids)
sendBroadcast(updateIntent)
本质就是发送更新的广播,除此之外,还可以使用 AppWidgetManager 来直接对 Widget 进行更新,代码如下。
1
2
3
4
val remoteViews = RemoteViews(context.packageName, R.layout.xxx)
val appWidgetManager = AppWidgetManager.getInstance(context)
val componentName = ComponentName(context, XXXWidgetProvider::class.java)
appWidgetManager.updateAppWidget(componentName, remoteViews)
这种方式就是通过 AppWidgetManager 来对指定的 Widget 进行修改,使用新的 RemoteViews 来更新当前 Widget。
应用外被动更新 Widget
1、自带的 updatePeriodMillis 属性
updatePeriodMillis 属性介绍
updatePeriodMillis 用于设置应用小部件自动更新的时间间隔。具体来说,它指定了系统多长时间会调用一次 AppWidgetProvider 的 onUpdate 方法,从而更新小部件的内容。
updatePeriodMillis属性定义了 App Widget 框架调用onUpdate()回调方法请求AppWidgetProvider更新的频率。使用该值时,实际更新并不能保证完全按时进行,因此我们建议更新频率尽可能低 – 也许每小时不超过一次,以节省电池。您也可以允许用户在配置中调整频率 – 有些人可能希望股票行情每 15 分钟更新一次,或者一天只更新四次。 注意:如果设备在更新时间(如 updatePeriodMillis 所定义)处于睡眠状态,那么设备将唤醒以执行更新。如果每小时更新不超过一次,这可能不会对电池寿命造成重大影响。但是,如果您需要更频繁地更新和/或您不需要在设备睡眠时更新,那么您可以根据 alarm 执行更新,这样就不会唤醒设备。为此,请使用 AlarmManager 通过 AppWidgetProvider 接收到的 Intent 设置闹钟。将闹钟类型设置为 ELAPSED_REALTIME 或 RTC,只有当设备处于唤醒状态时才会发出闹钟。然后将 updatePeriodMillis 设为零(”0”)。 目前推荐用 WorkManager
1
2
3
4
5
6
<?xml version="1.0" encoding="utf-8"?>
<appwidget-provider xmlns:android="http://schemas.android.com/apk/res/android"
    android:initialLayout="@layout/appwidget_layout"
    android:updatePeriodMillis="1800000"  <!-- 更新频率:30分钟 (30 * 60 * 1000 毫秒) -->
    android:widgetCategory="home_screen">
</appwidget-provider>
- 最小时间间隔:
updatePeriodMillis的最小值为 30 分钟。如果设置比这个值更低,系统依然会使用 30 分钟作为最小的更新时间间隔。 - 电池优化:频繁更新小部件会对电池寿命产生影响。建议尽量合理设置更新频率,以平衡实时性与电池消耗。
- 定时不保证:Android 系统可能会根据设备的状态(如低电量模式、后台限制等)调整实际的更新频率,因此
updatePeriodMillis只是一个建议时间。 - 休眠: 当手机息屏后可能会进入休眠状态,在休眠状态时不会自动更新,当设备解锁从休眠状态恢复时会立即刷新 widget。
onUpdate() 中做网络请求?
在 AppWidgetProvider 的 onUpdate 方法中执行网络请求虽然技术上是可行的,但需要注意以下几点:
- 耗时操作:
onUpdate方法在主线程(UI 线程)上运行,因此如果在此方法中执行耗时操作(如网络请求),可能会导致应用响应变慢或 ANR(应用无响应)错误。 - 电池消耗:频繁的网络请求会消耗更多的电量,不利于用户体验。
- 频率限制:小部件更新的频率受系统限制,即使设置较短的更新间隔,实际次数可能少于预期。
由于 AppWidgetProvider 继承处于 BroadcastReceiver, 生命周期非常短, 如果需要执行耗时操作会发生 ANR 异常, 因此我们可以在 onUpdate() 方法中启动 Service, 然后在 Service 数据处理,建议在 onEnable() 启动服务,onDisable() 关闭 Service
在 AppWidgetProvider 内开启后台服务执行耗时/异步操作已经行不通,在高版本 Android 上,主 App 没启动的情况下,不允许启动后台服务,只能启动前台服务。
为了在 onUpdate 方法中执行网络请求并避免上述问题,推荐使用 WorkManager 或其他异步任务执行框架(如 AsyncTask 或 Kotlin 协程)。
updatePeriodMillis 无效
现象: 配置了 updatePeriodMillis 属性但不生效。
原因: 部分厂商引入了自己的一套规则来限制后台处理,并在某些情况下完全忽略此属性,以人为地节省一些电池寿命。
[How to reliably update widgets on Android Arkadiusz Chmura](https://arkadiuszchmura.com/posts/how-to-reliably-update-widgets-on-android/) [Our mission Don’t kill my app!](https://dontkillmyapp.com/problem)
存在问题的设备:
- 国行
一加Ace2V
没有问题
- 三星 A51
解决: 用 WorkManager
2、前台服务
使用前台服务,需要自己维护前台服务的保活,当然由于是前台服务,就几乎不会被杀死,即使被杀死,根据 onStartCommand() 的返回值设置,服务仍然可以在资源充足的条件下立即重启。
这个方案并不是完美方案,难度在于前台服务的保活。比如说在前台服务被杀死时,重新启动自己;主 App 启动/运行时,检查前台服务;在 widget 上提供刷新按钮,让用户可以主动刷新。前台服务的优缺点如下:
优点:
- 定时任务较稳定,大部分情况下能正常运行。
- 刷新间隔想设多少就多少,适用于对刷新十分频繁的应用,如时钟天气类应用。
缺点:
- 会增大应用的耗电量
- 会在通知栏里显示服务且无法移除该通知
3、WorkManager
优点:
- 定时任务稳定,App 被杀死也能正常执行任务
- 实现简单,解决了 widget 在 App 不存活时的数据刷新问题,是后台服务的替代者
缺点:
- 刷新间隔有限,最快只能 15 分钟执行一次。
使用:
- 在
onEnable中 enqueue 定时任务,在onDisable中 cancel 定时任务
Application 中的初始化问题
当 widget 刷新时,如果应用没有处于开启状态下,这时会创建 APP 进程并初始化 Application,之后回调 widget 的 onUpdate 方法。然而这里会有一个问题,由于部分 app 为了性能优化,将部分初始化操作移动到了引导页或 Main 页面里了,这样当 widget 想使用某些功能时,由于只创建了 Application,在引导页或 main 页面里进行初始化的那部分功能没有进行初始化,便会抛出各种异常。所以这里开发的时候需要重点检查一遍。
脱离 APP 更新数据
添加了多个 widget,数据更新问题
- 添加了多个 widget,1 个 WorkManager 更新数据后,每个 widget 都能收到更新?
- 添加了多个 widget,1 个 widget 点击更新,其他 widget 的数据会更新吗?
极端情况
没有网络
首次打开,没有网络
APP 清除数据后,现有的 widget 和后新增的 widget
重启后
其他
语言切换
- 有的手机,语言切换后,多语言没有切换过来
- 多语言切换后,重新走了 onUpdate?
动态权限问题
在 App Widget 中无法动态获取权限
Widget 中能否获取运行时权限?
- APP Widget 中需要请求运行时权限,能请求吗?
不能,请求权限需要传递 activity 参数;在 APP Widget 中获取不到 activity
1
2
3
4
5
6
7
8
ActivityCompat.requestPermissions(
	this,
	arrayOf(
		Manifest.permission.ACCESS_FINE_LOCATION,
		Manifest.permission.ACCESS_COARSE_LOCATION
	),
	PERMISSION_REQUEST_LOCATION
)
定位问题
在 Android10 及以上在后台获取定位信息需要 android.permission.ACCESS_BACKGROUND_LOCATION 权限;在 App widget 中,App 不在前台,在后台,所以要在 App widget 中获取定位信息,是需要加上该权限的。
还存在其它问题:
- 隐私合规问题
- App 下架风险
重启后
- 重启后,不同 Widget 的对应的 AppWidgetProvider 对象会变更
- 重启后,已经添加的 Widget 的 appWidgetId 不会变
埋点
- 曝光:不能实现
- 点击:由于应用小部件(Widgets)的运行机制和安全限制,你不能直接在点击事件中执行自定义逻辑。要采取别的方案来支持,比较复杂
PendingIntent 问题
Android 12 PendingIntent flag 问题
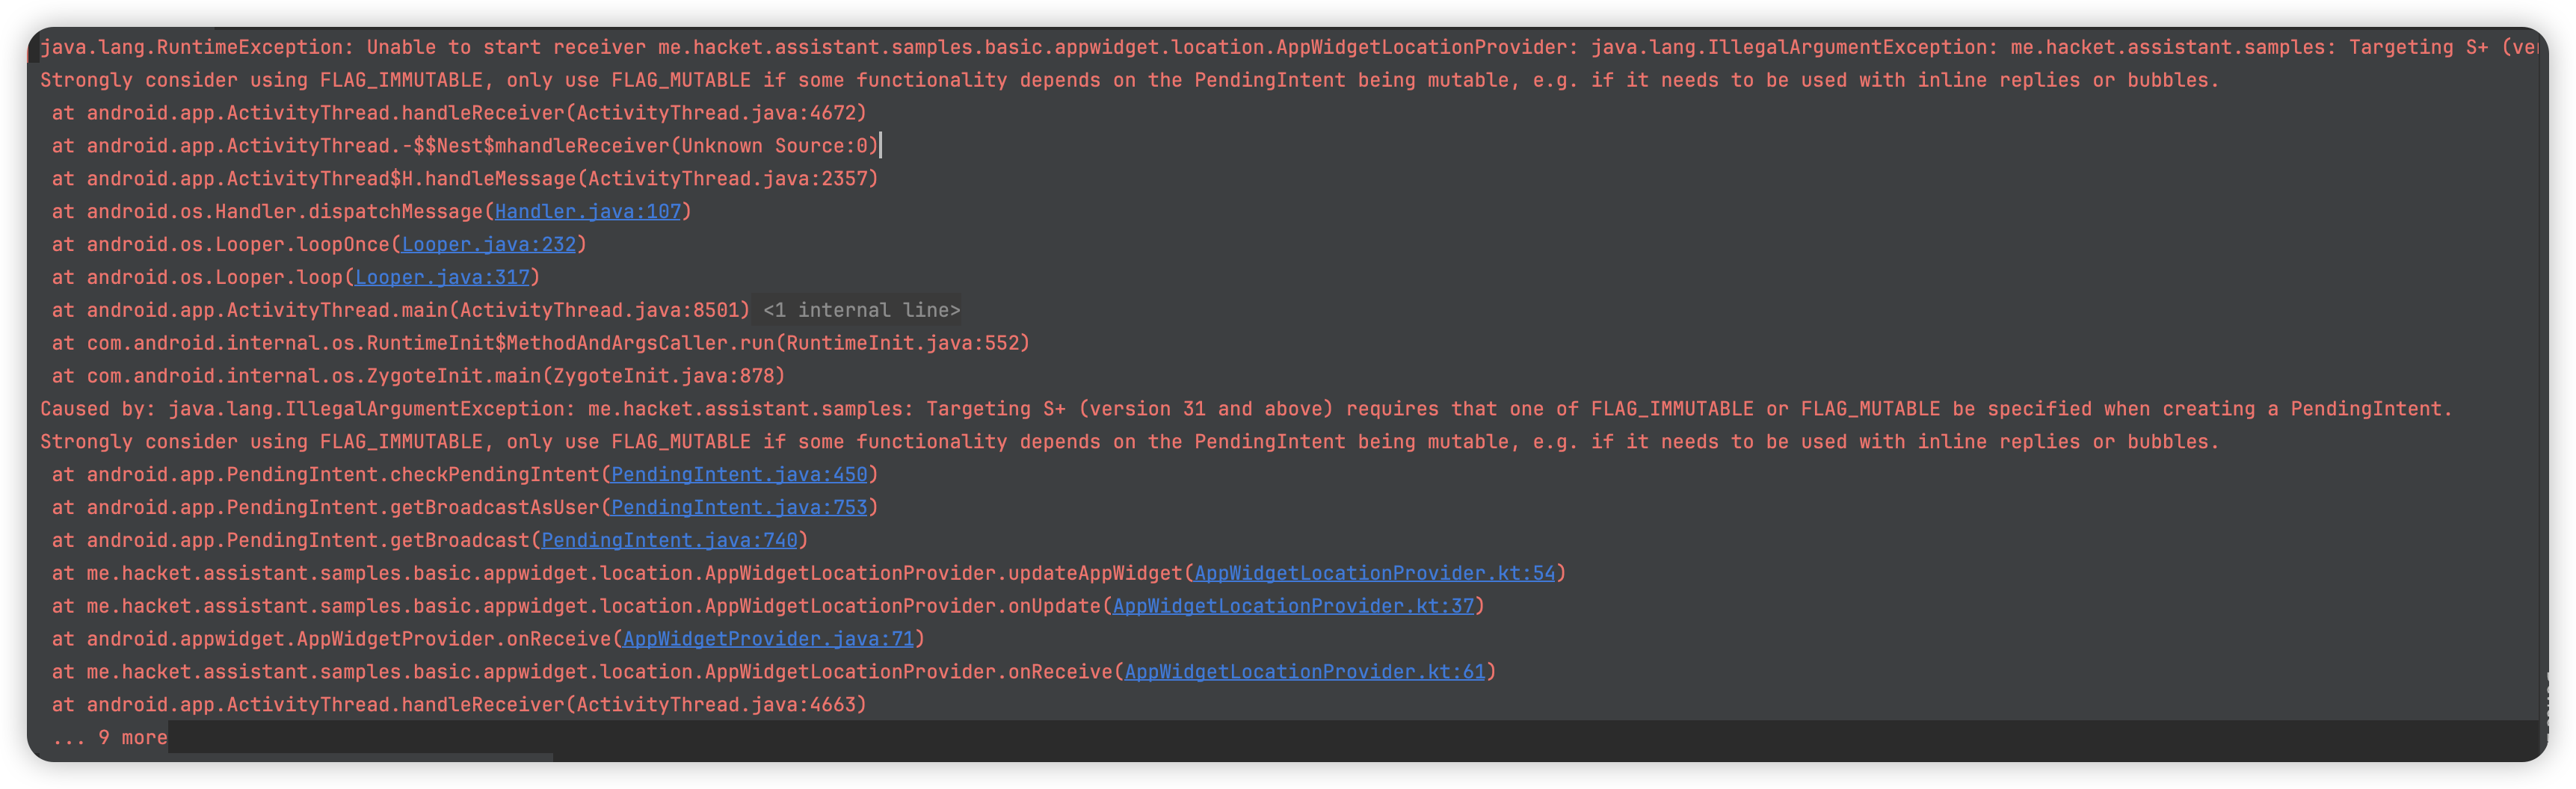
在 Android 12(API 31, 即版本 S)及以上,创建 PendingIntent 时需要明确指定 FLAG_IMMUTABLE 或 FLAG_MUTABLE 标记。这是为了确保平台可以更好地管理和理解 PendingIntent 的使用场景。
FLAG_IMMUTABLE 表示 PendingIntent 的内容不能被修改,而 FLAG_MUTABLE 则允许它在传递过程中被修改。大多数情况应该使用 FLAG_IMMUTABLE,除非你有特定的需求需要 PendingIntent 是可变的。
示例:
1
2
3
4
5
6
7
8
9
10
11
12
13
14
15
16
17
private fun updateAppWidget(context: Context, appWidgetManager: AppWidgetManager, appWidgetId: Int) {
	val views = RemoteViews(context.packageName, R.layout.appwidget_layout)
	// 创建点击事件的Intent
	val intent = Intent(context, MyAppWidgetProvider::class.java).apply {
		action = BUTTON_CLICK_ACTION
	}
	val flags = if (Build.VERSION.SDK_INT >= Build.VERSION_CODES.S) {
		PendingIntent.FLAG_UPDATE_CURRENT or PendingIntent.FLAG_IMMUTABLE
	} else {
		PendingIntent.FLAG_UPDATE_CURRENT
	}
	val pendingIntent = PendingIntent.getBroadcast(context, 0, intent, flags)
	// 将点击事件关联到Button
	views.setOnClickPendingIntent(R.id.button, pendingIntent)
	// 更新App Widget
	appWidgetManager.updateAppWidget(appWidgetId, views)
}
改了 click action
原有的 app widget,点击事件就失效了
PendingIntent 相同的问题
如果 action 不变,只是往 Intent 的 putExtra 不一样,会被认为是同一个 PendingIntent,要想复用同一个 action 来区分不同的点击事件,就需要加上其他的来区分。
- 为了确保两个
PendingIntent是唯一的,你可以使用Intent的 action、data、type、class、和 categories 等字段来区分。 - 或者加上不同的 requestCode
HarmonyOS 系统 click 事件 点击无效
报错信息:
1
Background activity start [callingPackage: com.zzz; callingUid: 11092; isCallingUidForeground: false; callingUidHasAnyVisibleWindow: false; callingUidProcState: RECEIVER; isCallingUidPersistentSystemProcess: false; realCallingUid: 11092; isRealCallingUidForeground: false; realCallingUidHasAnyVisibleWindow: false; realCallingUidProcState: RECEIVER; isRealCallingUidPersistentSystemProcess: false; originatingPendingIntent: null; isBgStartWhitelisted: false; intent: Intent { act=android.intent.action.VIEW dat=xxxlink://xxx.com/order/order_list?data={"page_from":"crm_widget","url_from":"widget-widget_middle_logistics-andshus-en-O-DOUDI","need_login":"true"} flg=0x10000000 cmp=com.zzz/com.xxx.welcome.WelcomeActivity }; callerApp: ProcessRecord{8cb016 2579:com.zzz/u0a1092}; shouldAbortSelfLaunchWhenReturnHome: false]
版本:
- 系统 HarmonyOS 2.0.1
- Nova 9
解决 1:后台弹窗,勾选该权限 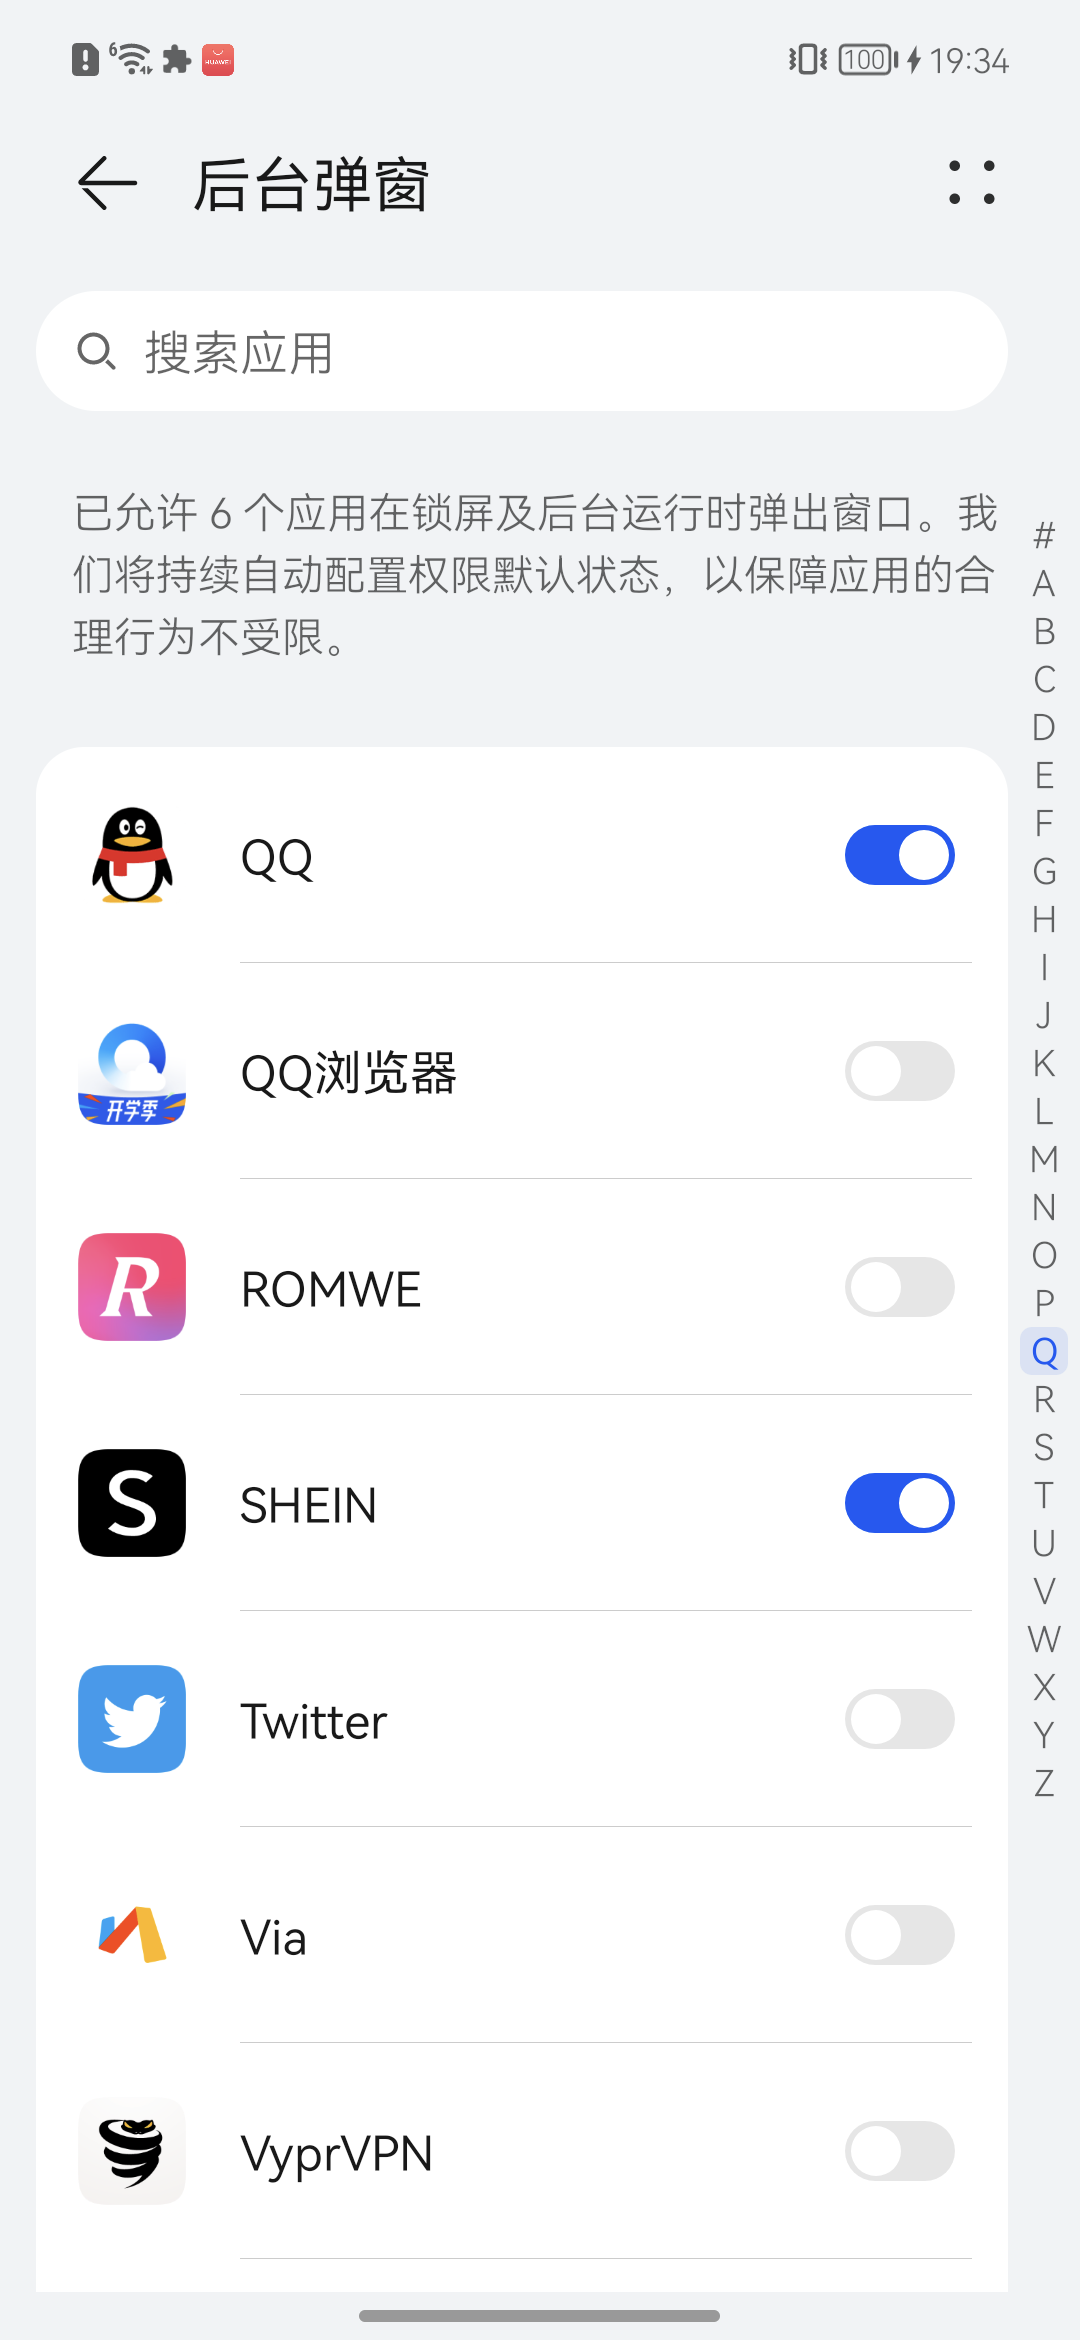
解决 2:点击事件不用广播,直接设置 PendingIntent 的 Activity
1
2
3
4
5
6
7
8
9
10
11
12
13
14
15
16
17
18
19
20
21
22
23
24
25
26
27
28
29
30
internal inline fun <reified P : AppWidgetProvider> RemoteViews?.setLogisticsItemOnclickPending(
    context: Context,
    actionName: String,
    @IdRes viewId: Int,
    deeplink: String?,
    defaultDeeplink: String = LOGISTICS_DEEPLINK_DOUDI_2X2
) {
    val link = deeplink?.takeIf { it.isNotEmpty() && it != "null" } ?: defaultDeeplink
//    this.apply {
//        val extra = Bundle()
//        extra.putString(WidgetConstants.EXTRA_DEEPLINK, link)
//        setOnclickPending<P>(
//            context = context,
//            viewId = viewId,
//            actionName = actionName,
//            extra = extra,
//            requestCode = 0
//        )
//    }
	// 改成下面这种,不用权限
    val intentParser = Uri.parse(link)
    val intent = Intent(Intent.ACTION_VIEW, intentParser)
    val pendingIntent =
        PendingIntent.getActivity(context, 200, intent, if (Build.VERSION.SDK_INT >= Build.VERSION_CODES.S) { // Android12
            PendingIntent.FLAG_UPDATE_CURRENT or PendingIntent.FLAG_IMMUTABLE
        } else {
            PendingIntent.FLAG_UPDATE_CURRENT
        })
    this?.setOnClickPendingIntent(viewId, pendingIntent)
}
解决 3:代码申请权限
安卓代码权限 AndroidManifest.xml 设置:uses-permission android:name=“android.permission.SYSTEM_ALERT_WINDOW”
1
2
3
4
5
6
7
8
9
10
11
12
13
14
// 检查是否已经授予悬浮框权限
if (Build.VERSION.SDK_INT >= Build.VERSION_CODES.M) {
	if (!Settings.canDrawOverlays(this)) {
		//若未授权则请求权限
		getOverlayPermission();
		finish();
		return;
	}
} else {
	boolean pFlag = FloatWindowManager.getInstance().requestPermission(context);
	if (!pFlag) {
		return;
	}
}
Ref:
[APP在前台时开启Activity失败-华为开发者论坛 华为开发者联盟](https://developer.huawei.com/consumer/cn/forum/topic/0204119640849851086) [鸿蒙2.0上线的后台弹窗权限相关问题-华为开发者论坛 华为开发者联盟](https://developer.huawei.com/consumer/cn/forum/topic/0204102705940140237)
BroadcastReceiver 中 (后台) 启动 Activity
在后台比如 BroadcastReceiver service 中启动 Activity 需要注意一下几点
Intent Flag
1
Intent intent = new Intent(); intent.setClassName(context, "class name"); intent.setFlags(Intent.FLAG_ACTIVITY_NEW_TASK);
权限,任何在后台 startActivity 的操作都将会延迟 5 秒
注:系统应用才有权限添加 在 AndroidManifest.xml 中添加 "android.permission.STOP_APP_SWITCHES" 权限;
对于非系统应用,StackOverFlow 有如下解决方案:
1
2
3
4
5
6
7
8
9
10
11
12
13
Intent intent = new Intent(context, A.class);
intent.setFlags(Intent.FLAG_ACTIVITY_NEW_TASK);
context.startActivity(intent);

// 改为:
Intent intent = new Intent(context, A.class);
intent.setFlags(Intent.FLAG_ACTIVITY_NEW_TASK);
PendingIntent pendingIntent = PendingIntent.getActivity(context, 0, intent, 0);
try {
  pendingIntent.send();
} catch (PendingIntent.CanceledException e) {
  e.printStackTrace();
}
兼容问题
Android 15 Resources$NotFoundException
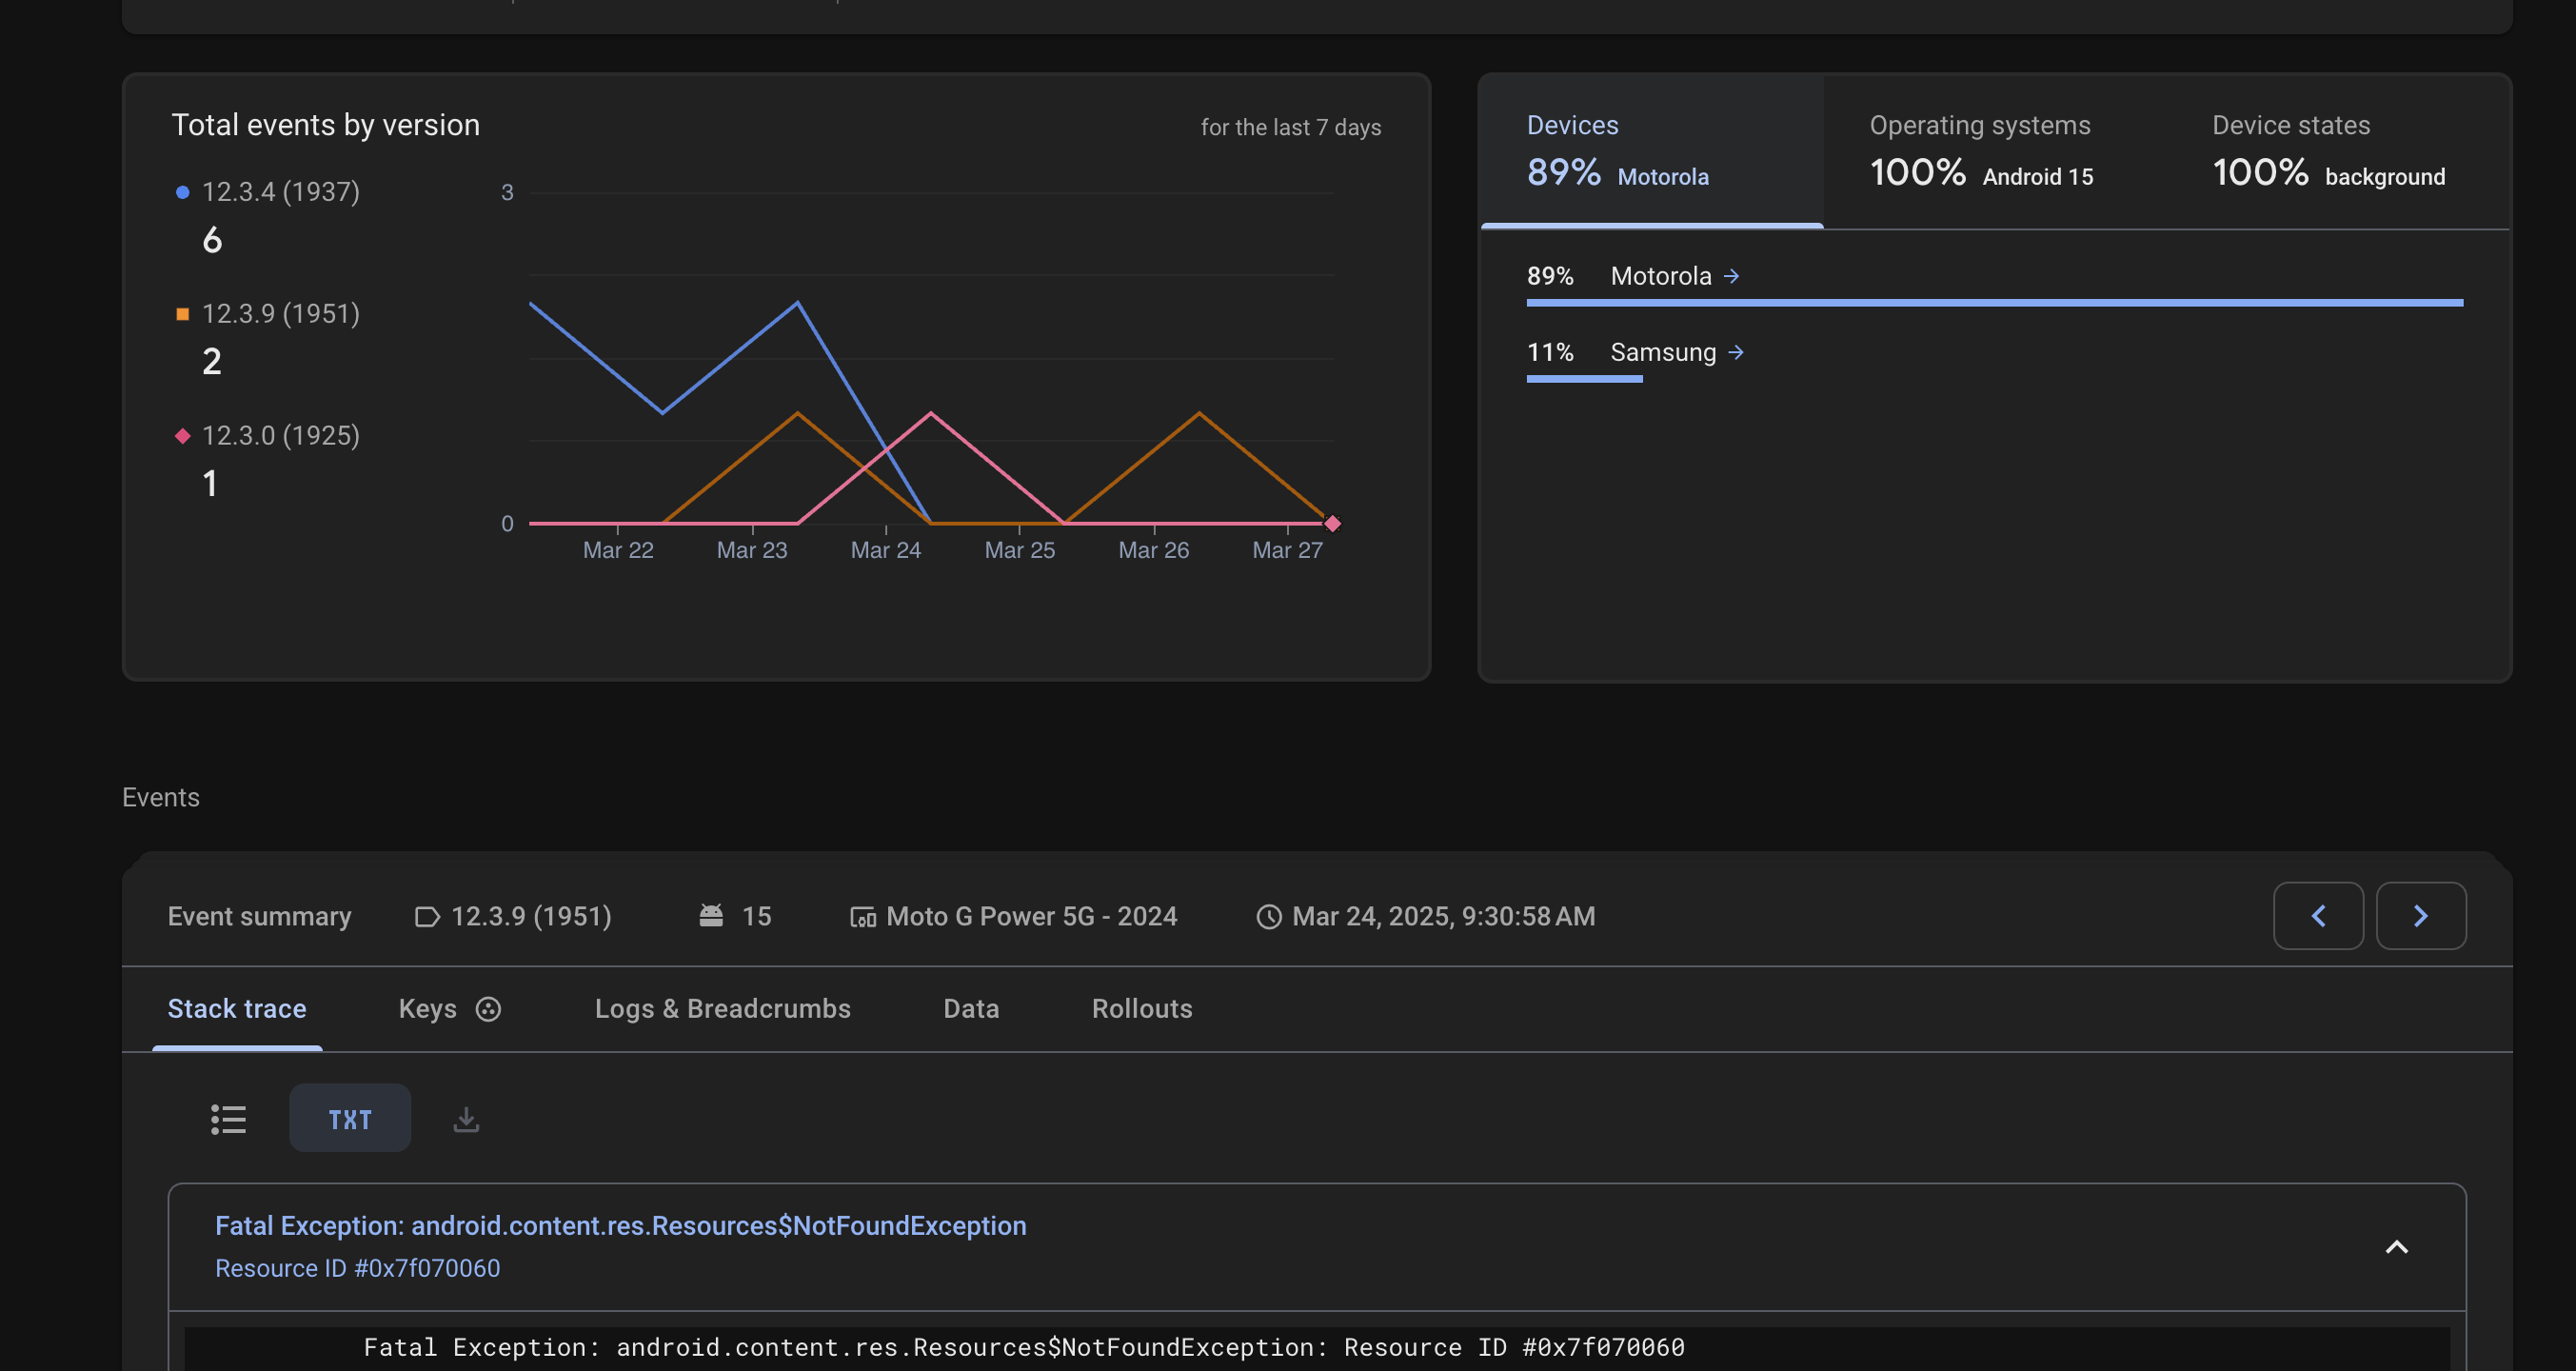
崩溃代码:
1
2
3
4
val Int.dimen: Float
    get() = AppContext.application.resources.getDimensionPixelSize(this).toFloat()
val appWidgetBgRadius: Float
    get() = R.dimen.app_widget_background_radius_dimen.dimen
app_widget_background_radius_dimen:
1
2
3
4
5
values
<dimen name="app_widget_background_radius_dimen">21dp</dimen>

values-v31
<dimen name="app_widget_background_radius_dimen">@android:dimen/system_app_widget_background_radius</dimen>
解决: 不用 Application 的 resources,用小组件的 Context 获取 resources
较难适配手机
| 手机型号 | 原因 | 备注 |
|---|---|---|
| Galaxy S21 | 小组件经常展示不出来,需要单独做套小尺寸的 | Android 14 |
| OnePlusAce2V 国行 | 尺寸小,Android12 也没有系统裁剪圆角 | Android 12 |
| Galaxy A51 | 小组件尺寸很大,写死尺寸的话经常很多空白 | Android 12 |
| nova 9 | 点击 PendingIntent 拉起 Activity 需要后台弹窗权限 | HarmonyOS 2.0.1 |
| Galaxy A32 | 放在 drawable-nodpi 目录下的预览图,很大 |  解决:放到 解决:放到 drawable-xxxhdpiAndroid 11 |